Introduction with a practical example (routing depending on user status)
Welcome to another edition of anynode video tutorial serials. We invite you to sit back and watch as we show you how to use a specific destination number to change the source phone number.
In our following application example, we want to give employees of a company the opportunity to distinguish between each call, whether they want to send their extension or alternatively the main number or even a service number when making a call out to the provider.
In our example, we would like to replace the phone number +49 895 678 10 with a new source phone number. We would like the service number of our company to be taken as the originating number if the caller dials a 99 before its actual destination.
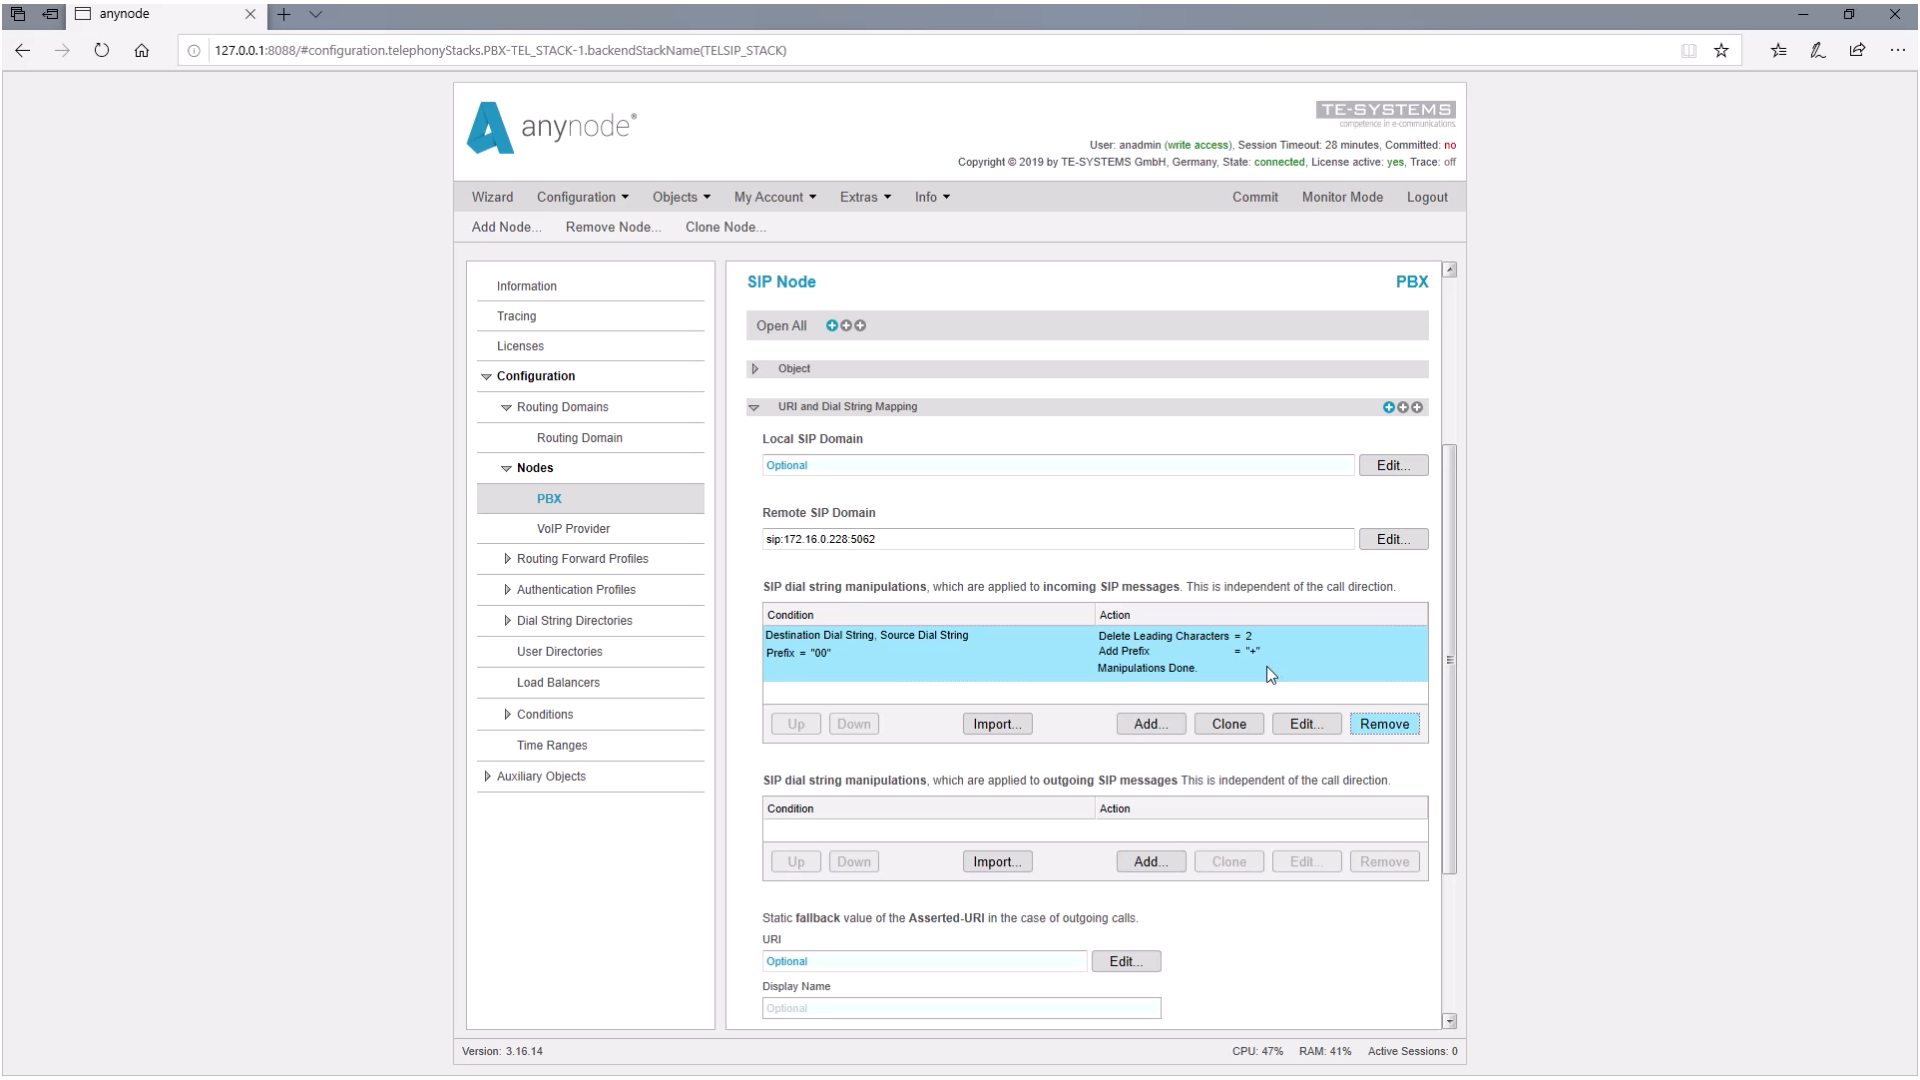
We have already prepared a configuration with a VoIP provider and a PBX. We recommend that you view the tutorial video “Basics Dial String Manipulation and Routing” as a starting point in order to get familiar with this topic. In this video, we will show you how to manipulate the source and destination fields. This usually should be done in the incoming and outgoing manipulations in the SIP node.
Route assistant: define route filter
Here we would like to change the source number based on the destination number and such a cross manipulation is only possible in the route.
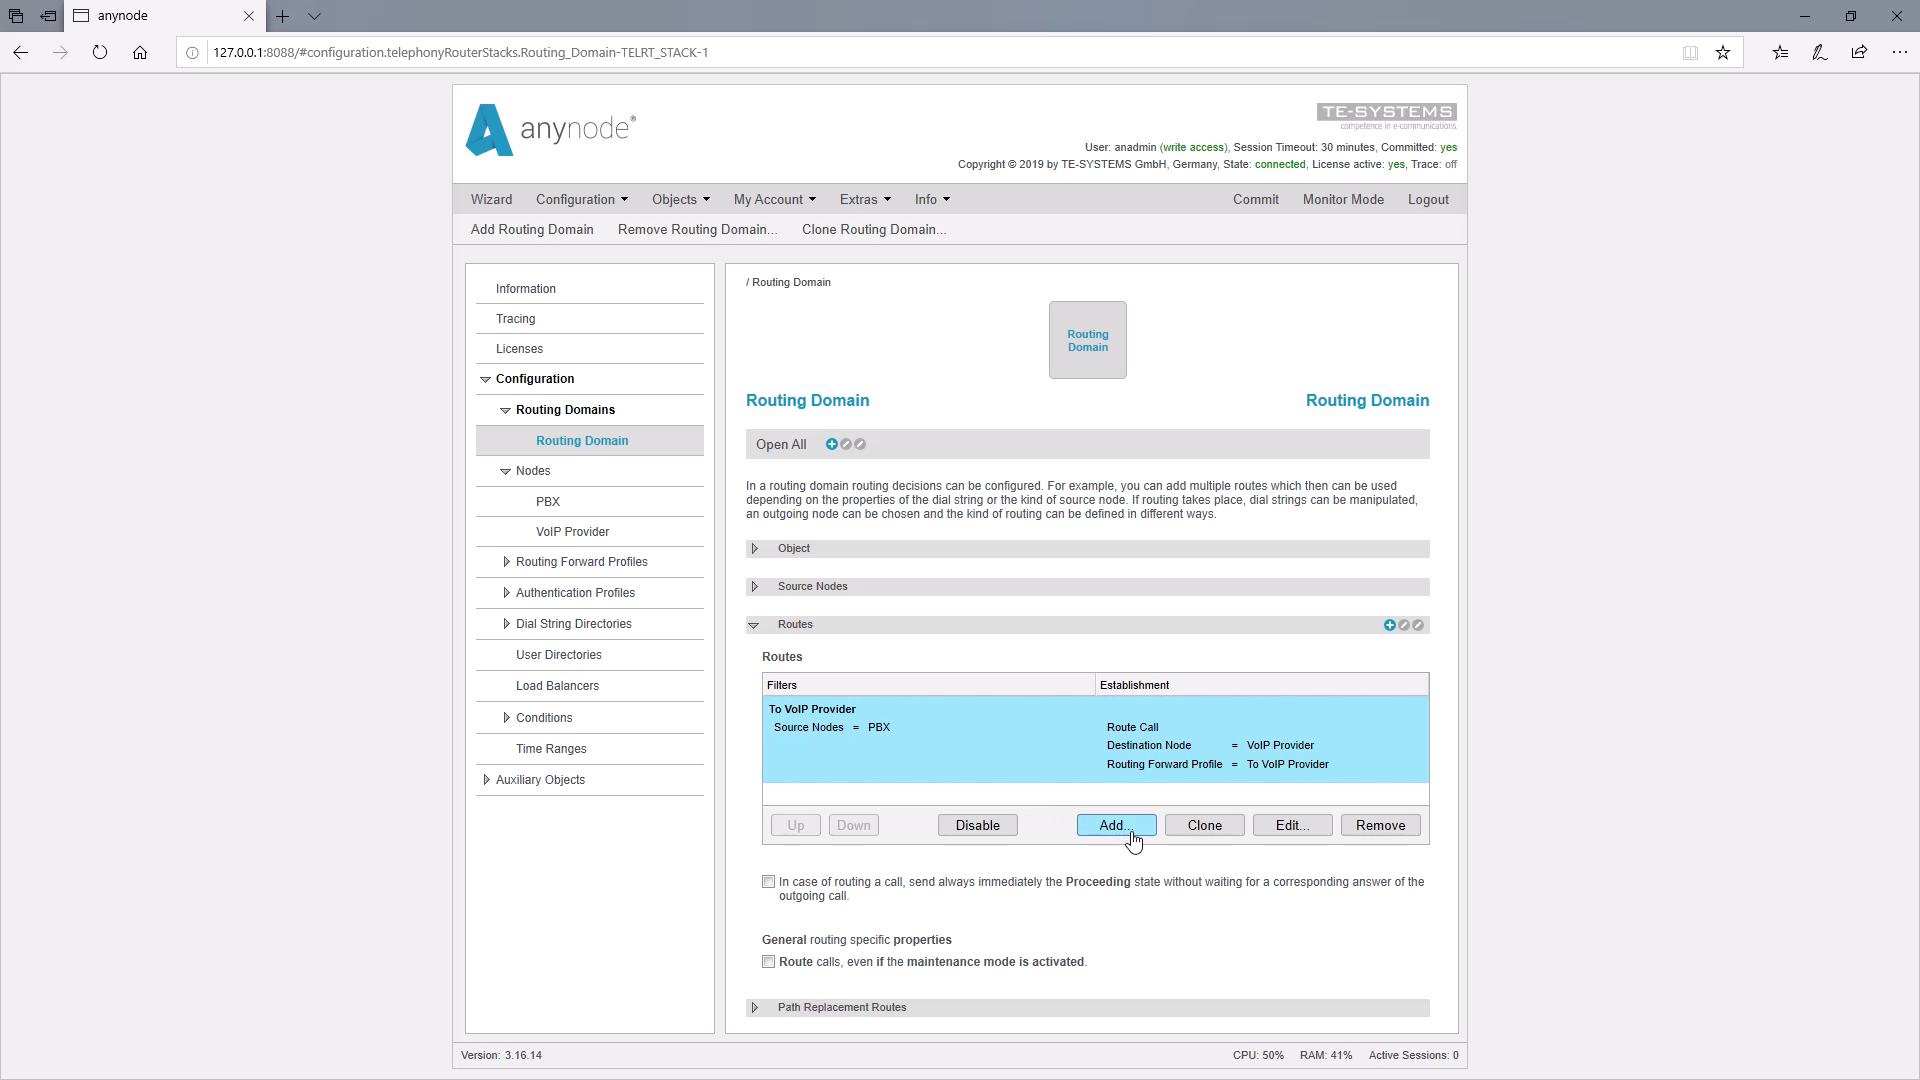
For this purpose, we create a new route in the routing domain, which should only be taken if the caller selects a 99. If no 99 is dialed at the beginning of the number, the previous routes should be taken without changing the source number.
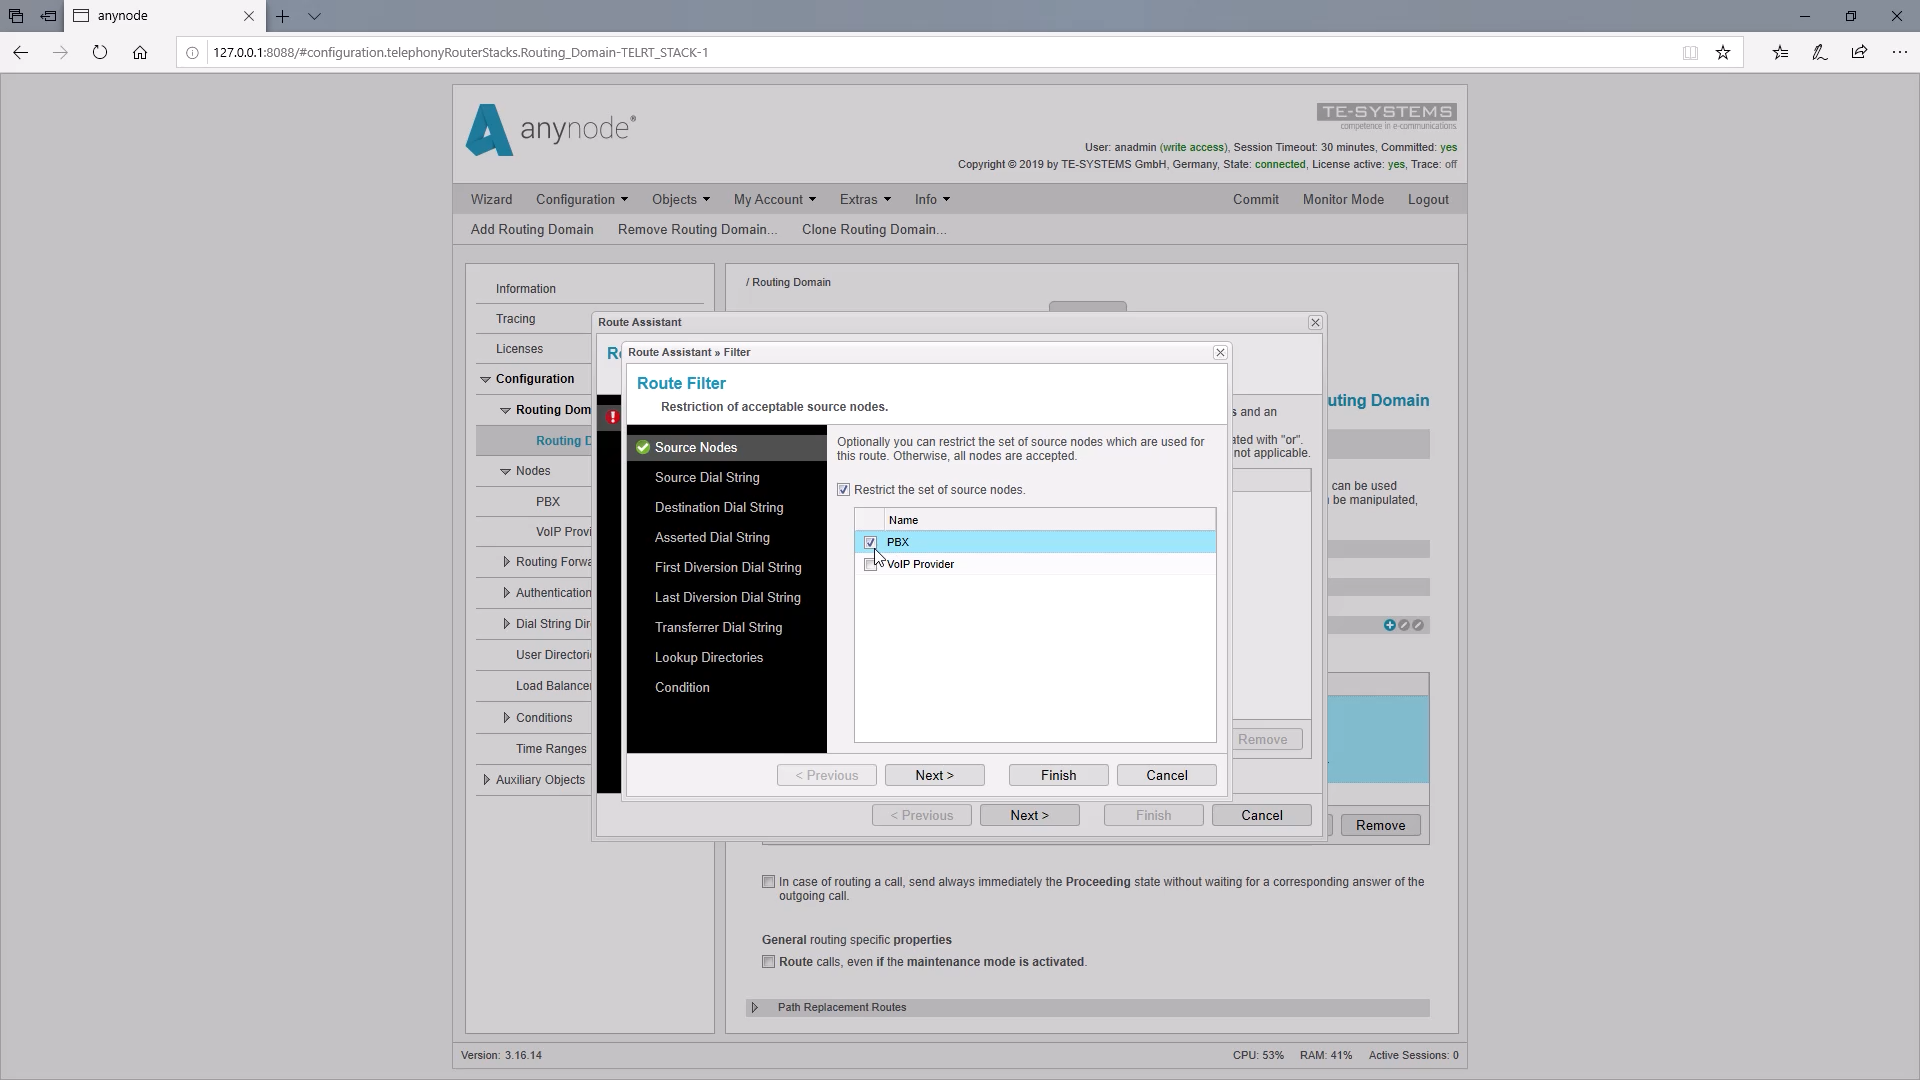
With “Add” we start the Route Assistant. First, we set a route filter. The source node should be the PBX dialed by the caller with the 99.
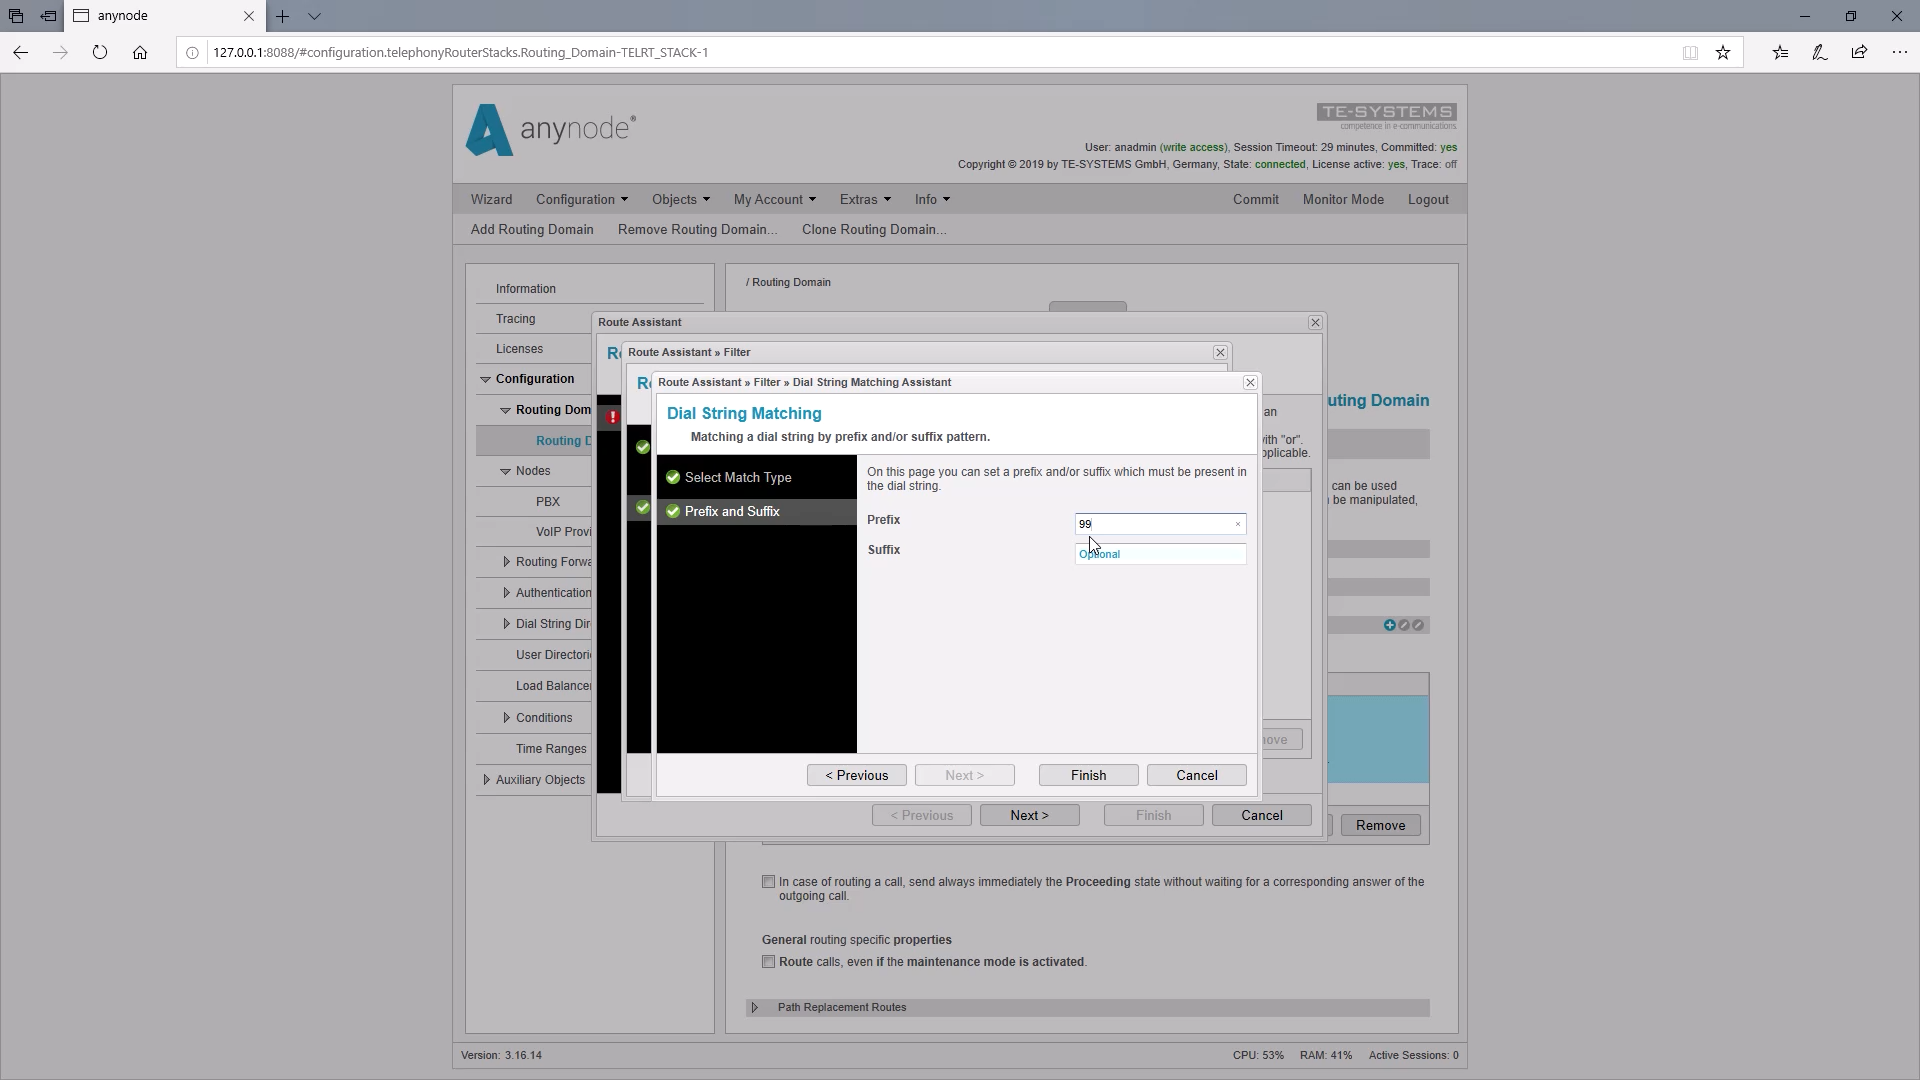
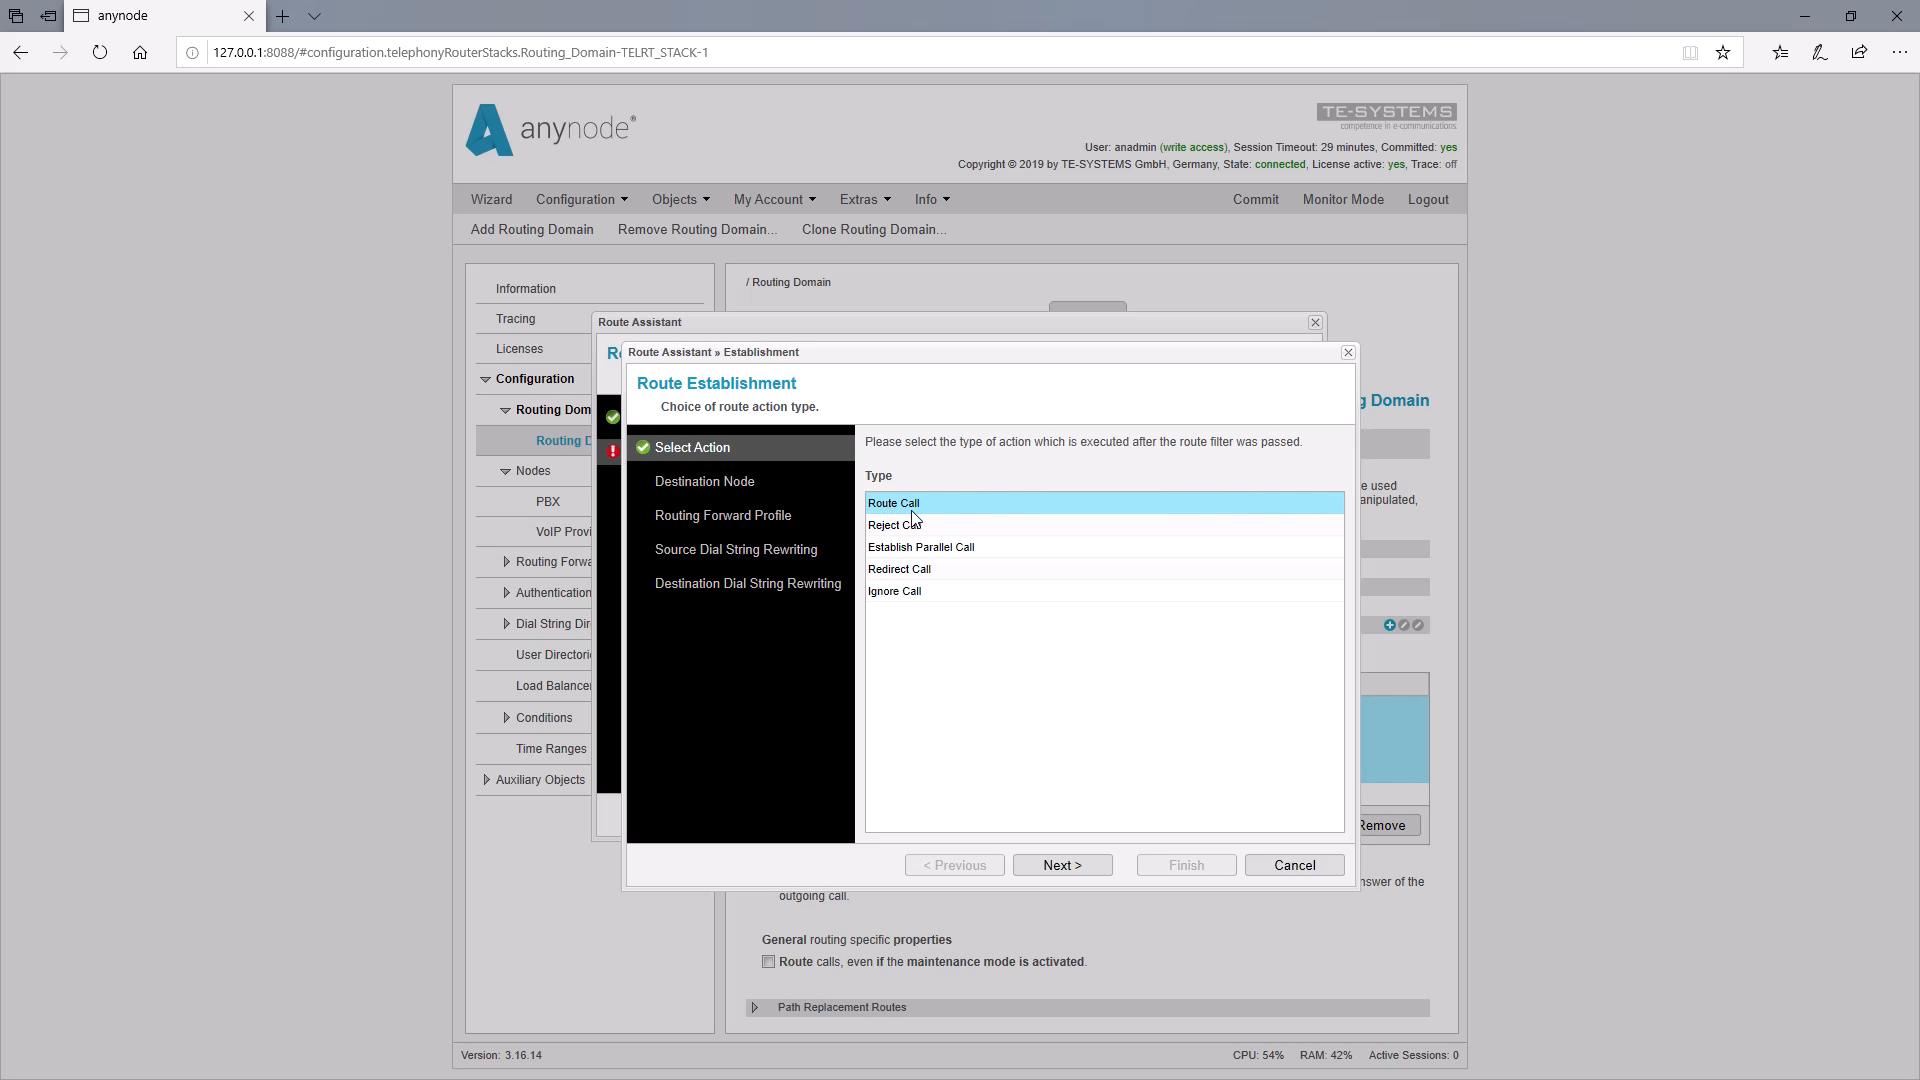
We enter the 99 under “Destination Dial String” as a prefix route filter. With “Finish” we can then switch to the establishment, so which action should be carried out in the route.
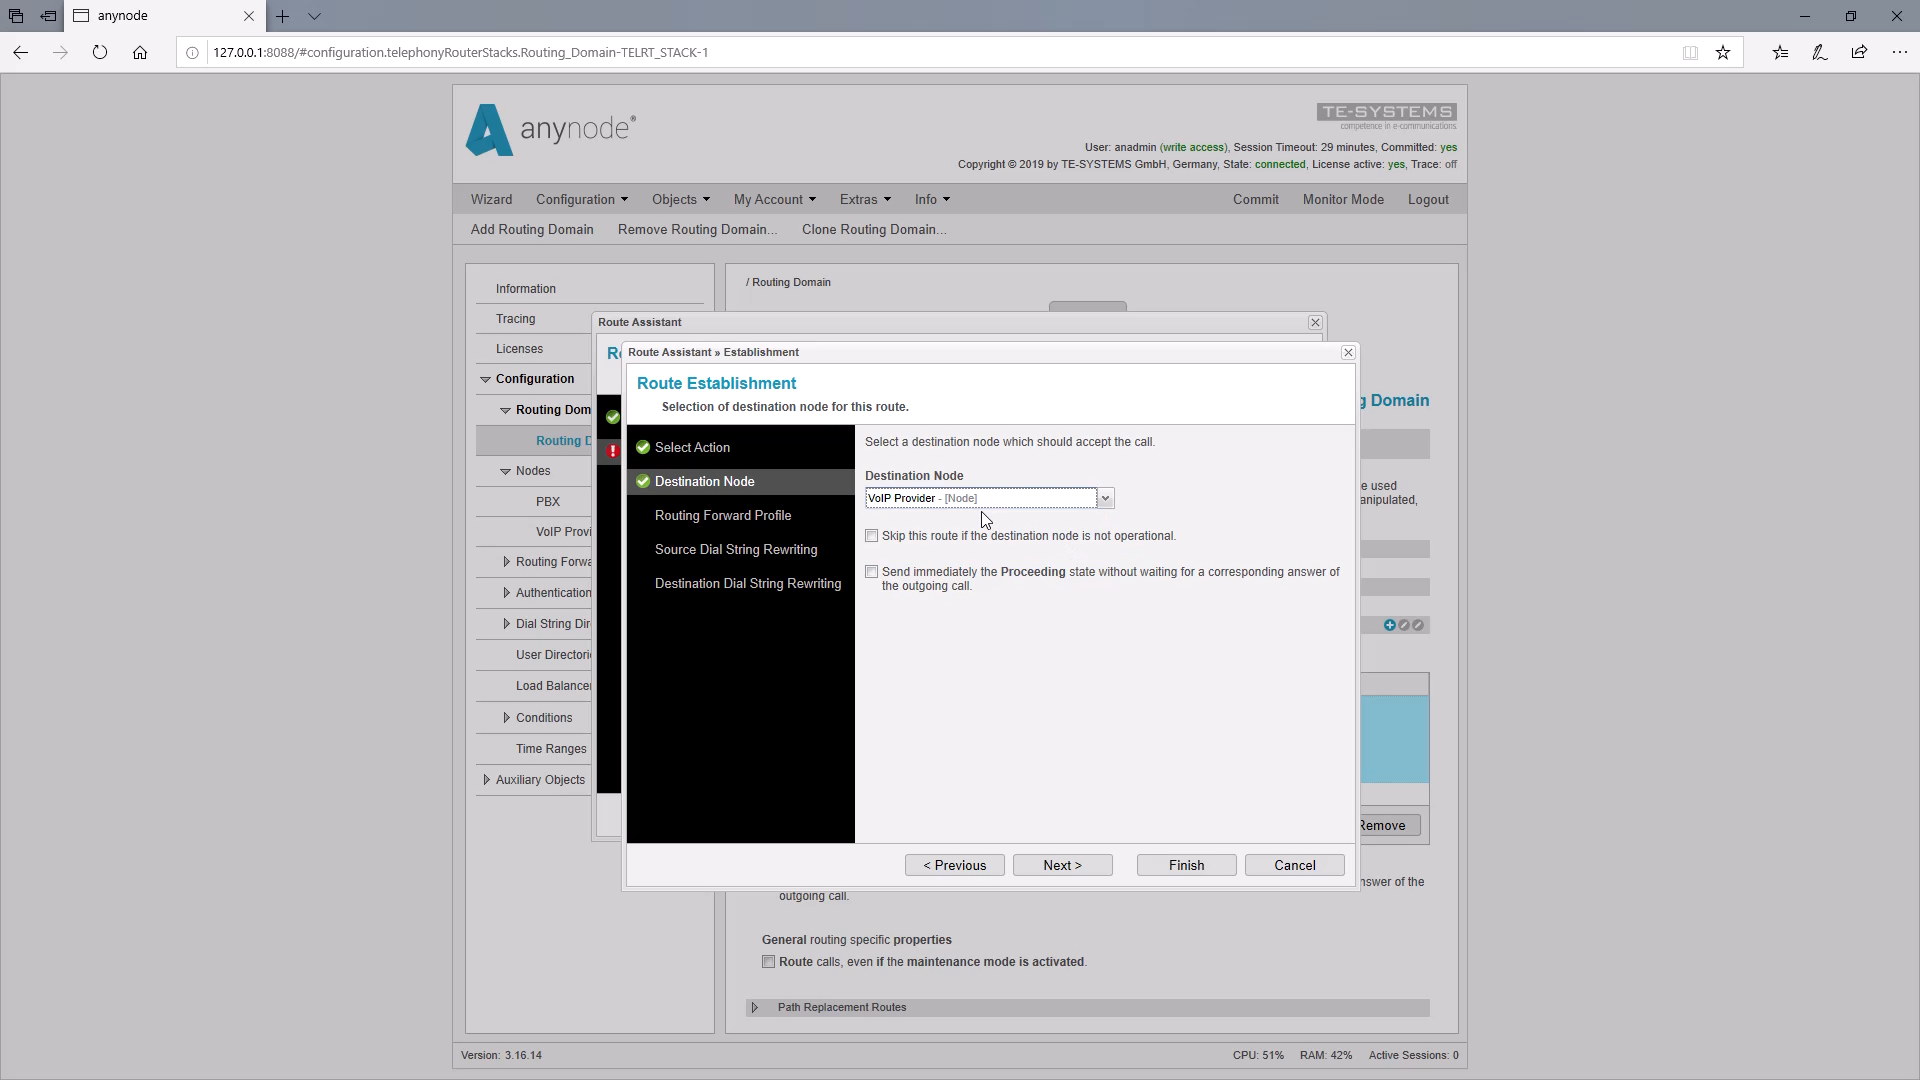
In our case, we want the call to be routed to the provider. Therefore, we choose the VoIP provider as the destination node.
Route assistant: define establishment
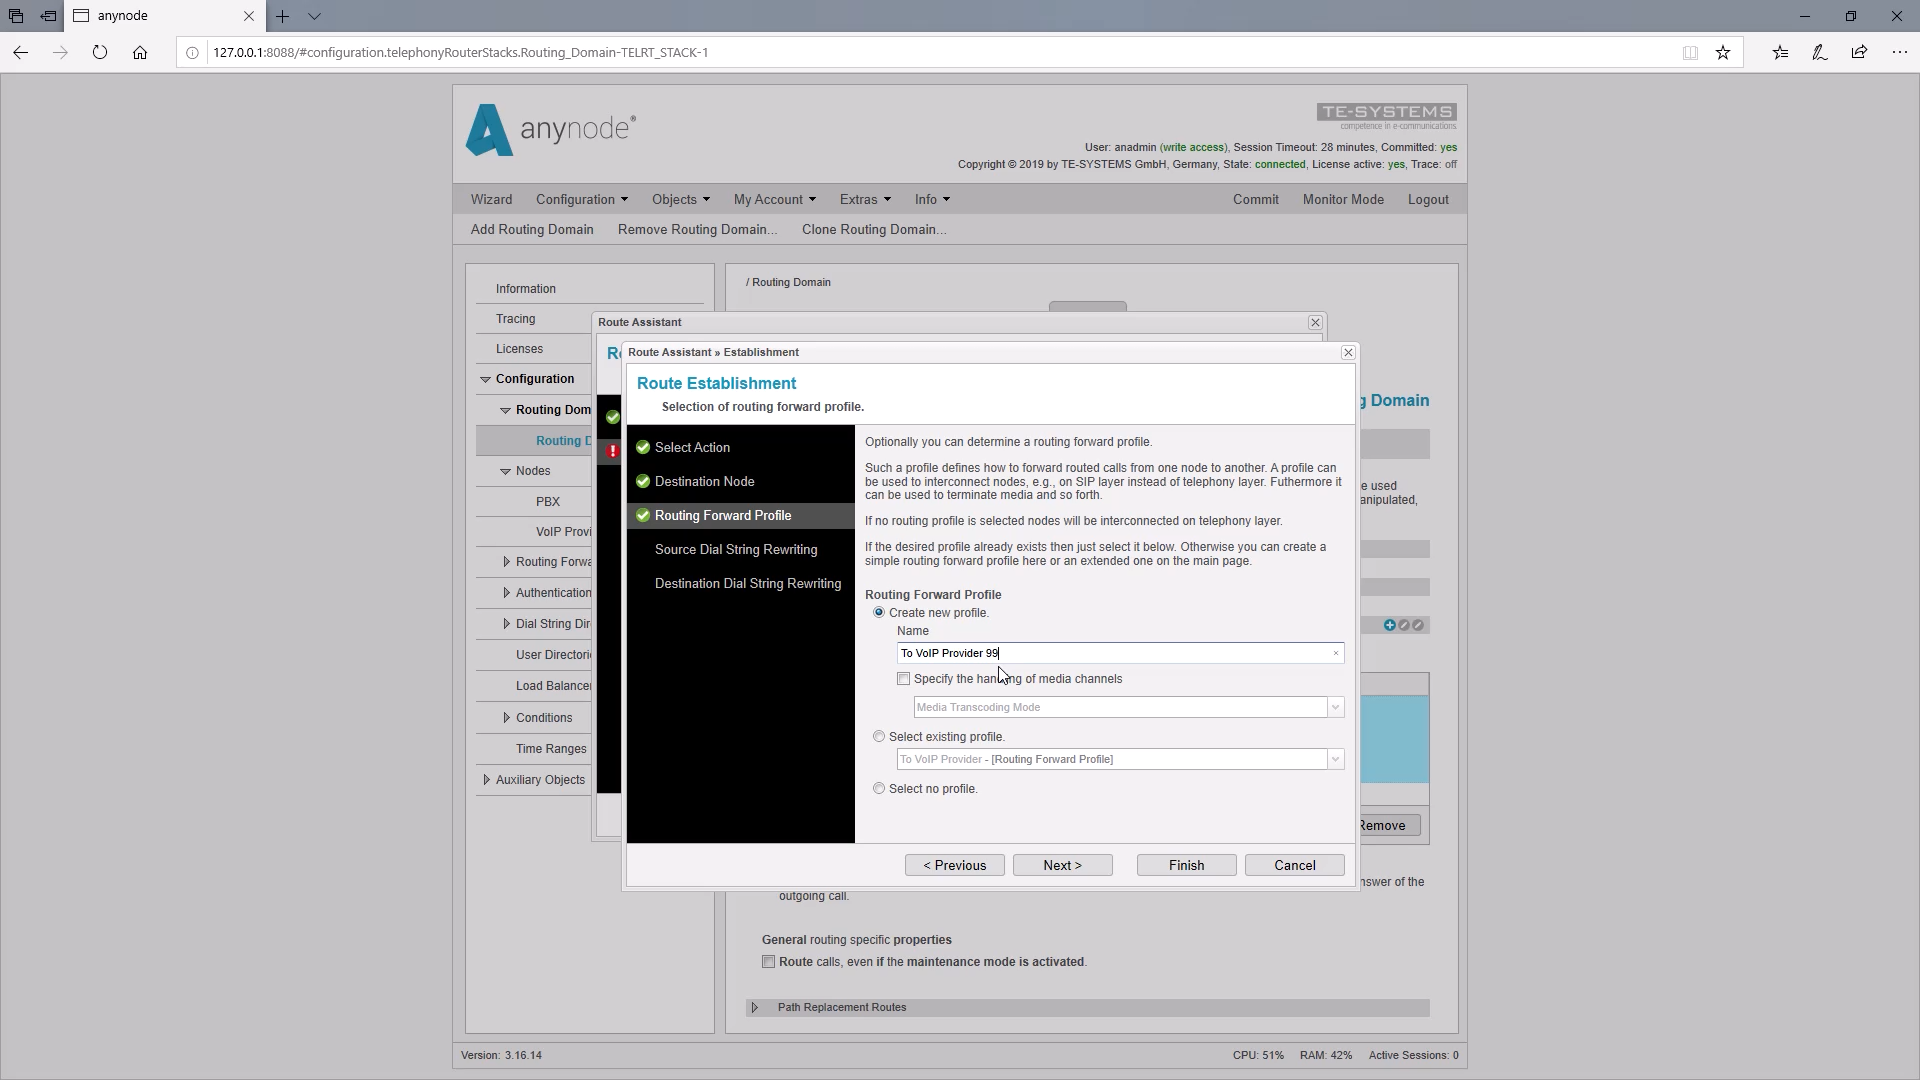
Now it is important to create a new routing forward profile because we need to change a default value in the forwarding profile for this routing decision afterward so that the source manipulation takes effect.
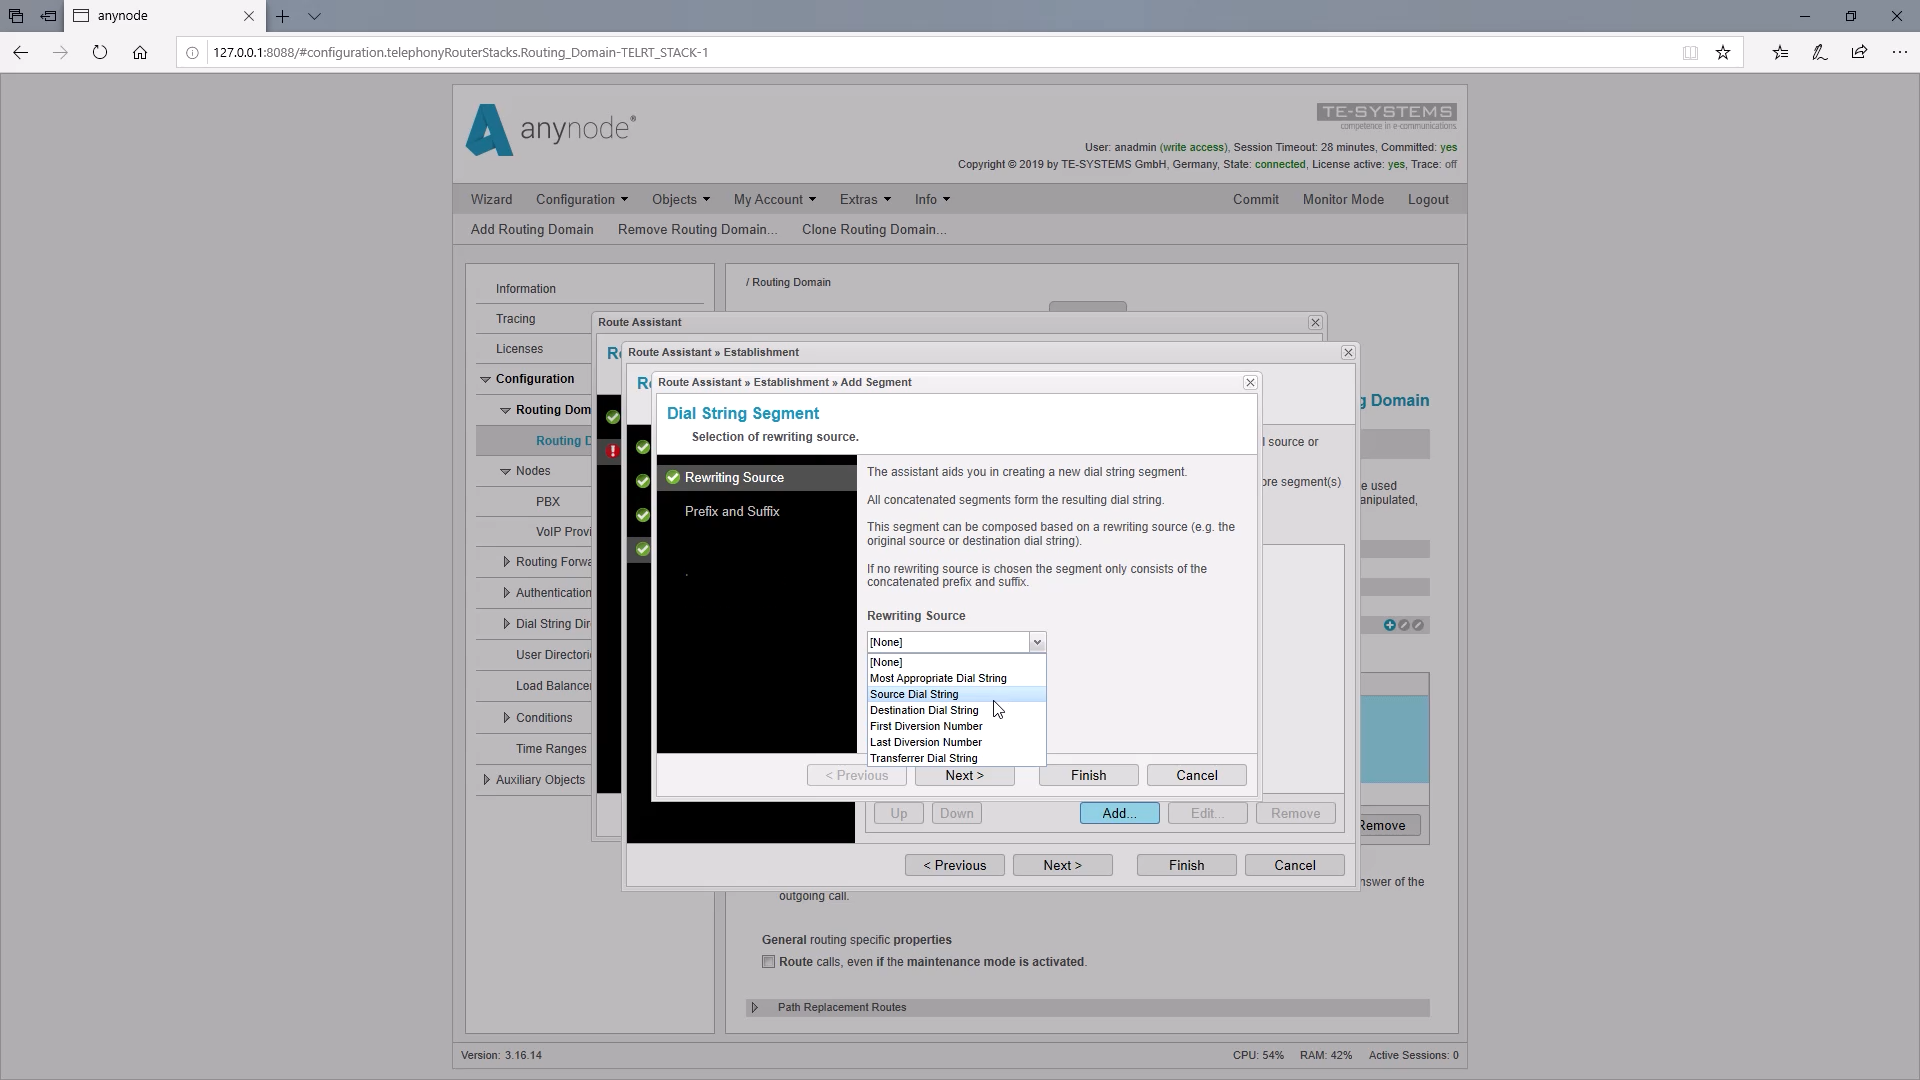
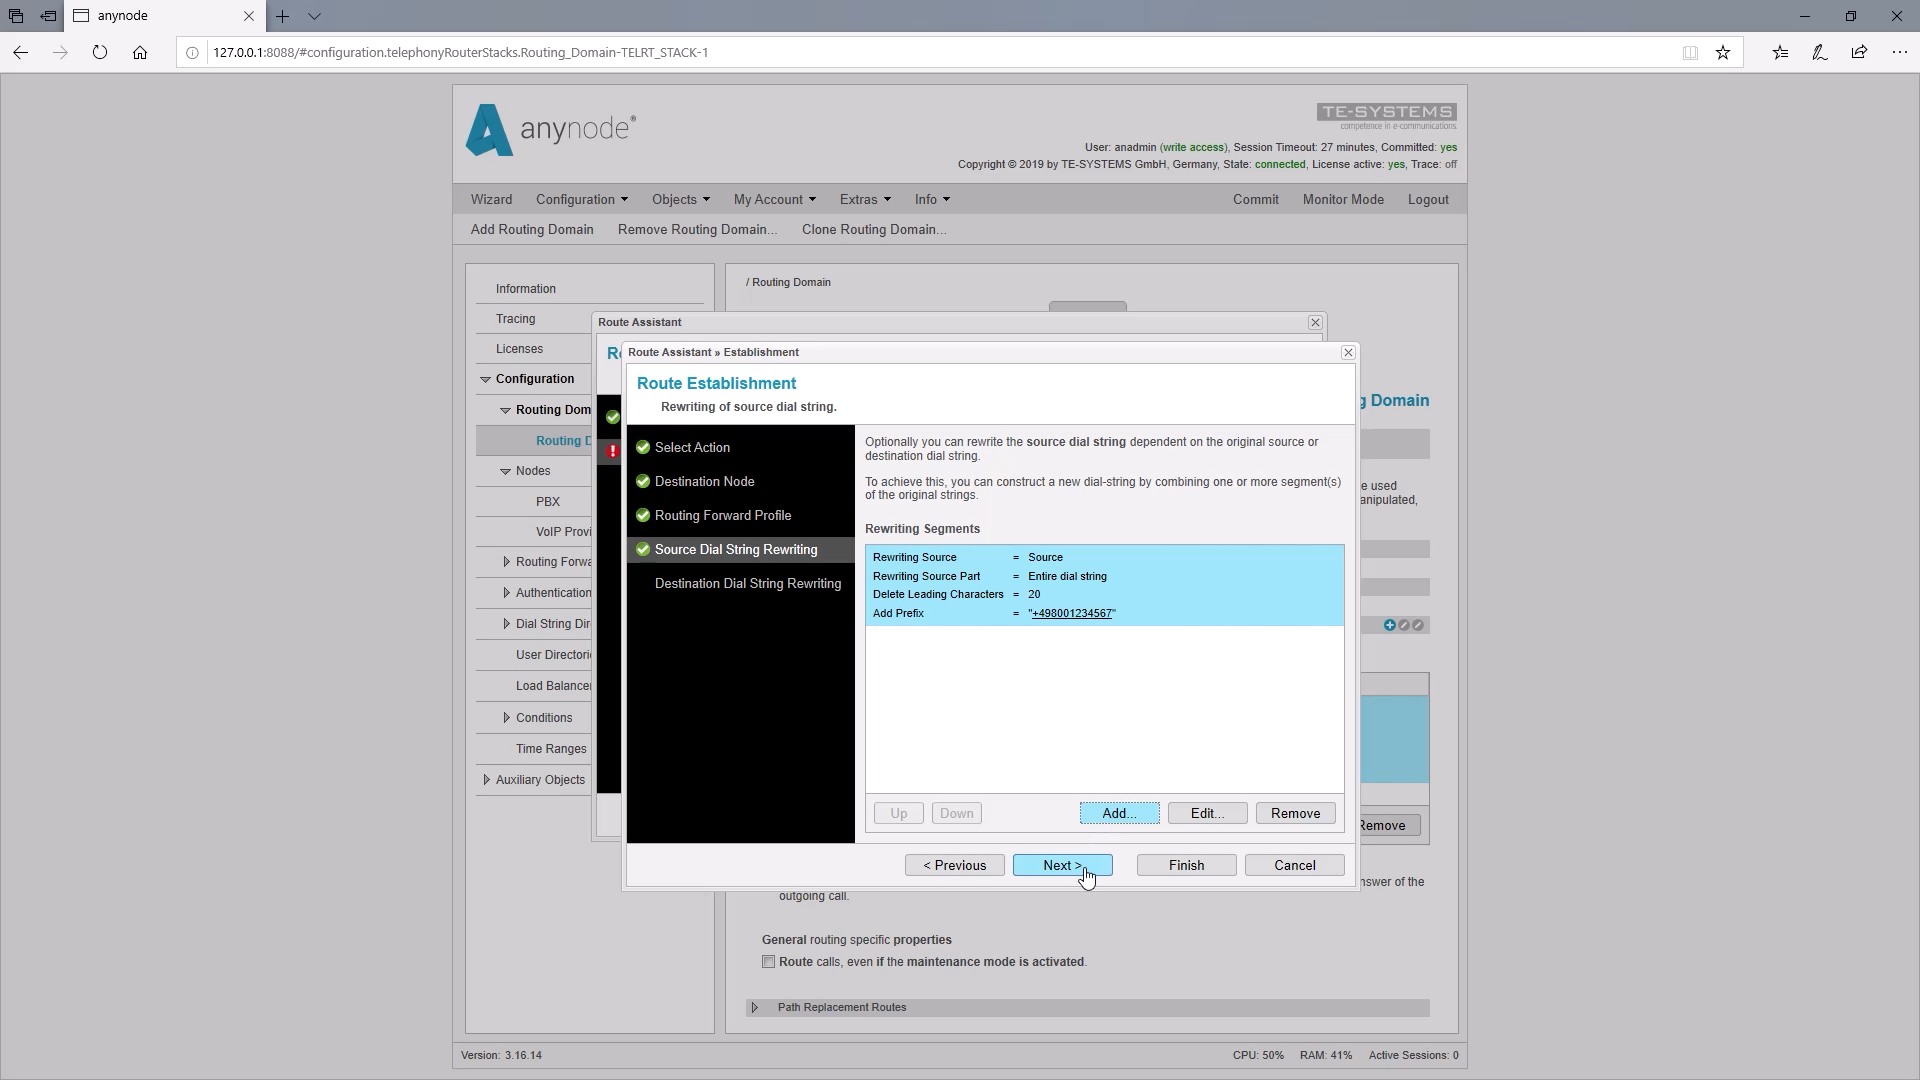
Now we add a Source Dial String Rewriting.
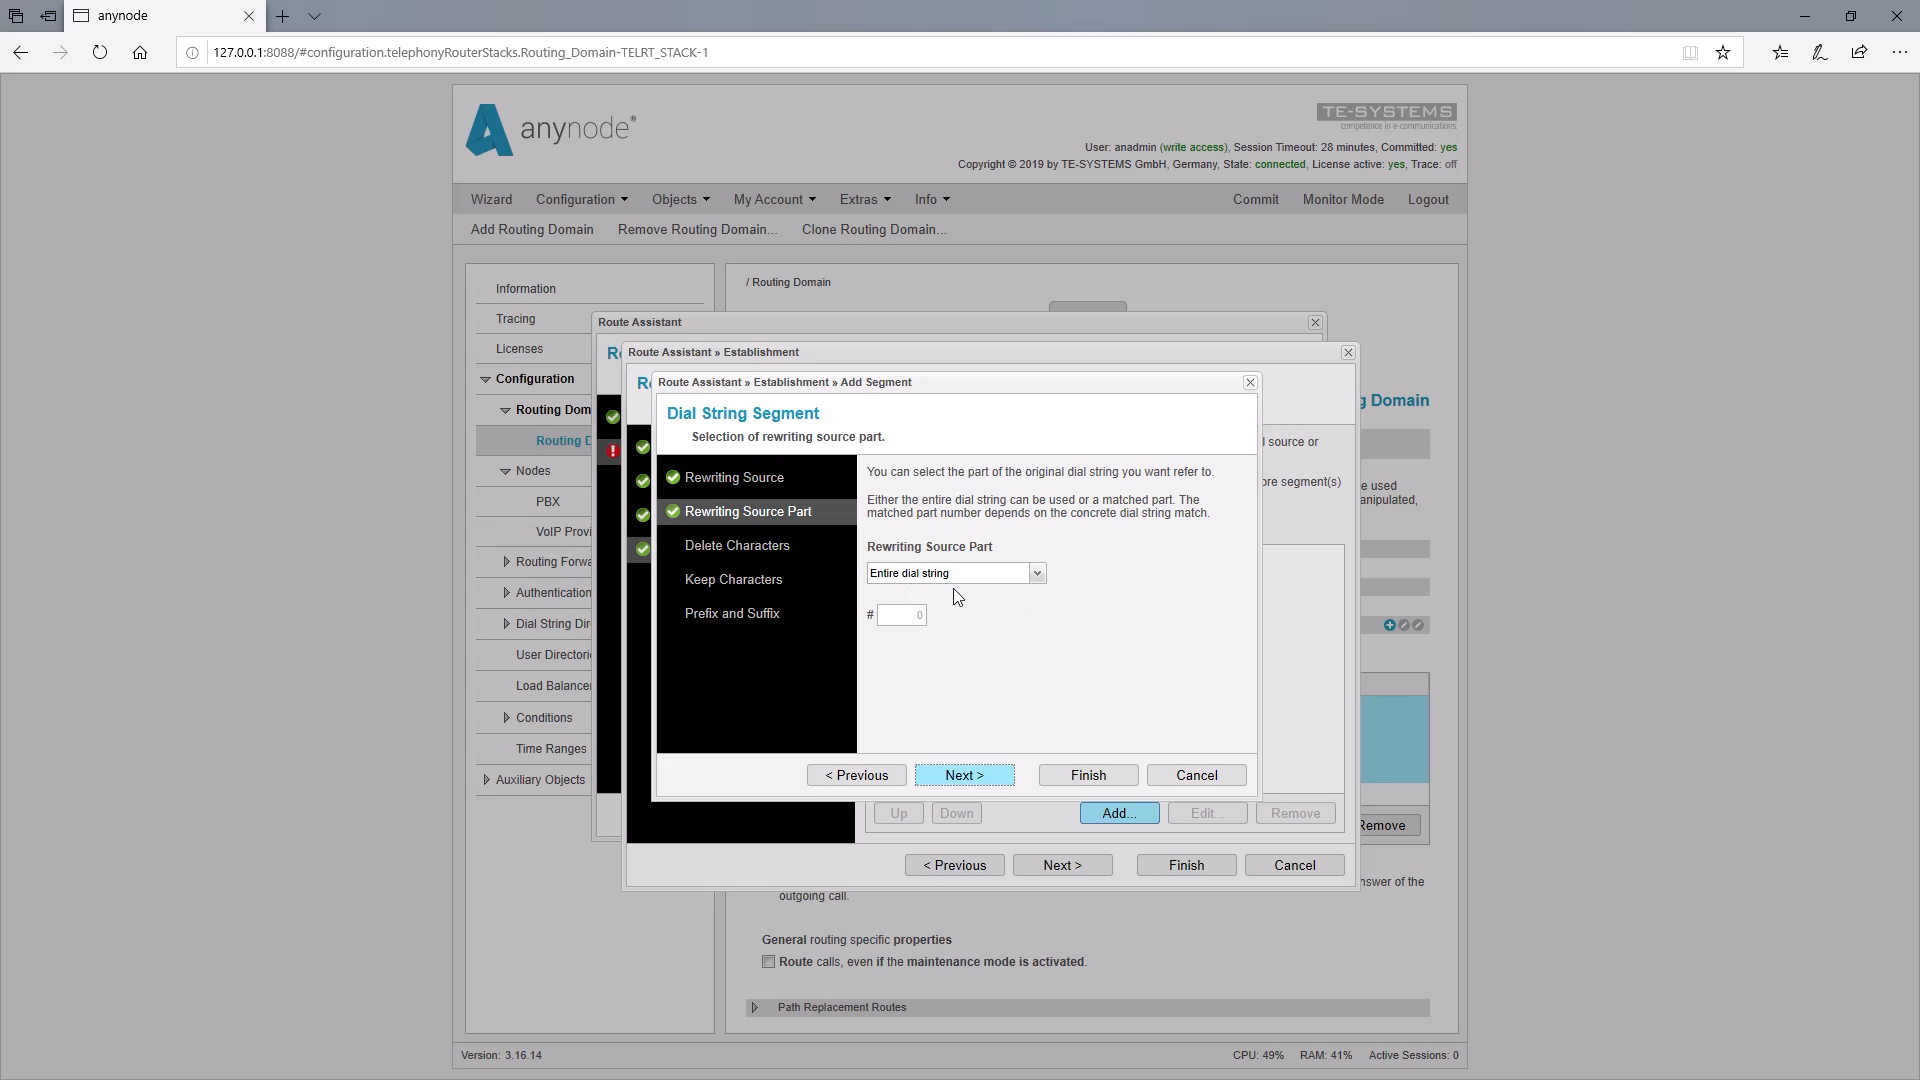
The source dial string should serve as a source for the rewriting. In our example, we would like to change the entire Source Dial string.
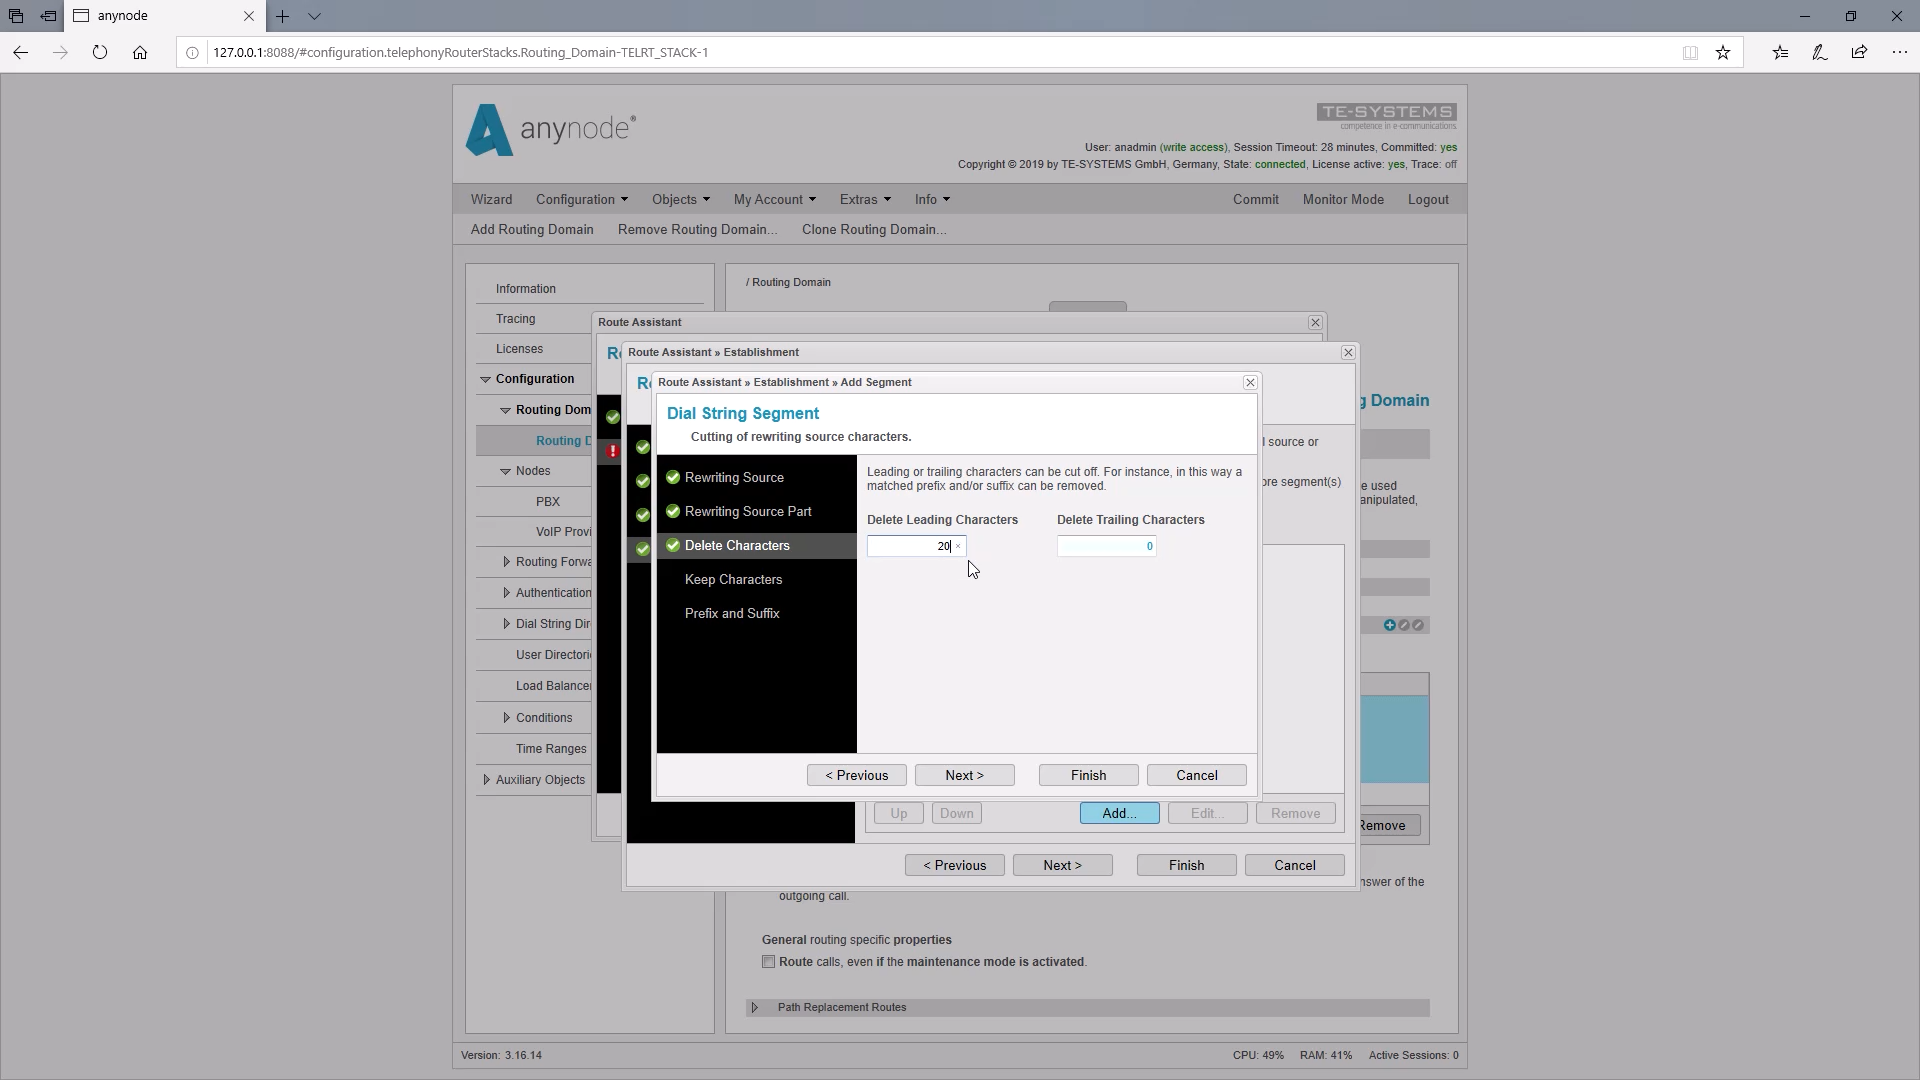
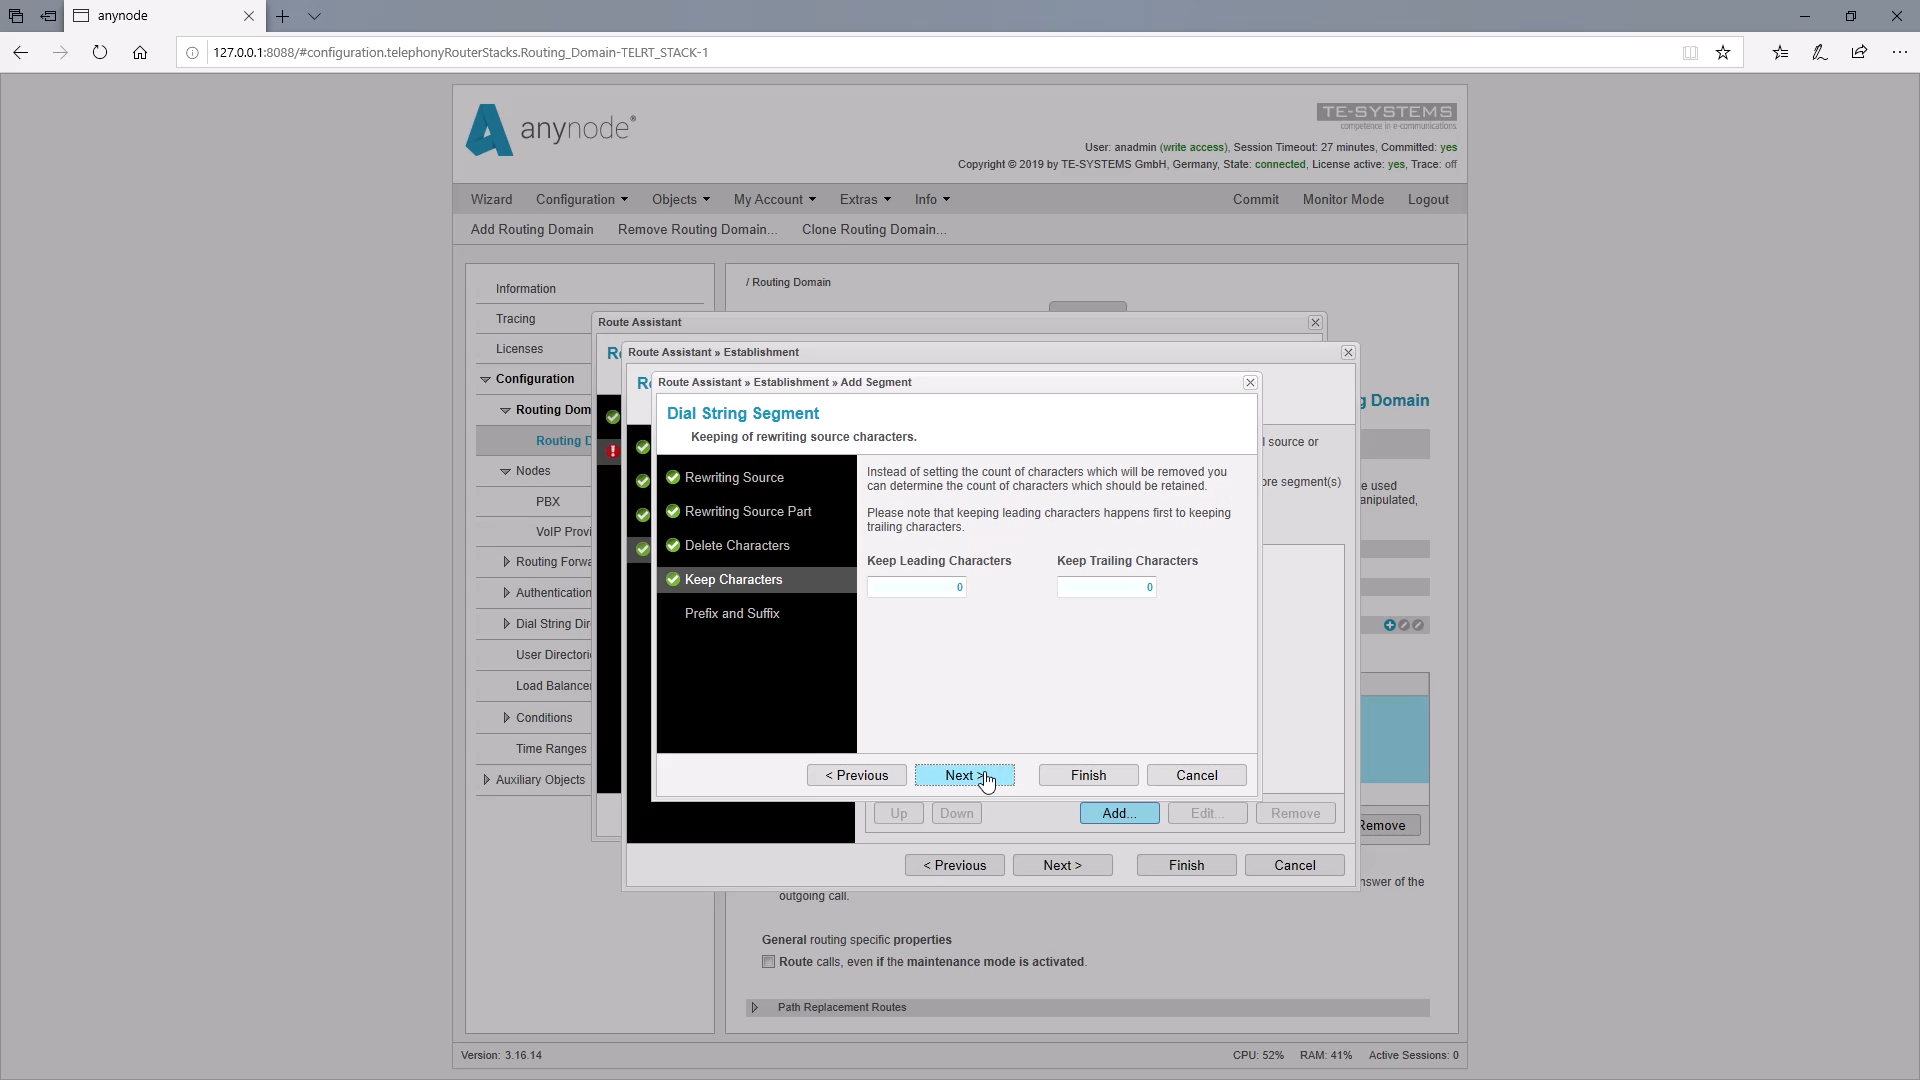
For “Delete Leading Characters”, we enter 20 to be sure that the entire number will be deleted. Alternatively, you can also keep parts of the phone number here.
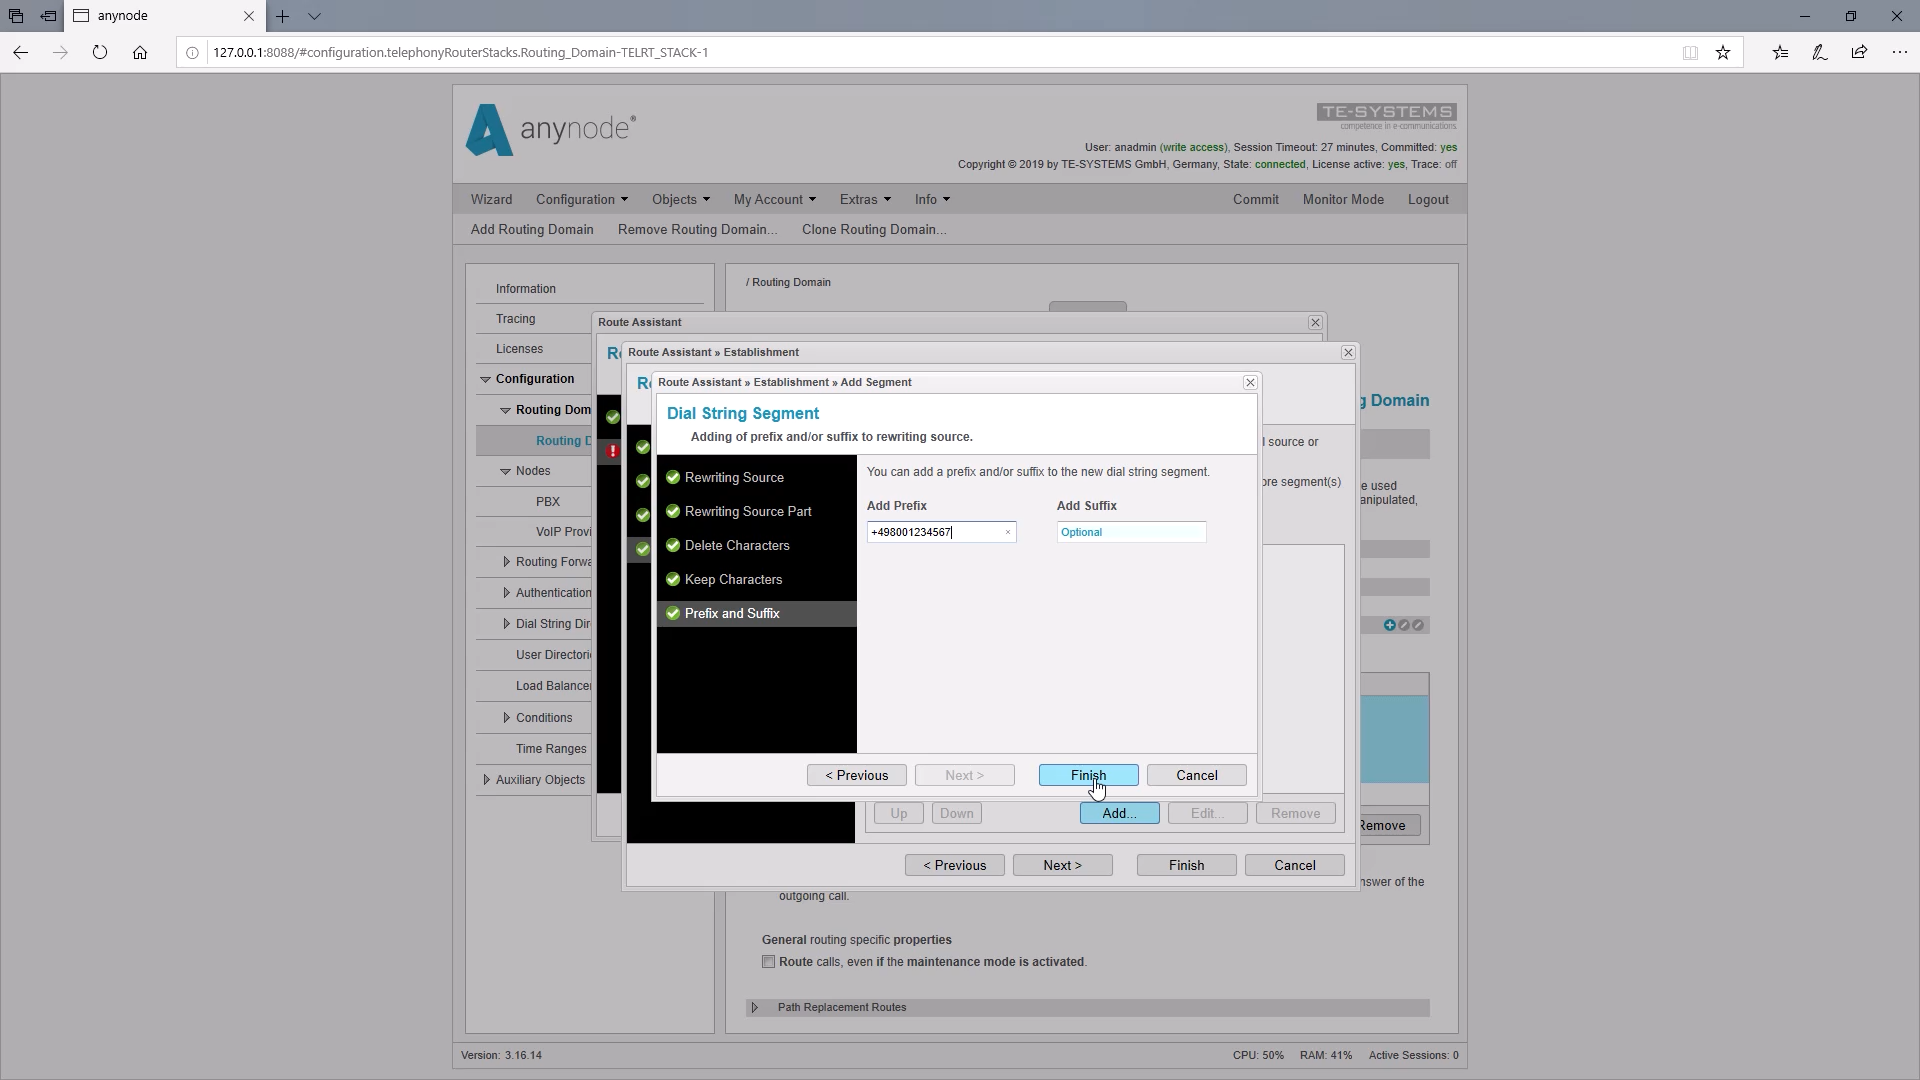
Now we add the new number to be sent when using the 99 prefix.
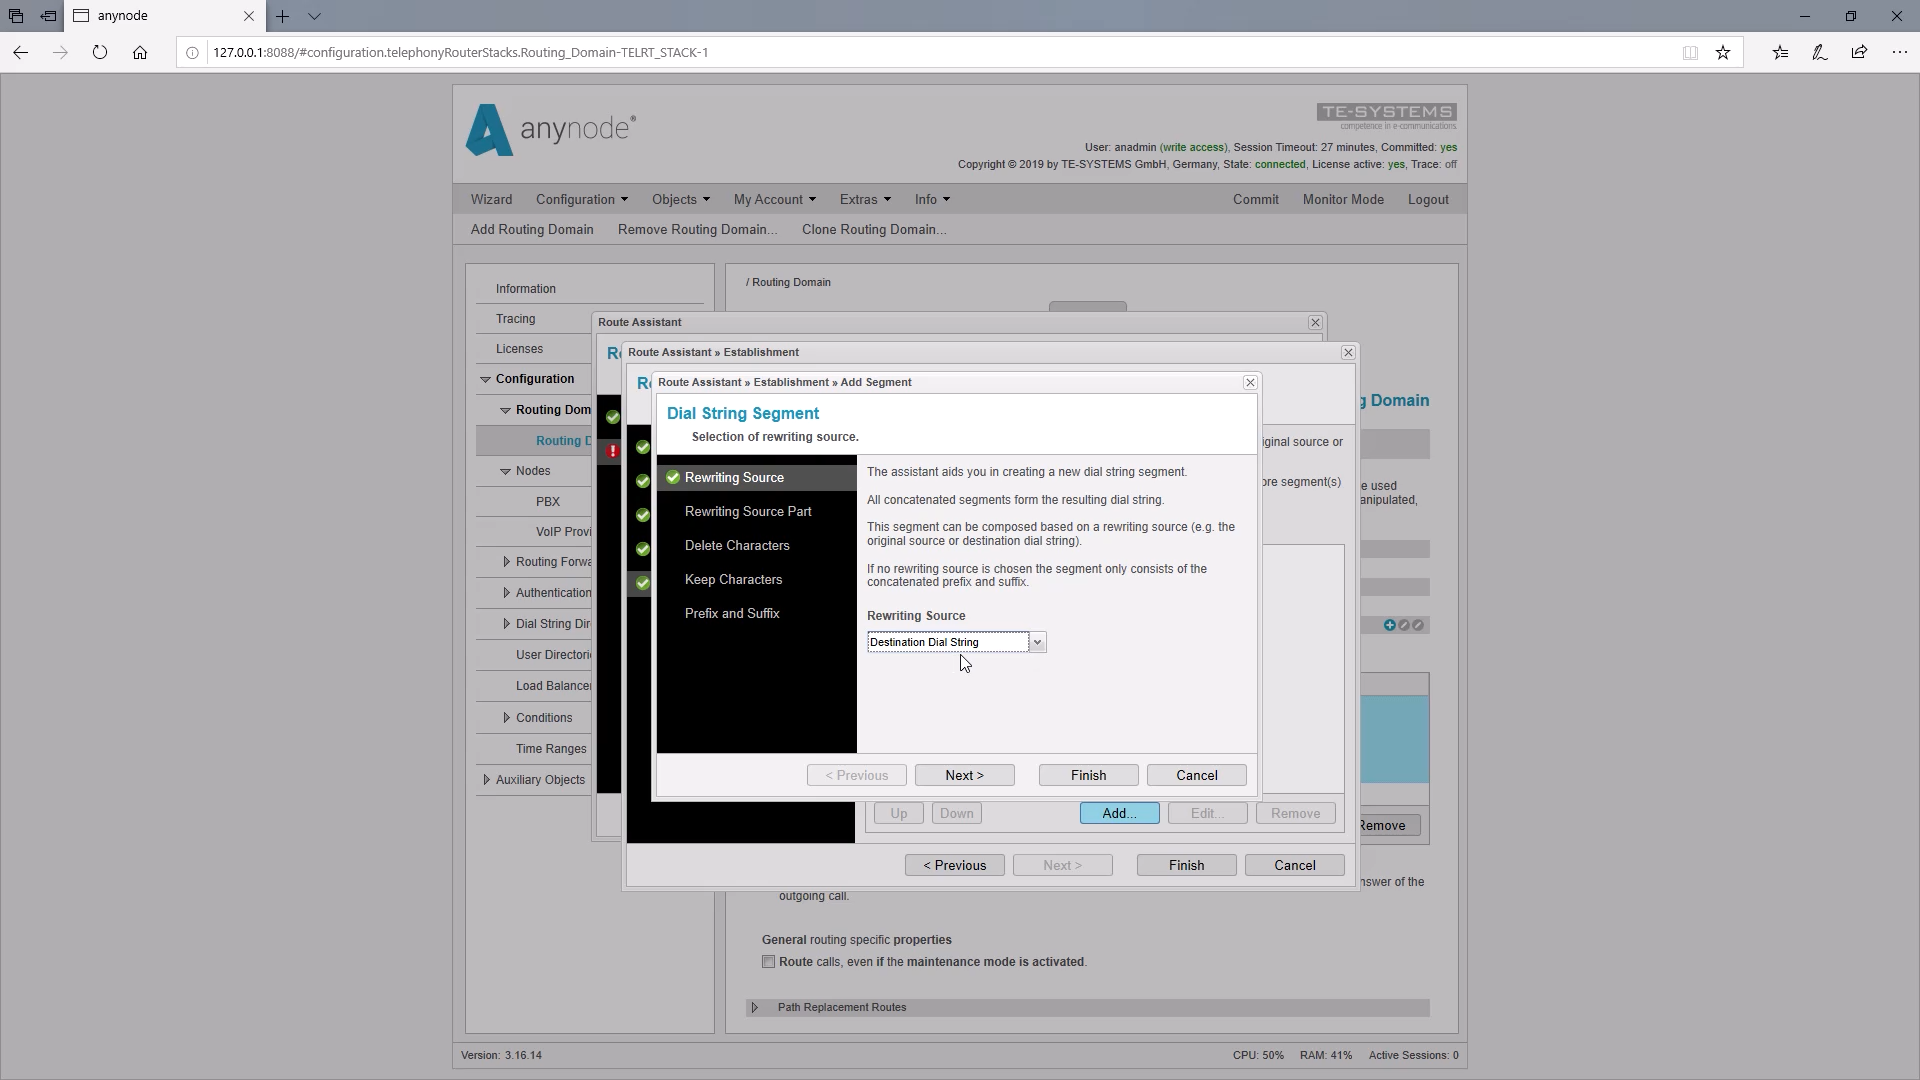
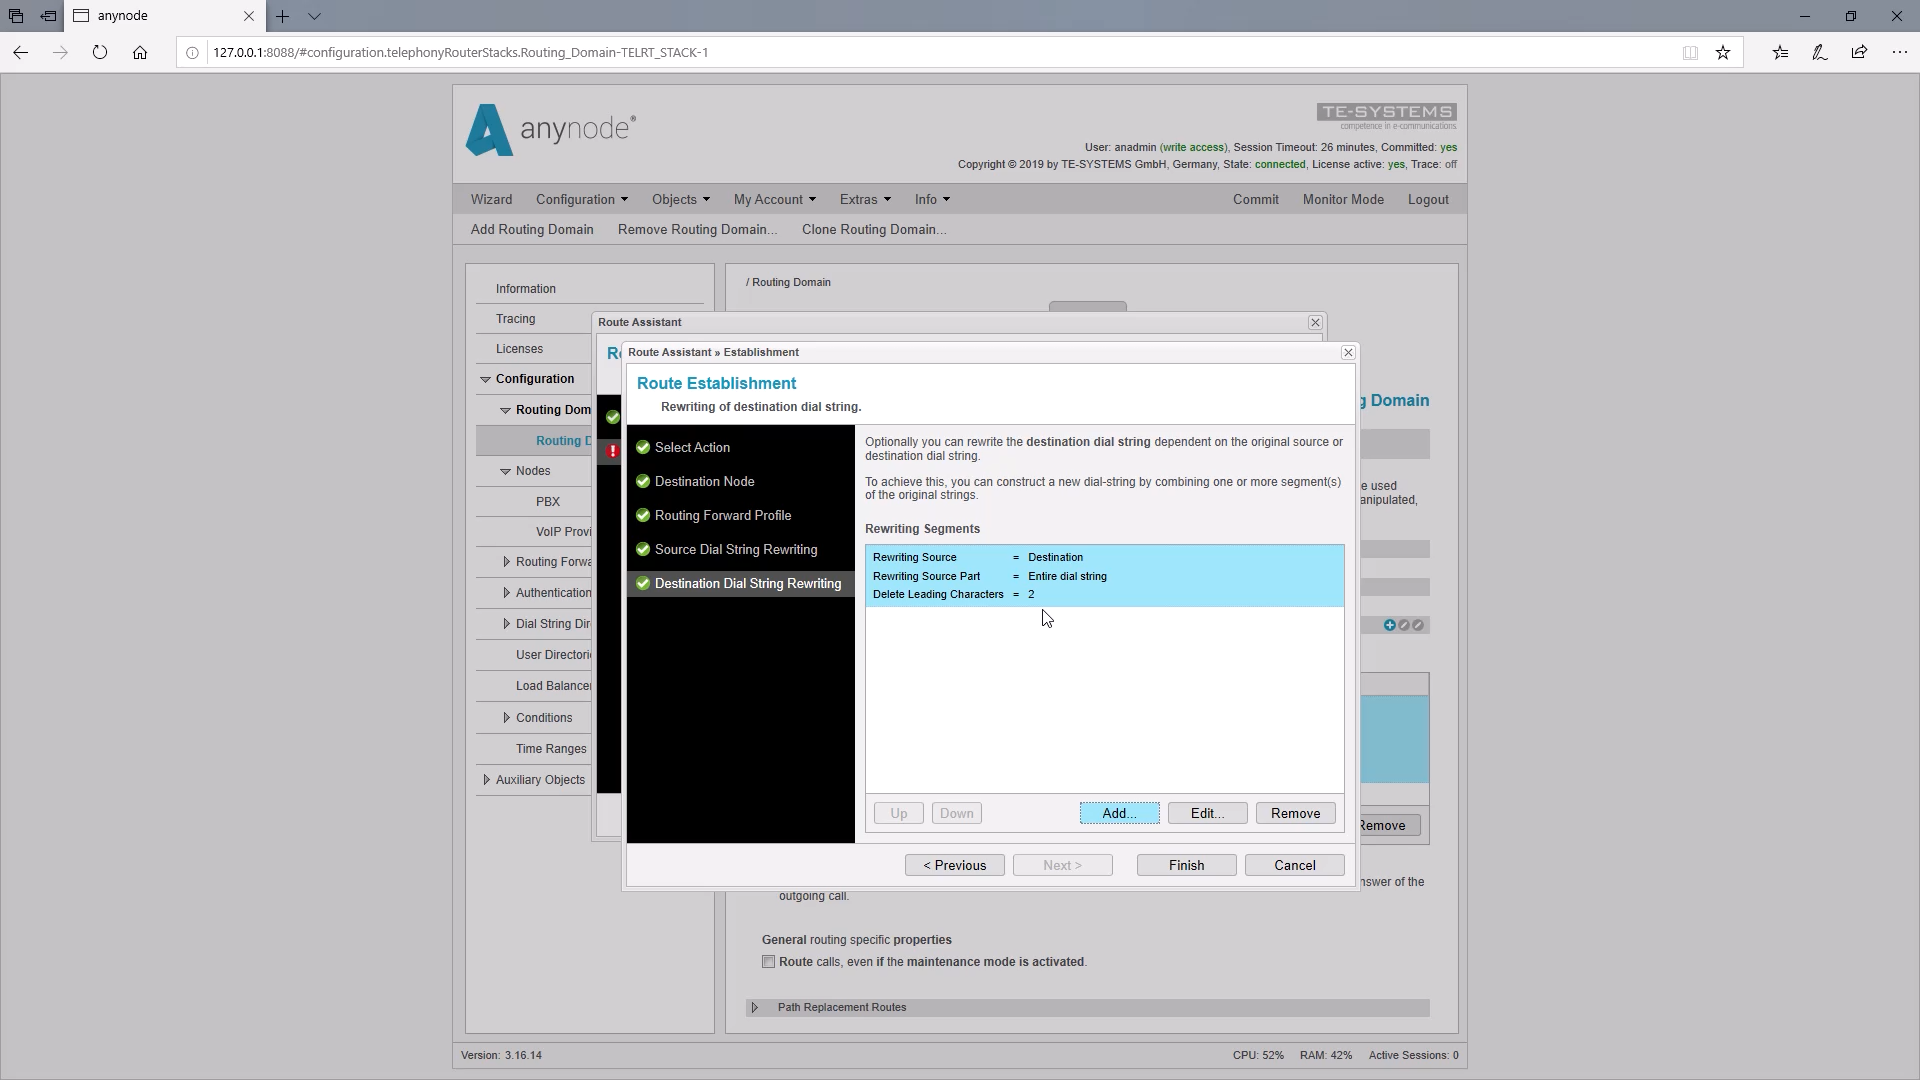
With “Destination Dial String Rewriting” we must not forget to remove the pre-dialed 99again so that the call can be forwarded by the provider.
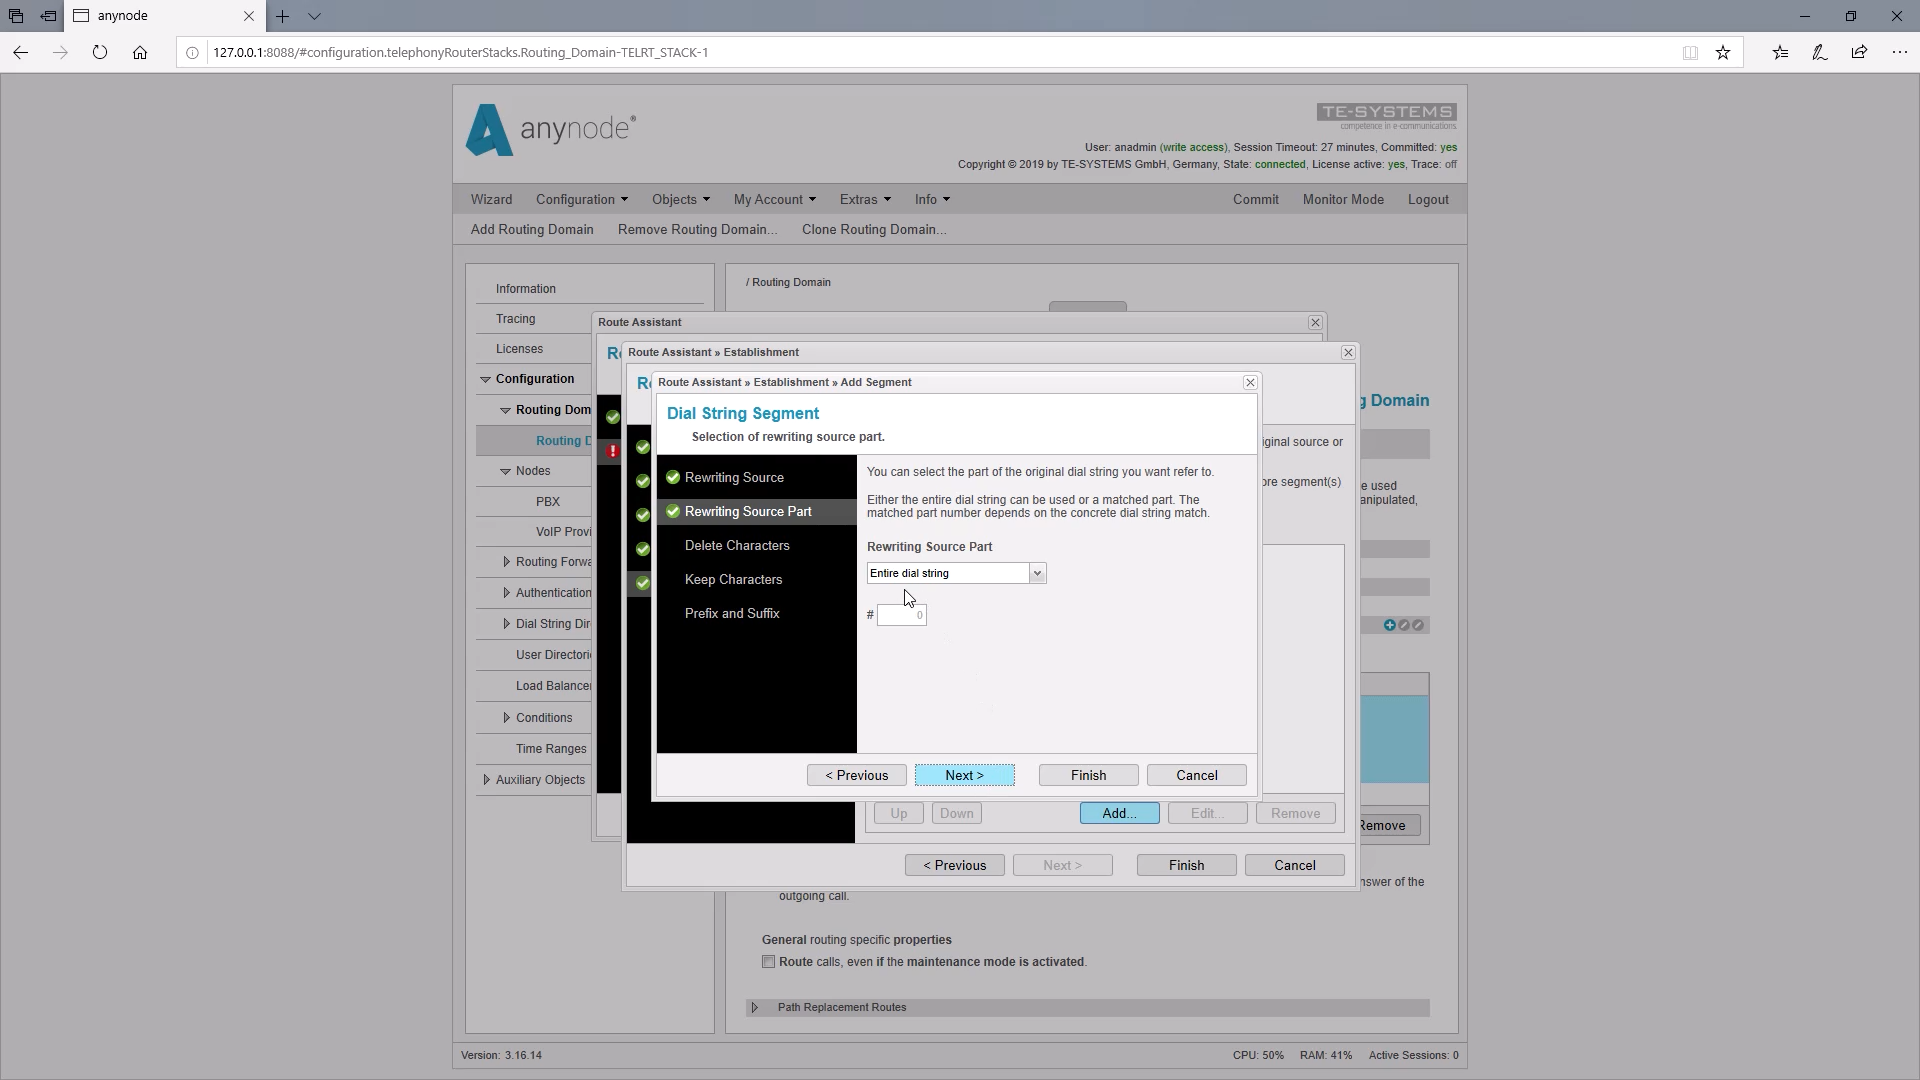
Here we select the Destination Dial String as the source for the rewriting and this should also affect the entire dial string.
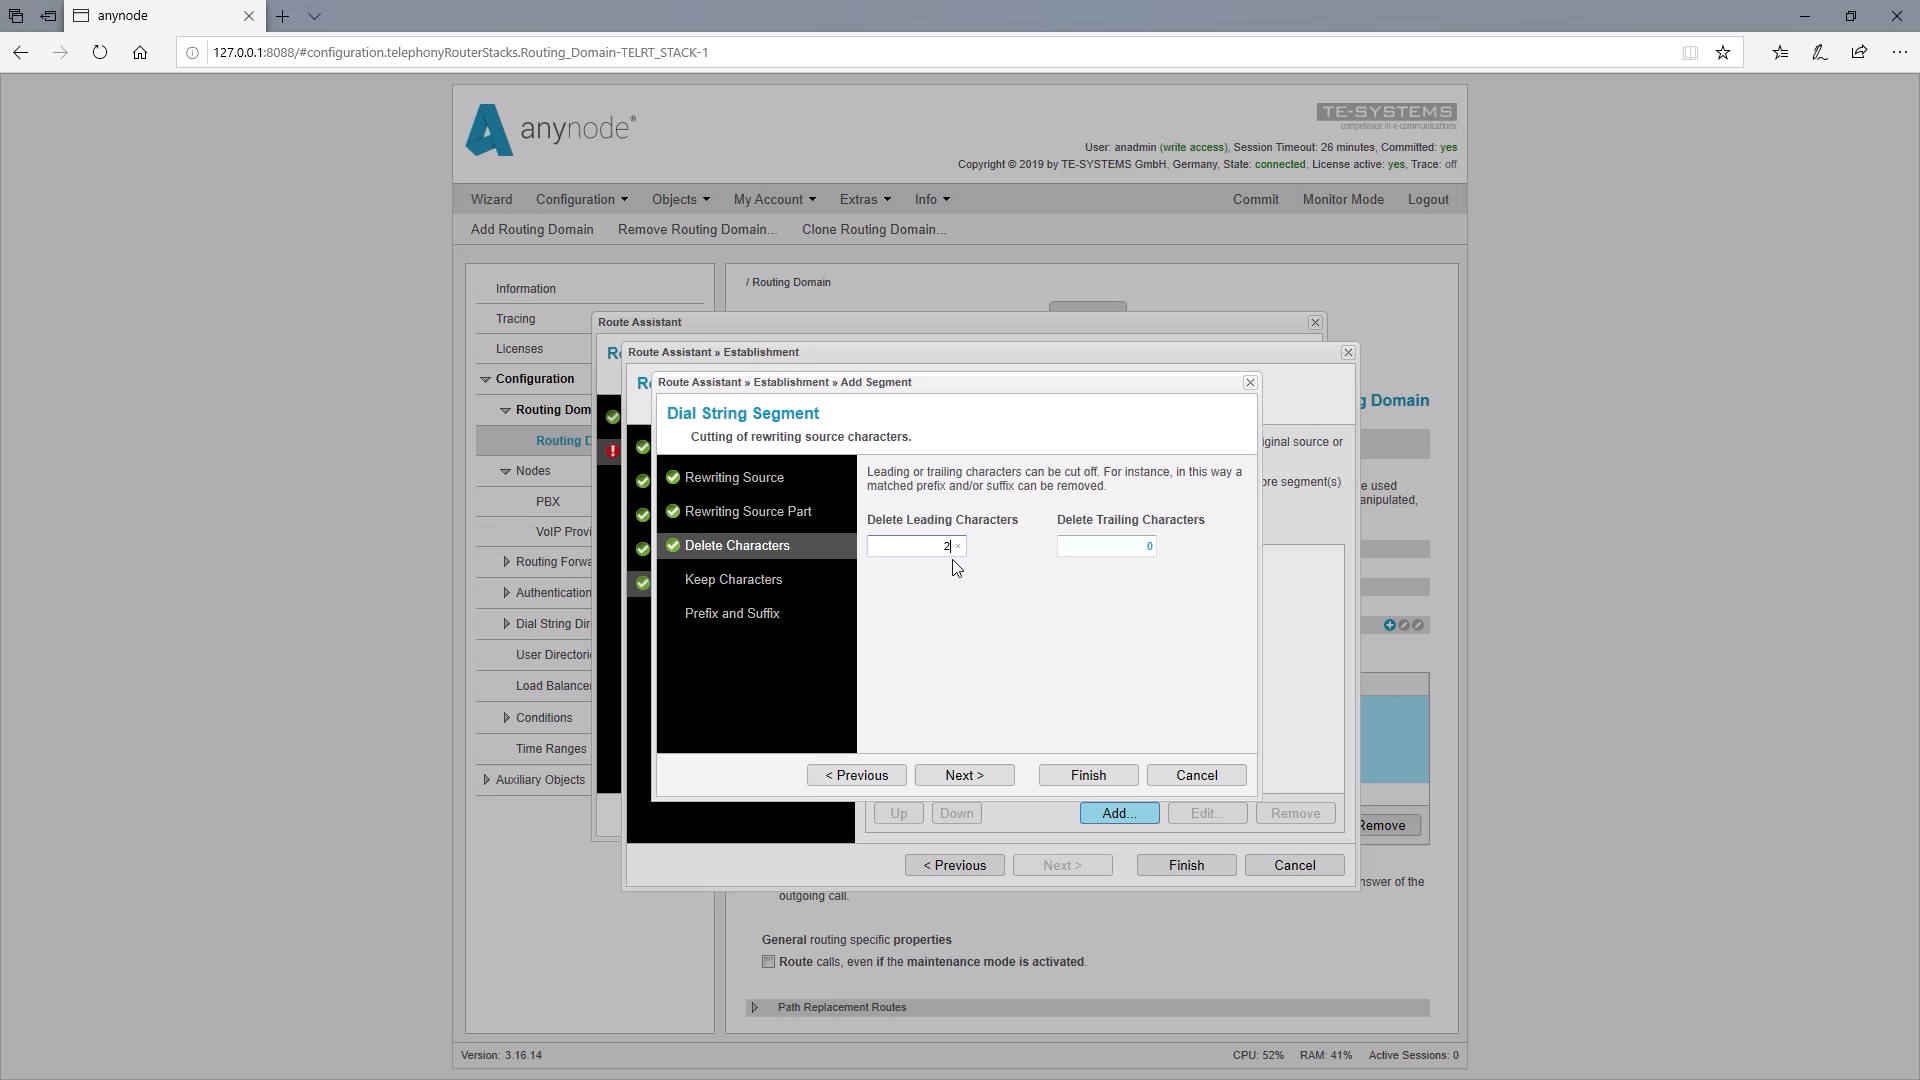
For “Delete Leading Characters” we enter 2so that the first two digits of the number, which are the 99, are deleted.
Now we can click on “Finish” and give a name for this routing decision.
Edit route table
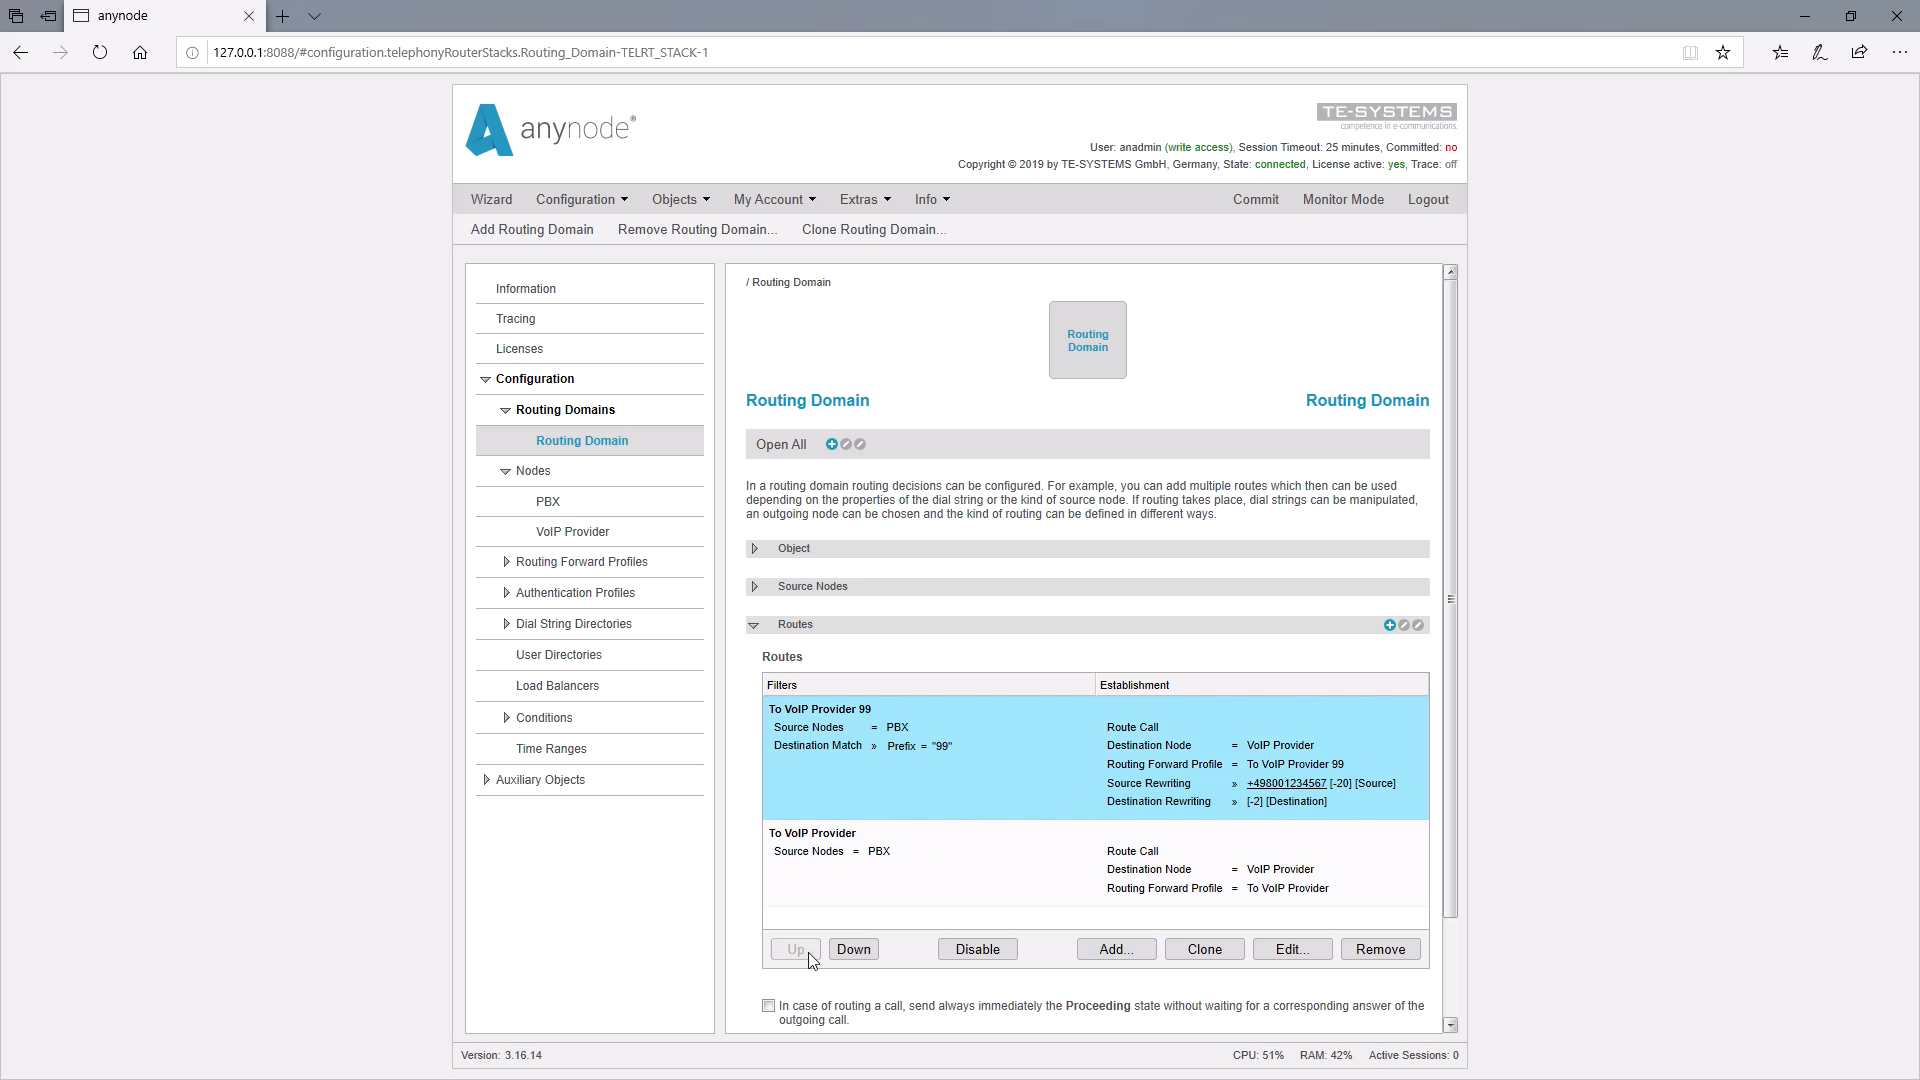
Since the route table is processed from top to bottom, we must necessarily set this route filter upwards so that no other route decision takes effect.
Edit telephony forwarding
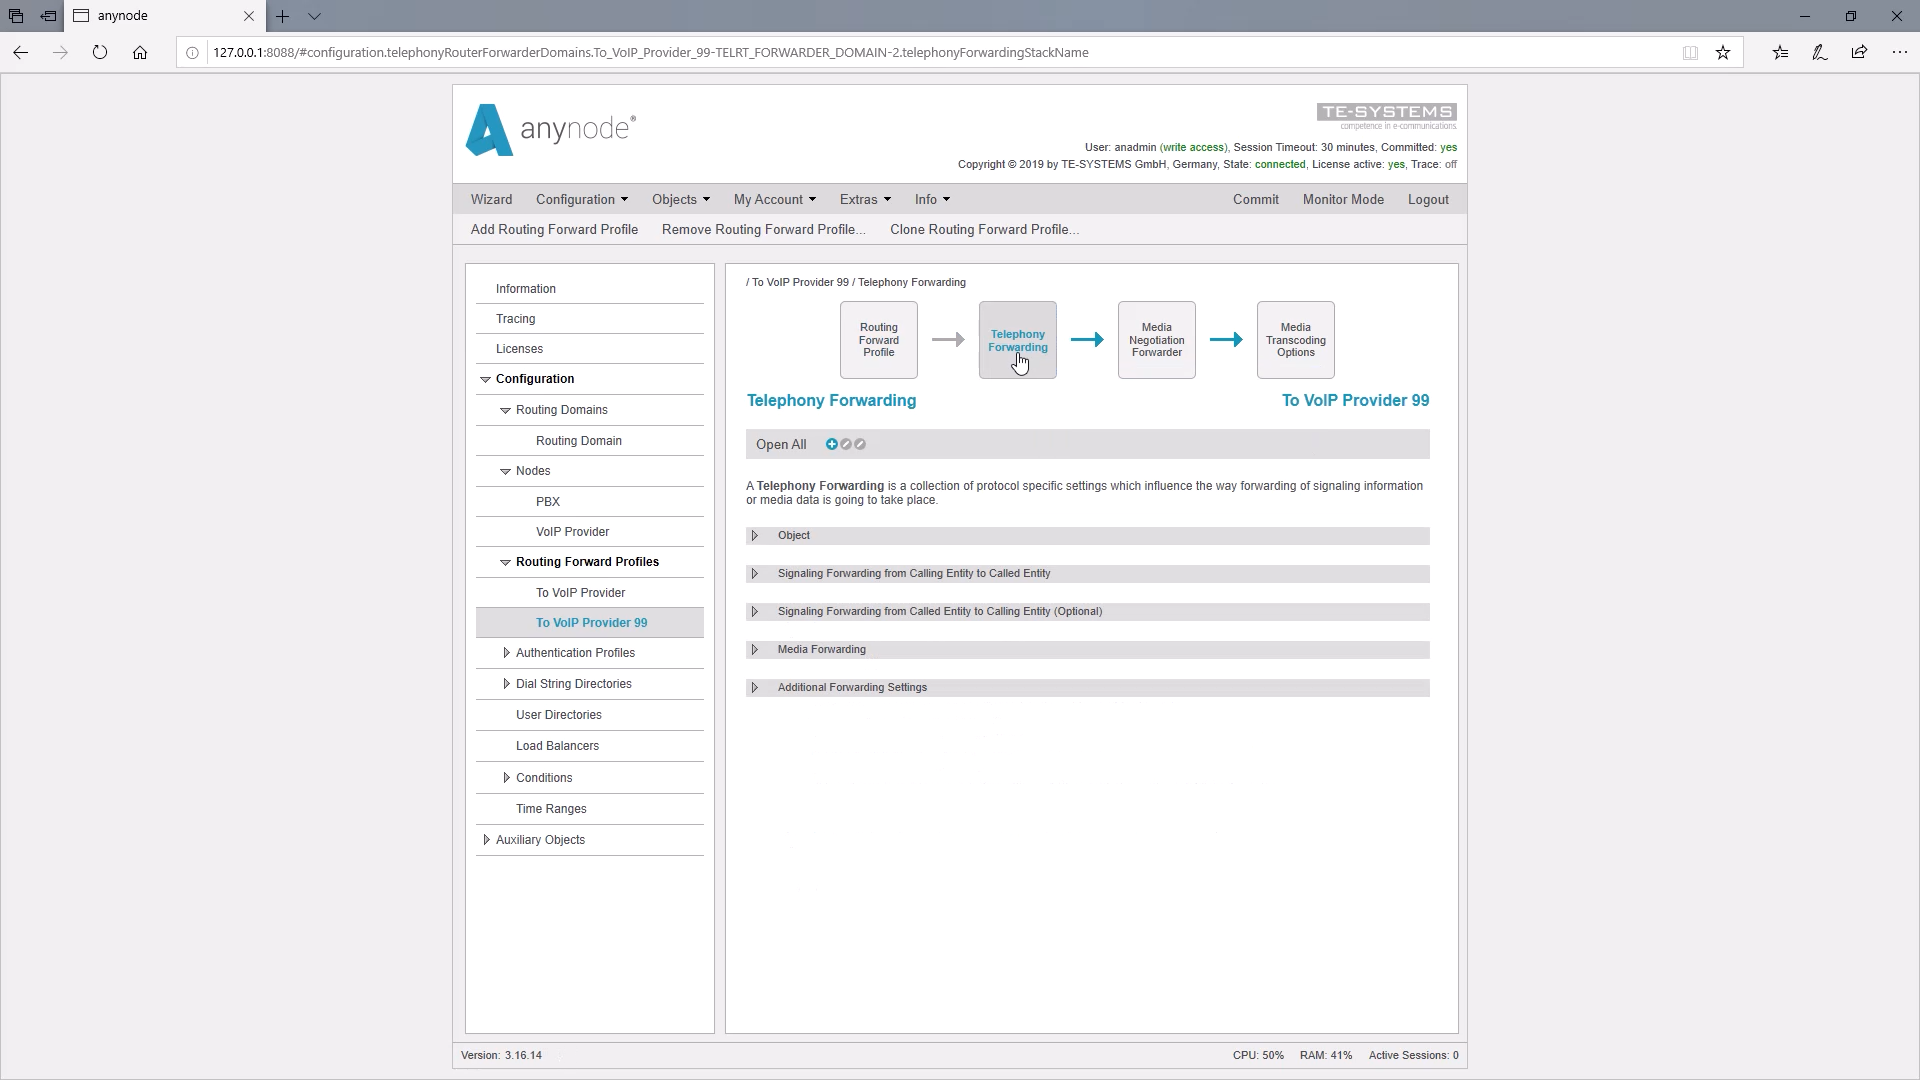
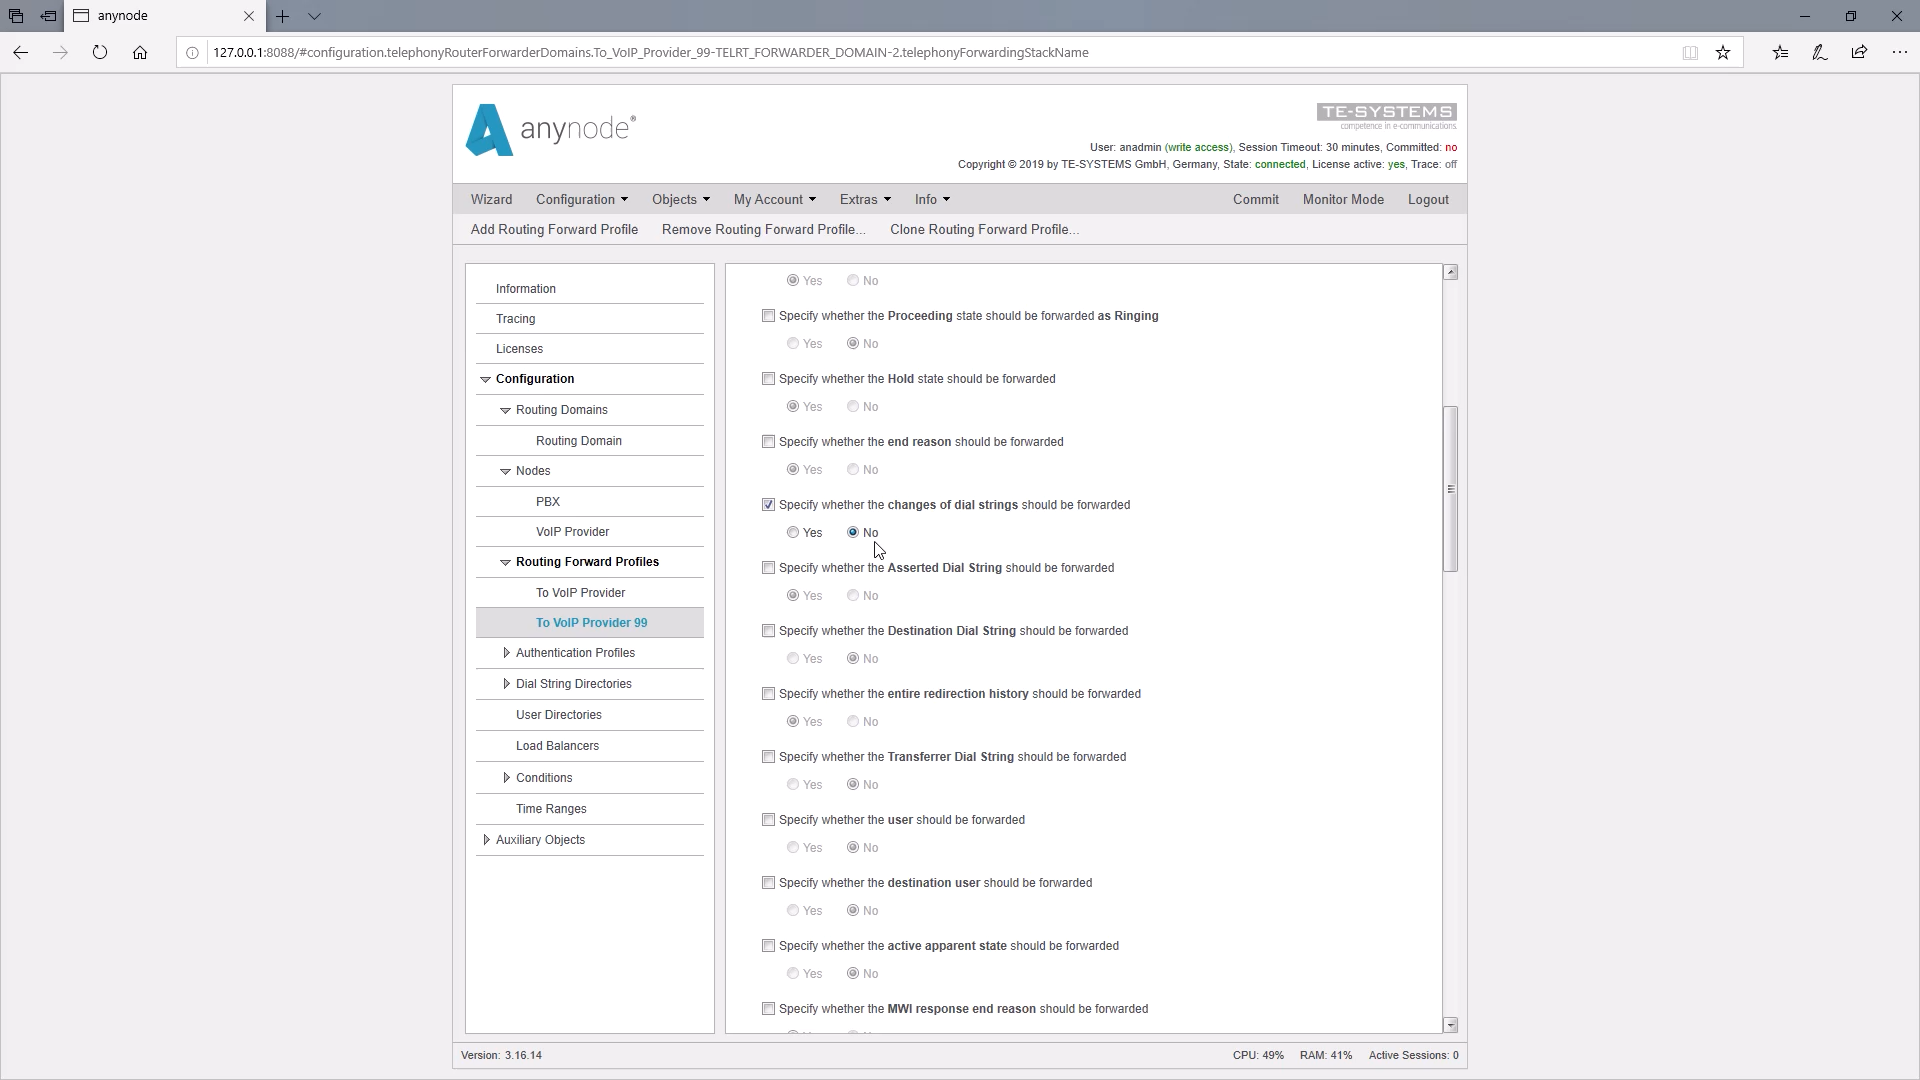
Then we have to change the previously mentioned default value. Under “Telephony Forwarding” we find the default value for “Specify the changes of dial strings should be forwarded”.
The default value here is “Yes”. In order to avoid overwriting our manipulation in the routing by the automatic setting in the Routing Forward Profile, we need to use “No” here.
Call test in monitor mode
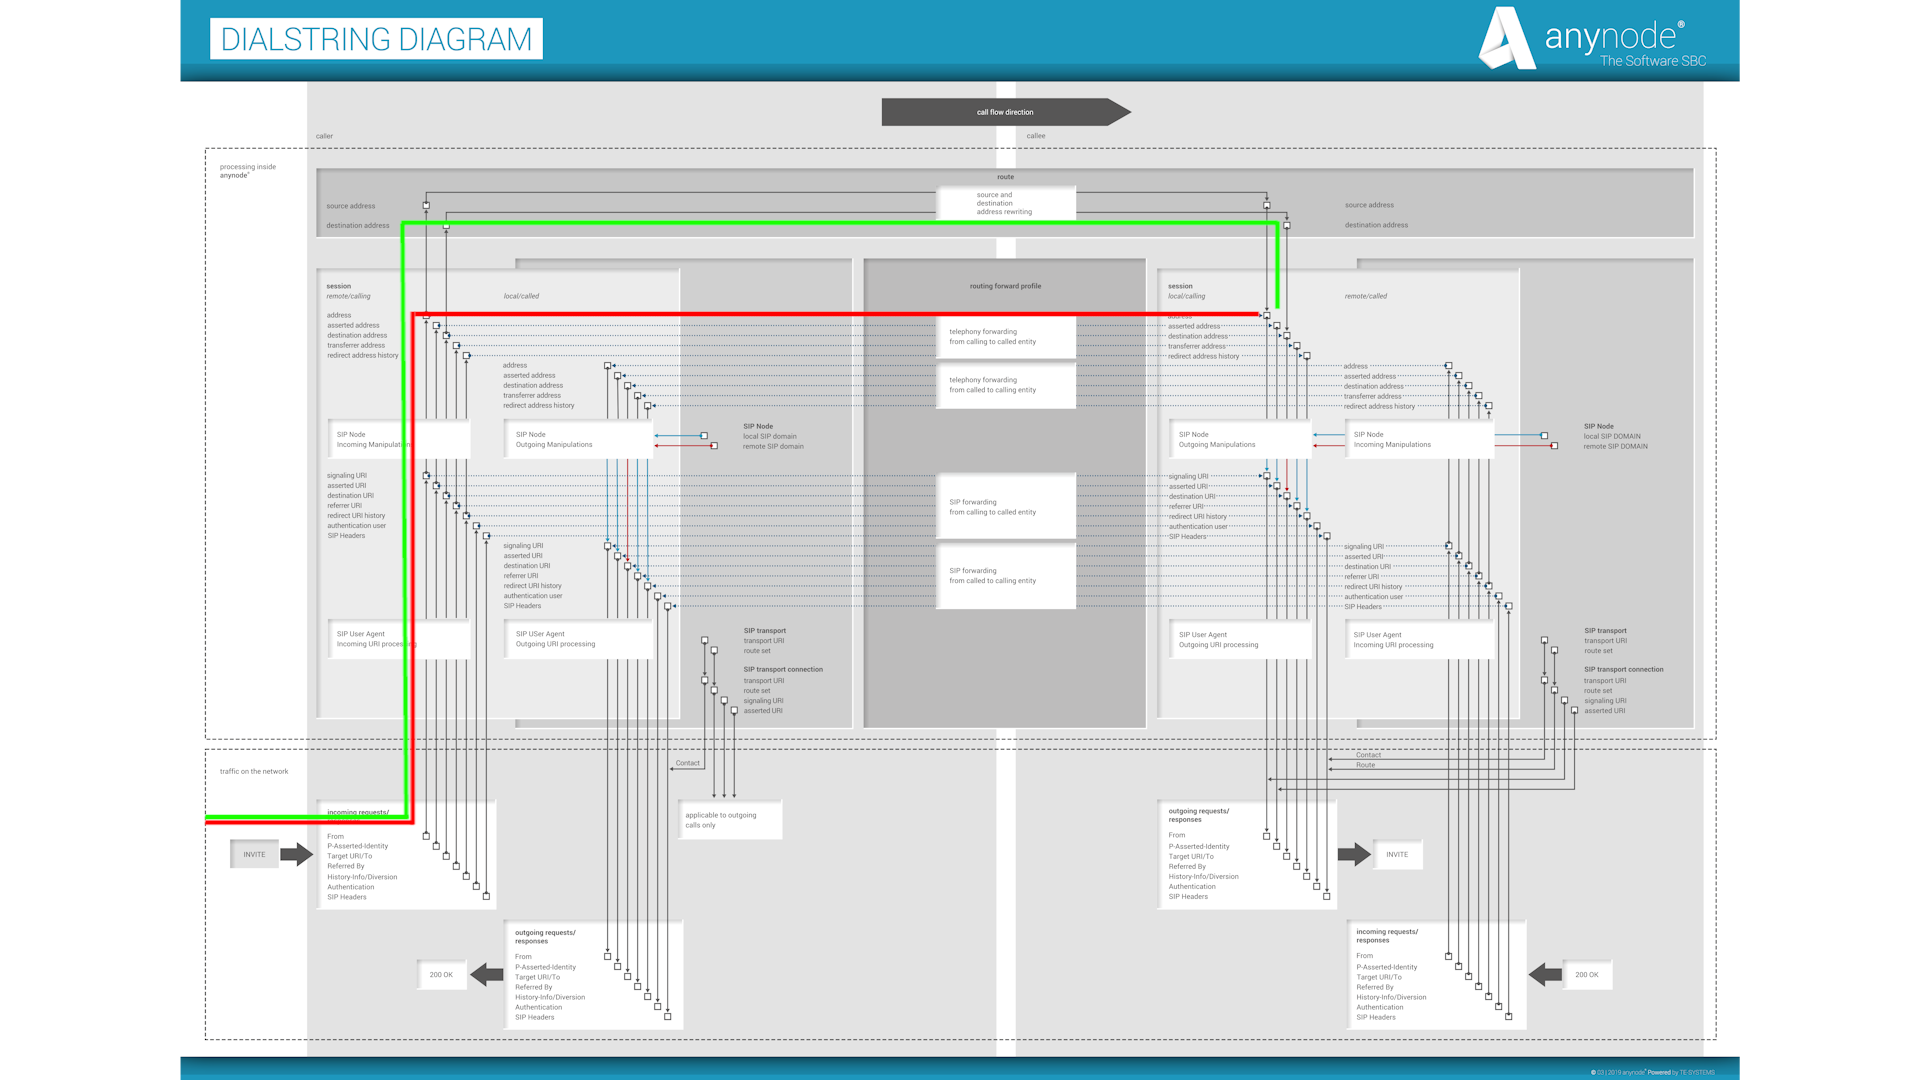
A look under the hood of anynode shows us the signal processes. The SIP message arrives here with an Invite and it’s taking the shortest possible route with the default Routing Forward Profile setting and the Source Dial String Rewriting is overwritten again. By switching off the default value, the source manipulation takes effect.
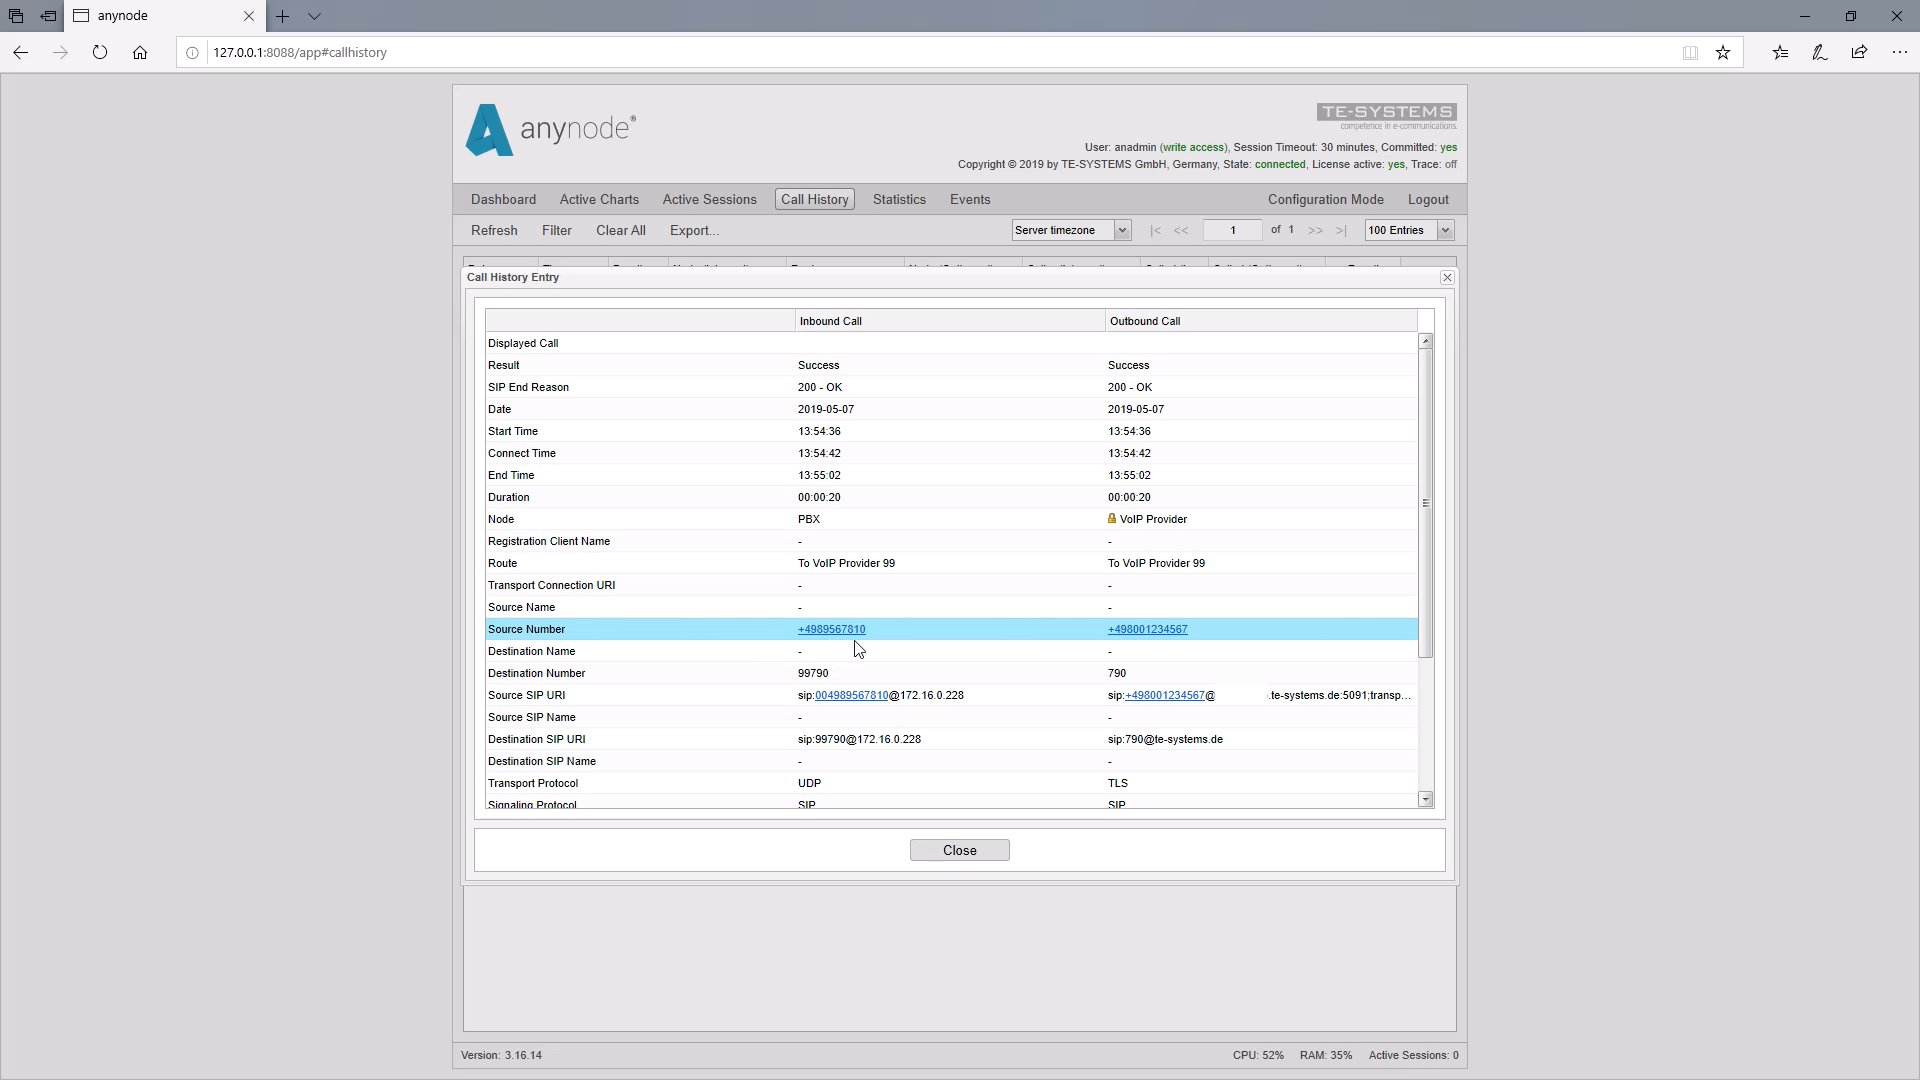
We are now testing the result in monitor mode. The easiest way is to use the call history and double-click on the already ended test call. Under “Source Number” we can see that the source number has changed to the desired number using the prefix 99 and also the correct route has been taken.


