Introduction
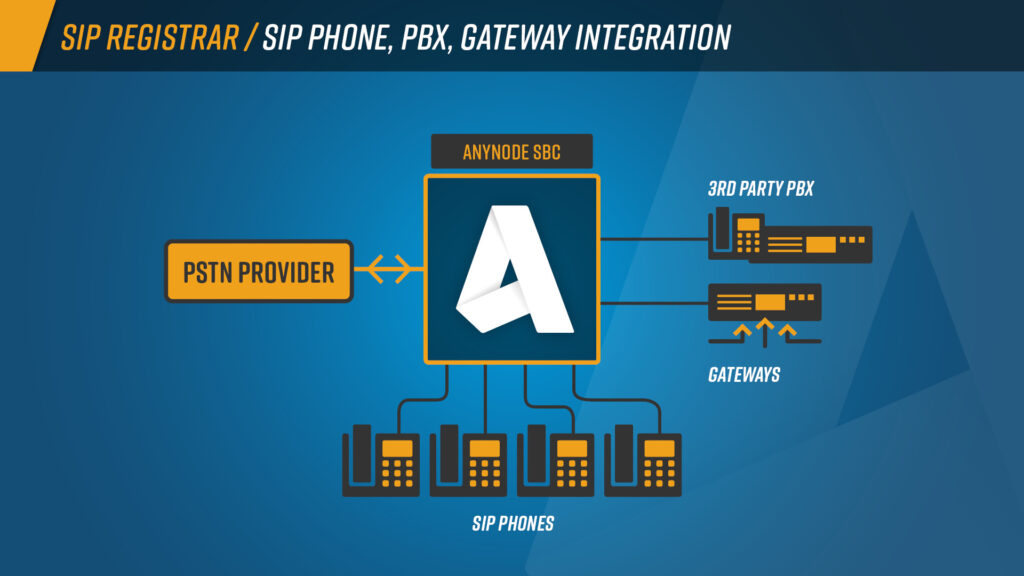
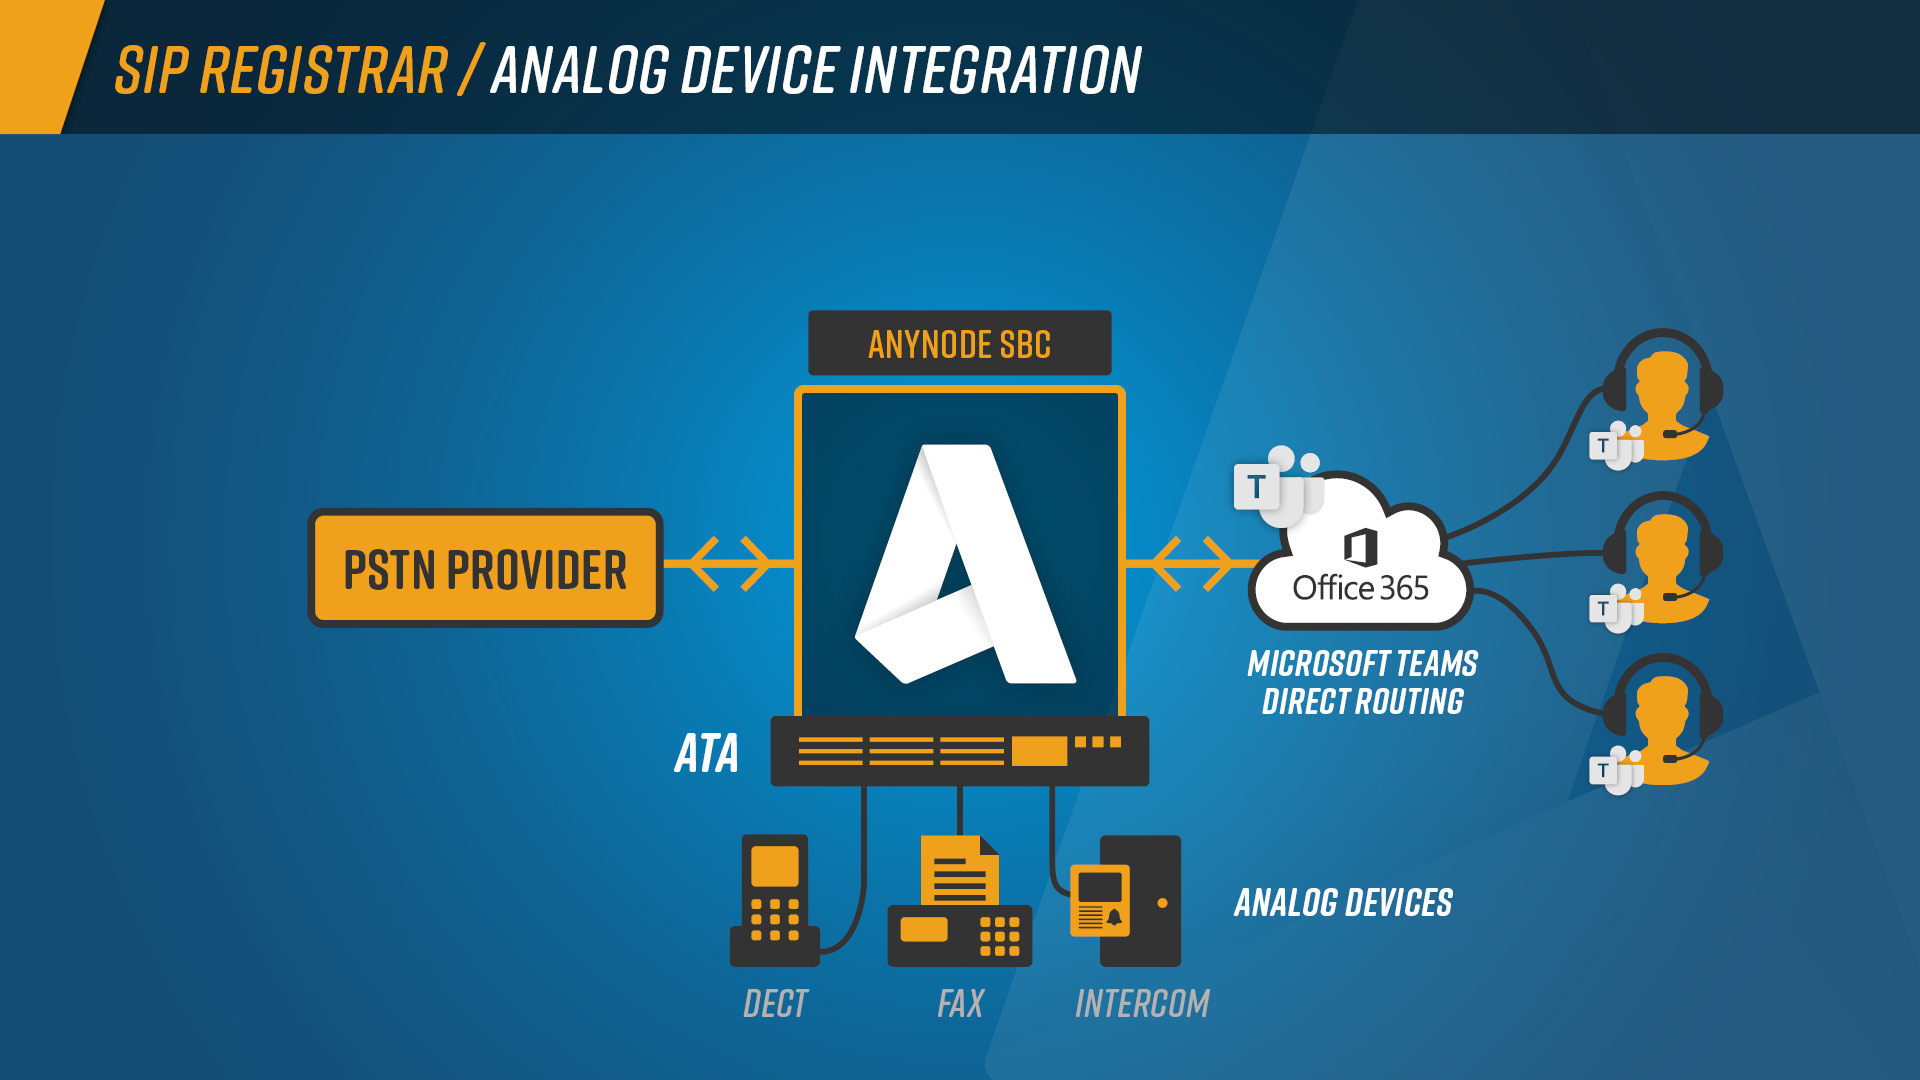
Welcome to another edition of anynode video tutorial serials. In this episode, we invite you to sit back and watch as we share information on using the SIP Registrar feature. With SIP Registrar and anynode, analog devices, SIP telephones, existing telephone systems, and gateways can be integrated in a communication environment, even in a cloud-based VoIP architecture.
When a user makes a call from an analog device, the signal and media flow is transmitted to anynode via the analog telephony adapter (ATA).
The SIP registrar allows multiple telephony devices to be registered at the same time and calls can be routed using simple routing. The devices can be combined with user-related manipulation options for phone numbers in complex topologies.
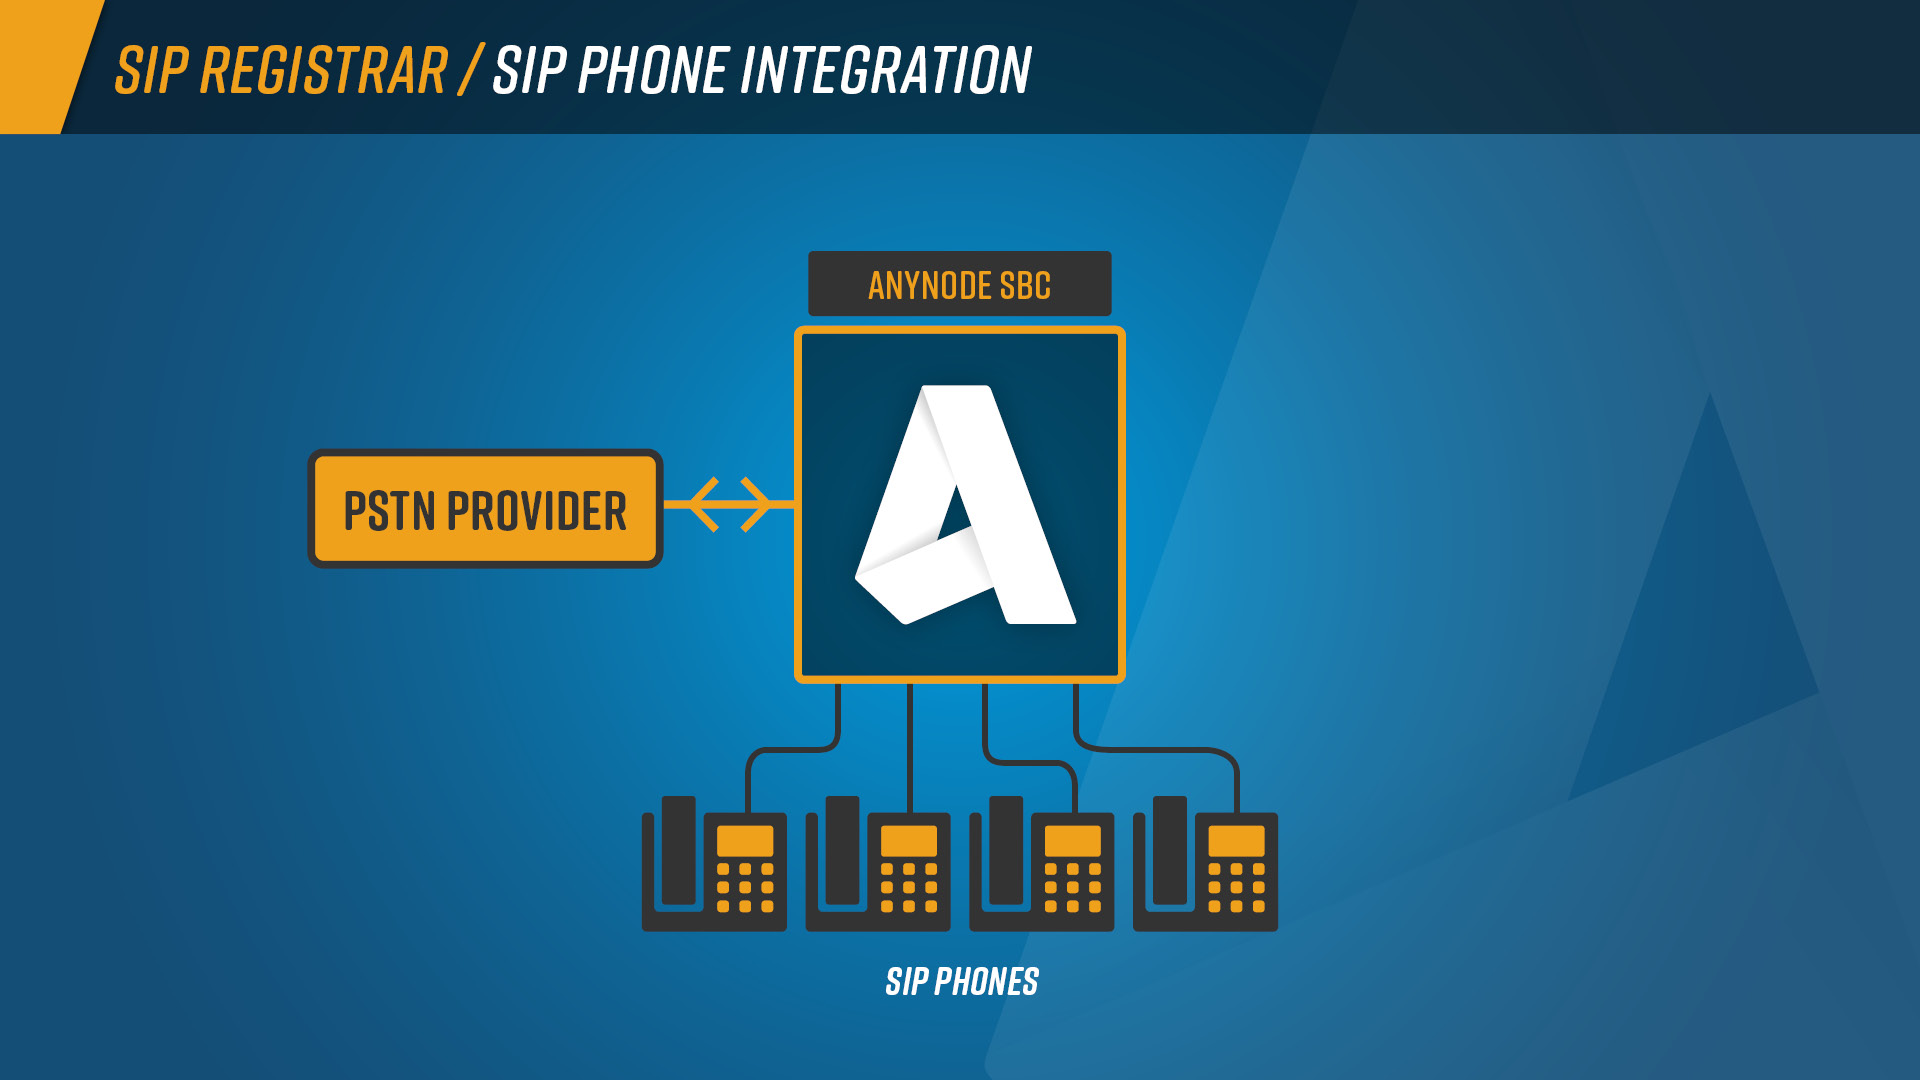
For the sake of simplicity, in this tutorial video, we will assume simple end devices such as SIP telephones are being used. Take a look at the configuration, which can be done easily with the help of the anynode wizards.
Configuration: 2 possibilities
We start with an existing scenario: We have a provider node, a Microsoft Teams Direct Routing Node, and a PBX node being expanded by a SIP registrar node. This means that several SIP remote sites, e.g. several SIP phones, can be integrated into our configuration.
Of course, any number of registrar nodes can be created. In our example, we use a user directory to define the credentials and the registrar dial string and we also use the same user directory for routing.
There are two ways to add a SIP registrar:
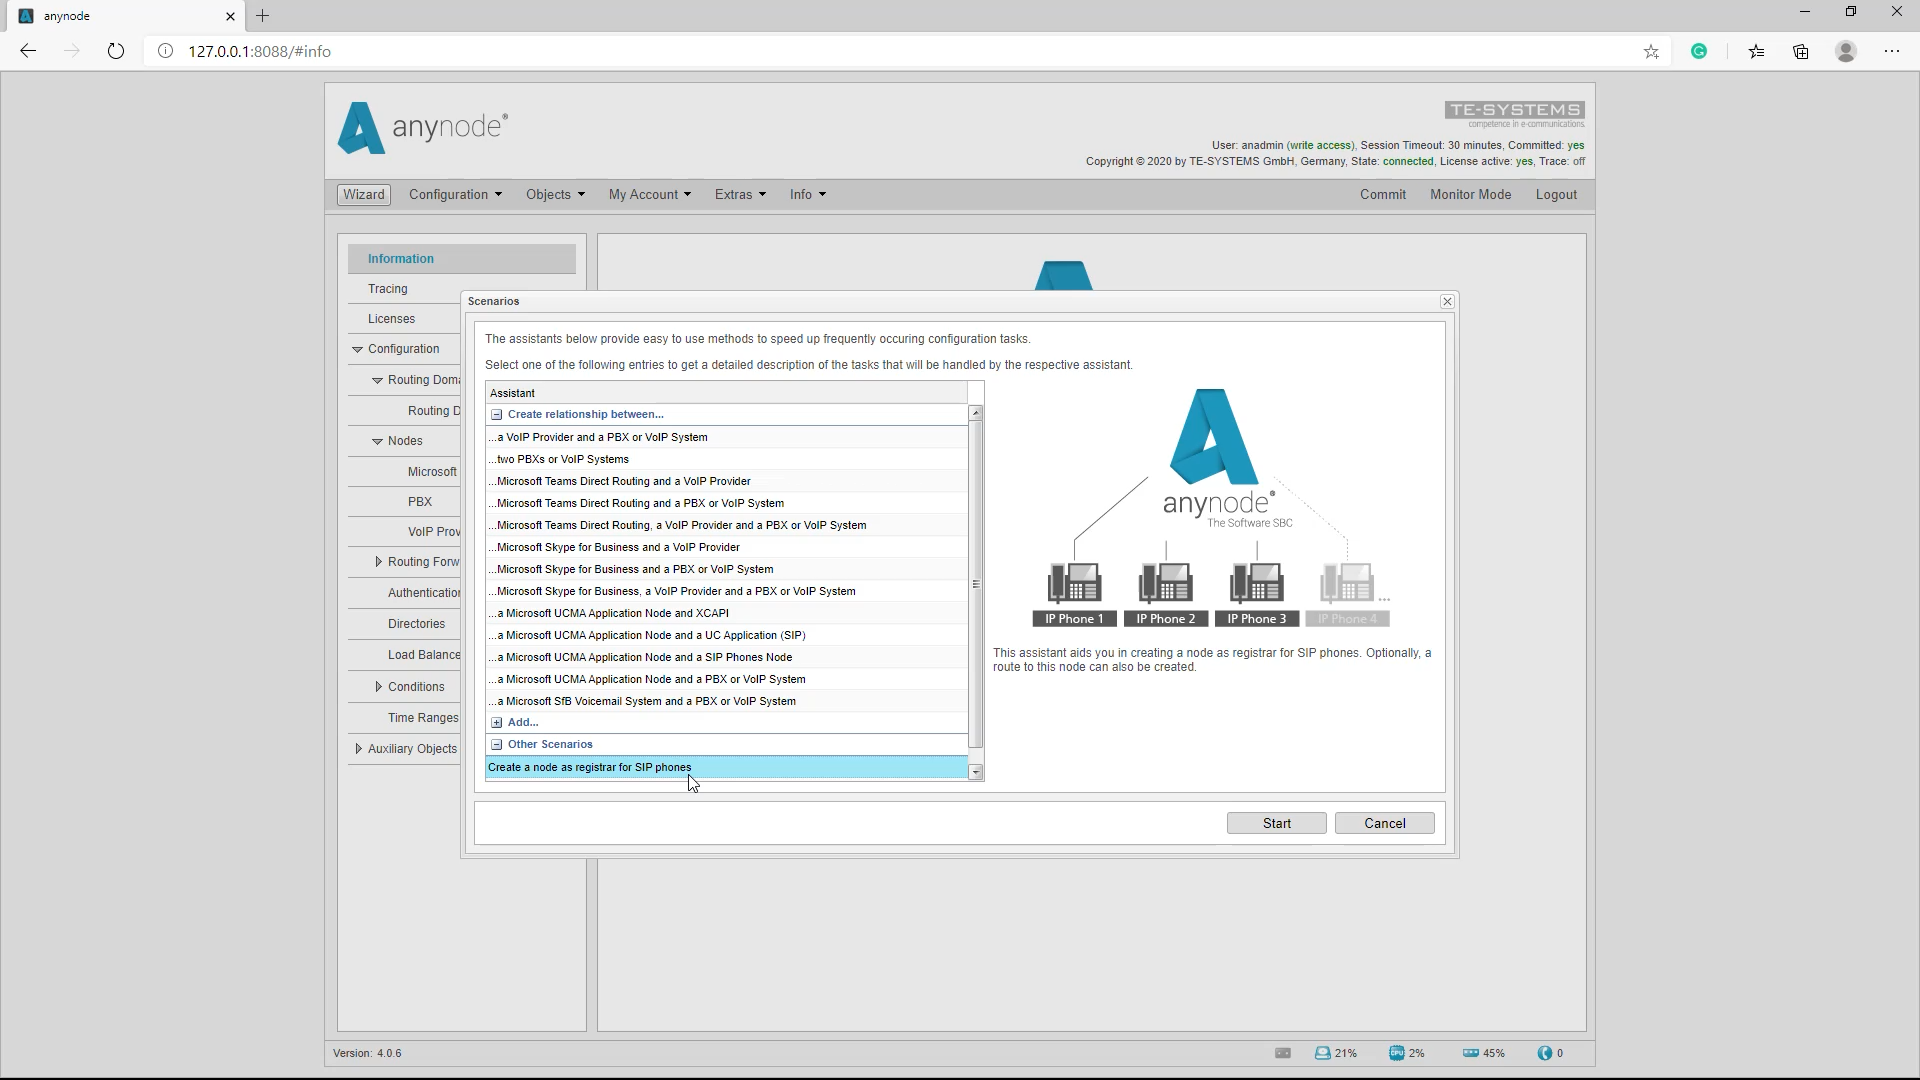
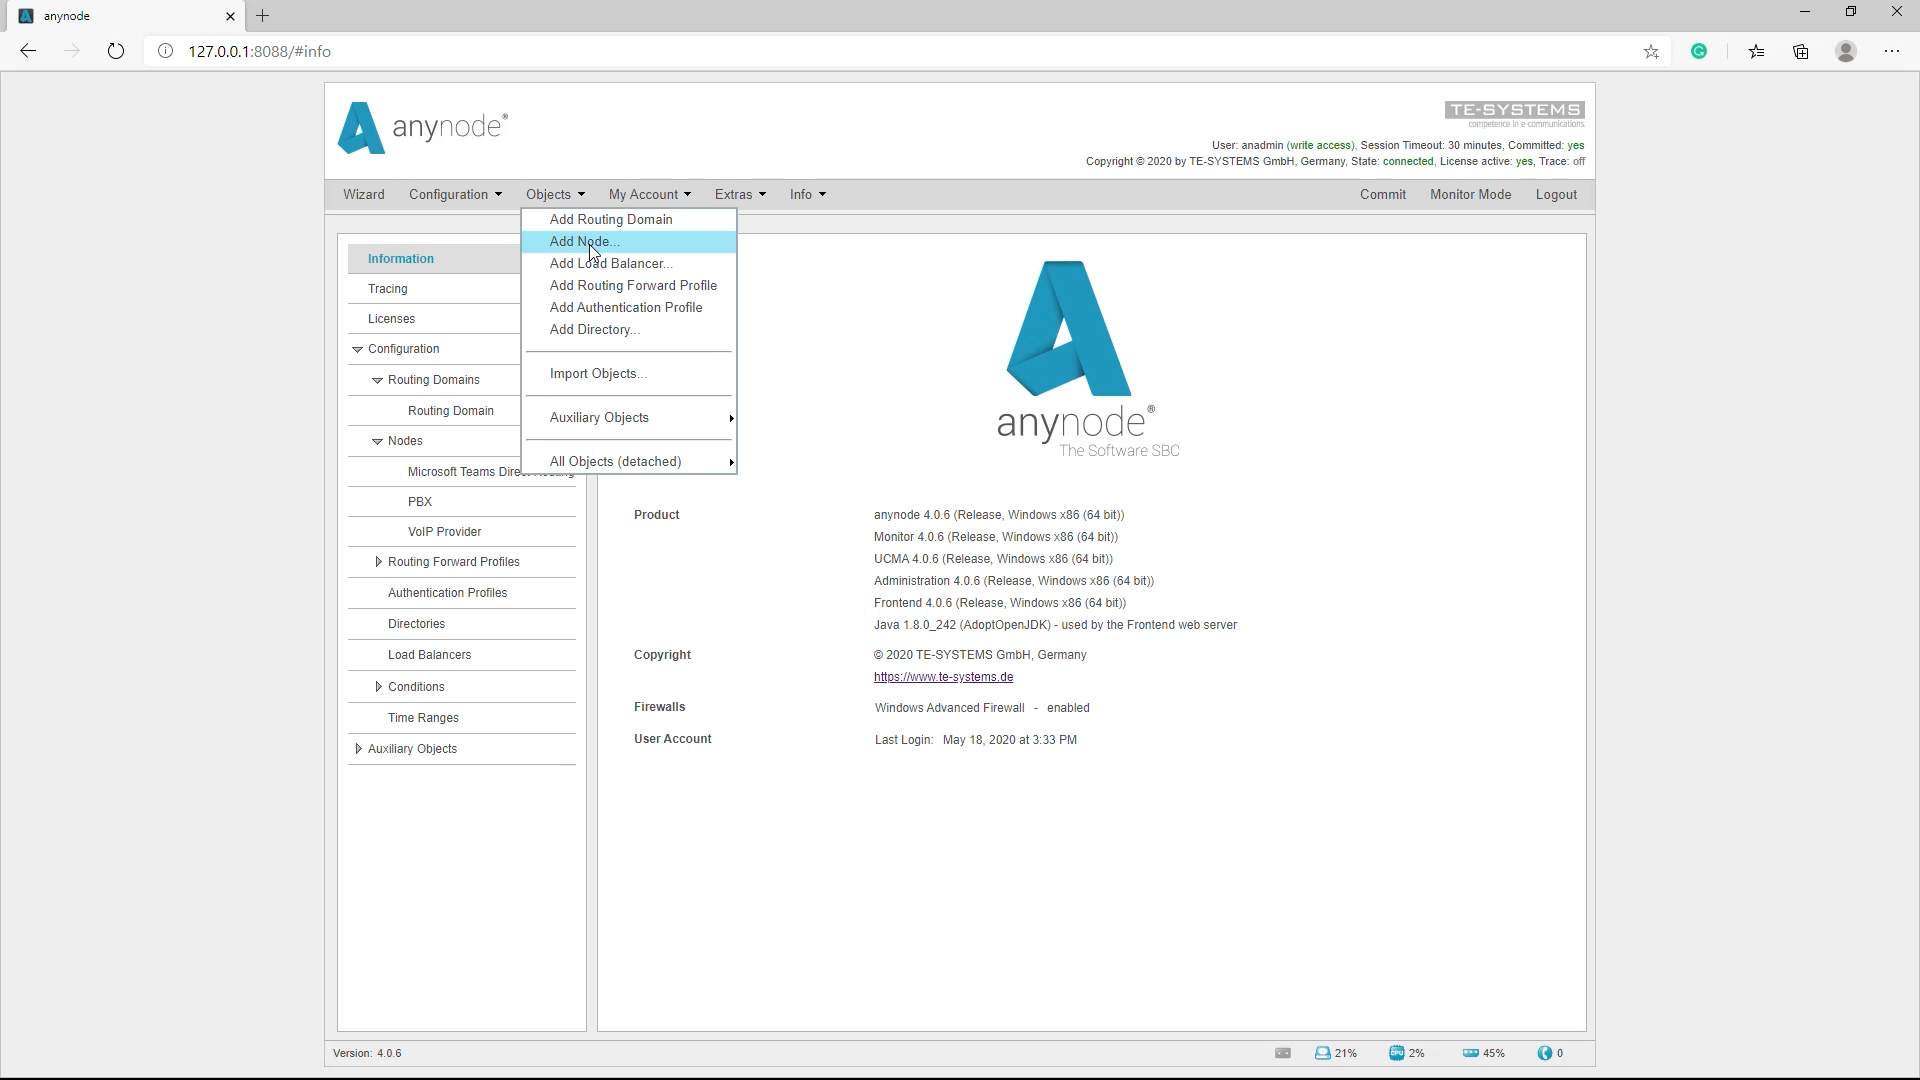
It can be done with the Scenario Wizard or with a simple “Add Node” under “Objects”.
Objects can be used at any time to add individual objects such as another SIP registrar node without the automatic creation of a route.
The SIP registrar function via the wizard has the advantage that that also creates corresponding routing.
We start with the Scenario Wizard. We are accompanied step by step through the configuration and do not forget any important settings.
Configuration: network controller
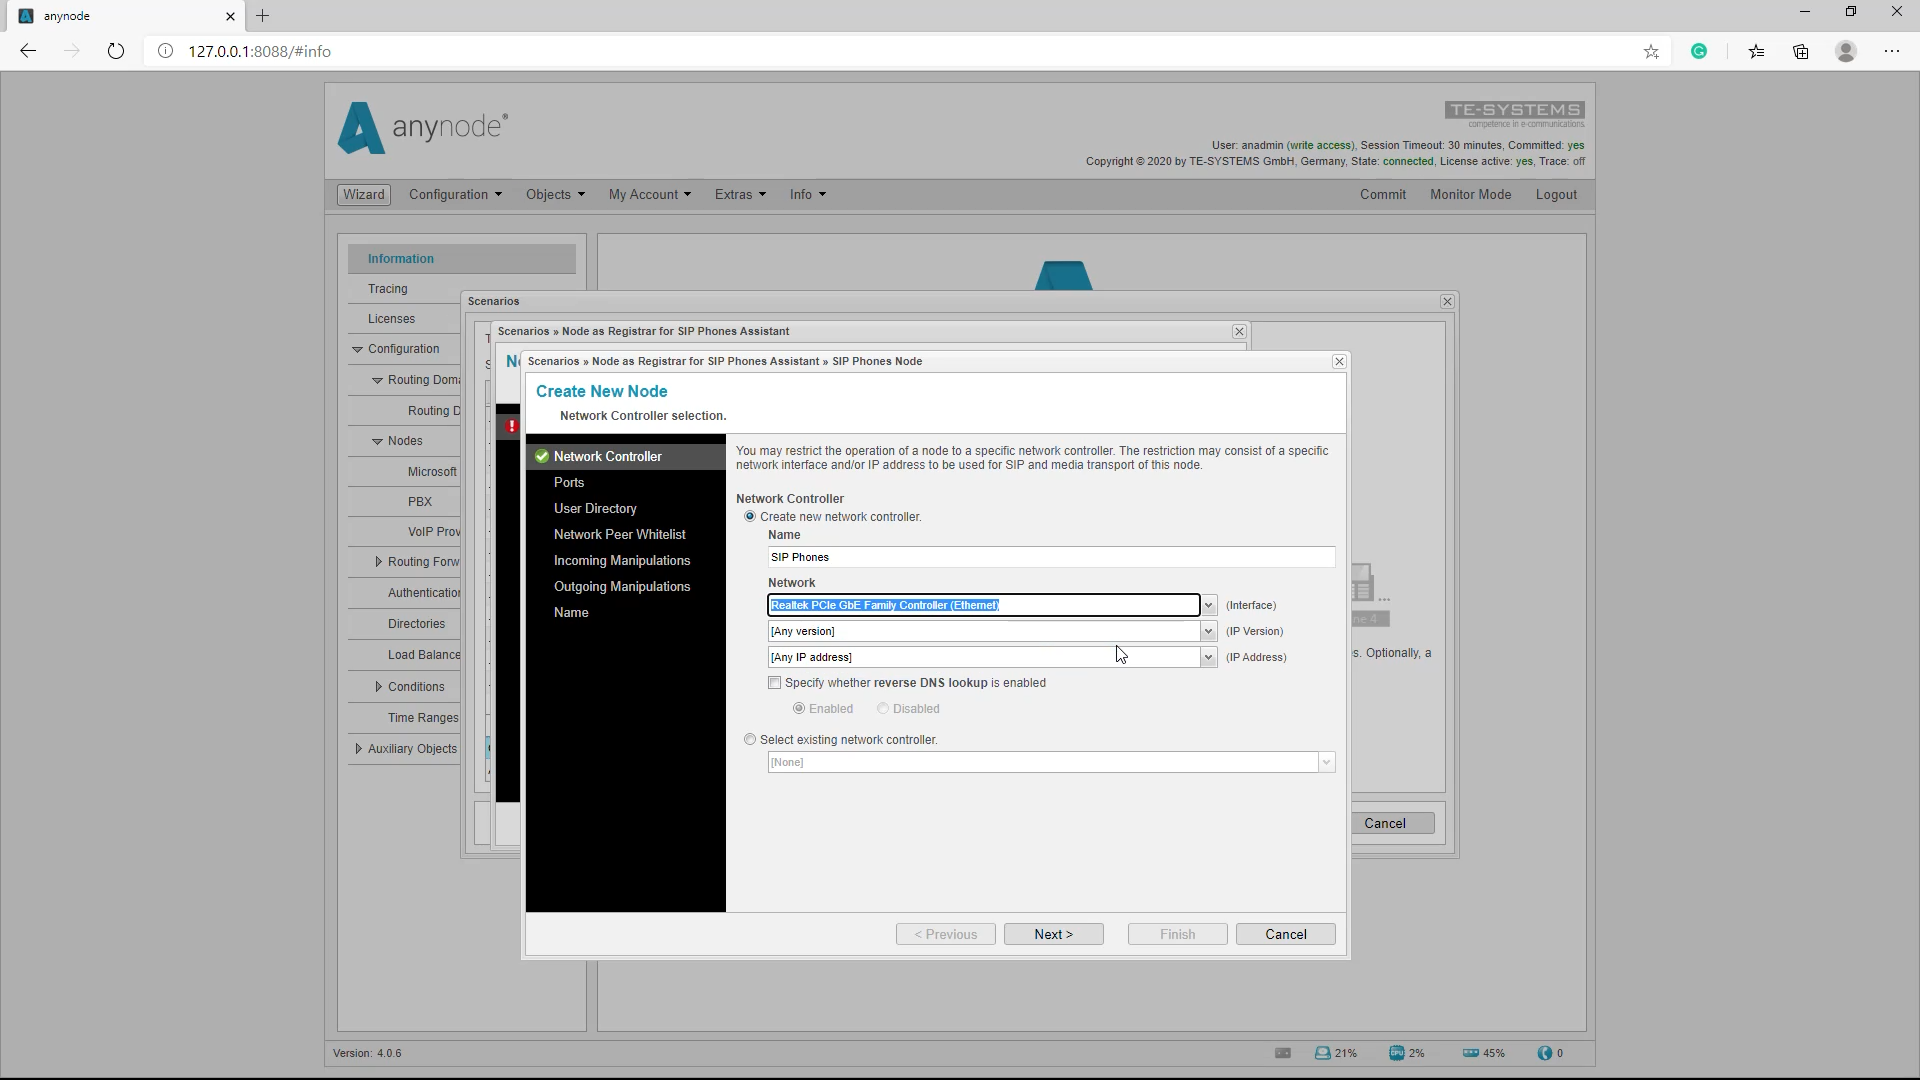
First, you should give the network controller a unique name. In this case, we adopt the name “SIP Phones” suggested by the wizard. With “Interface” you have to select the NIC with which the SIP telephones are to communicate.
Configuration: ports
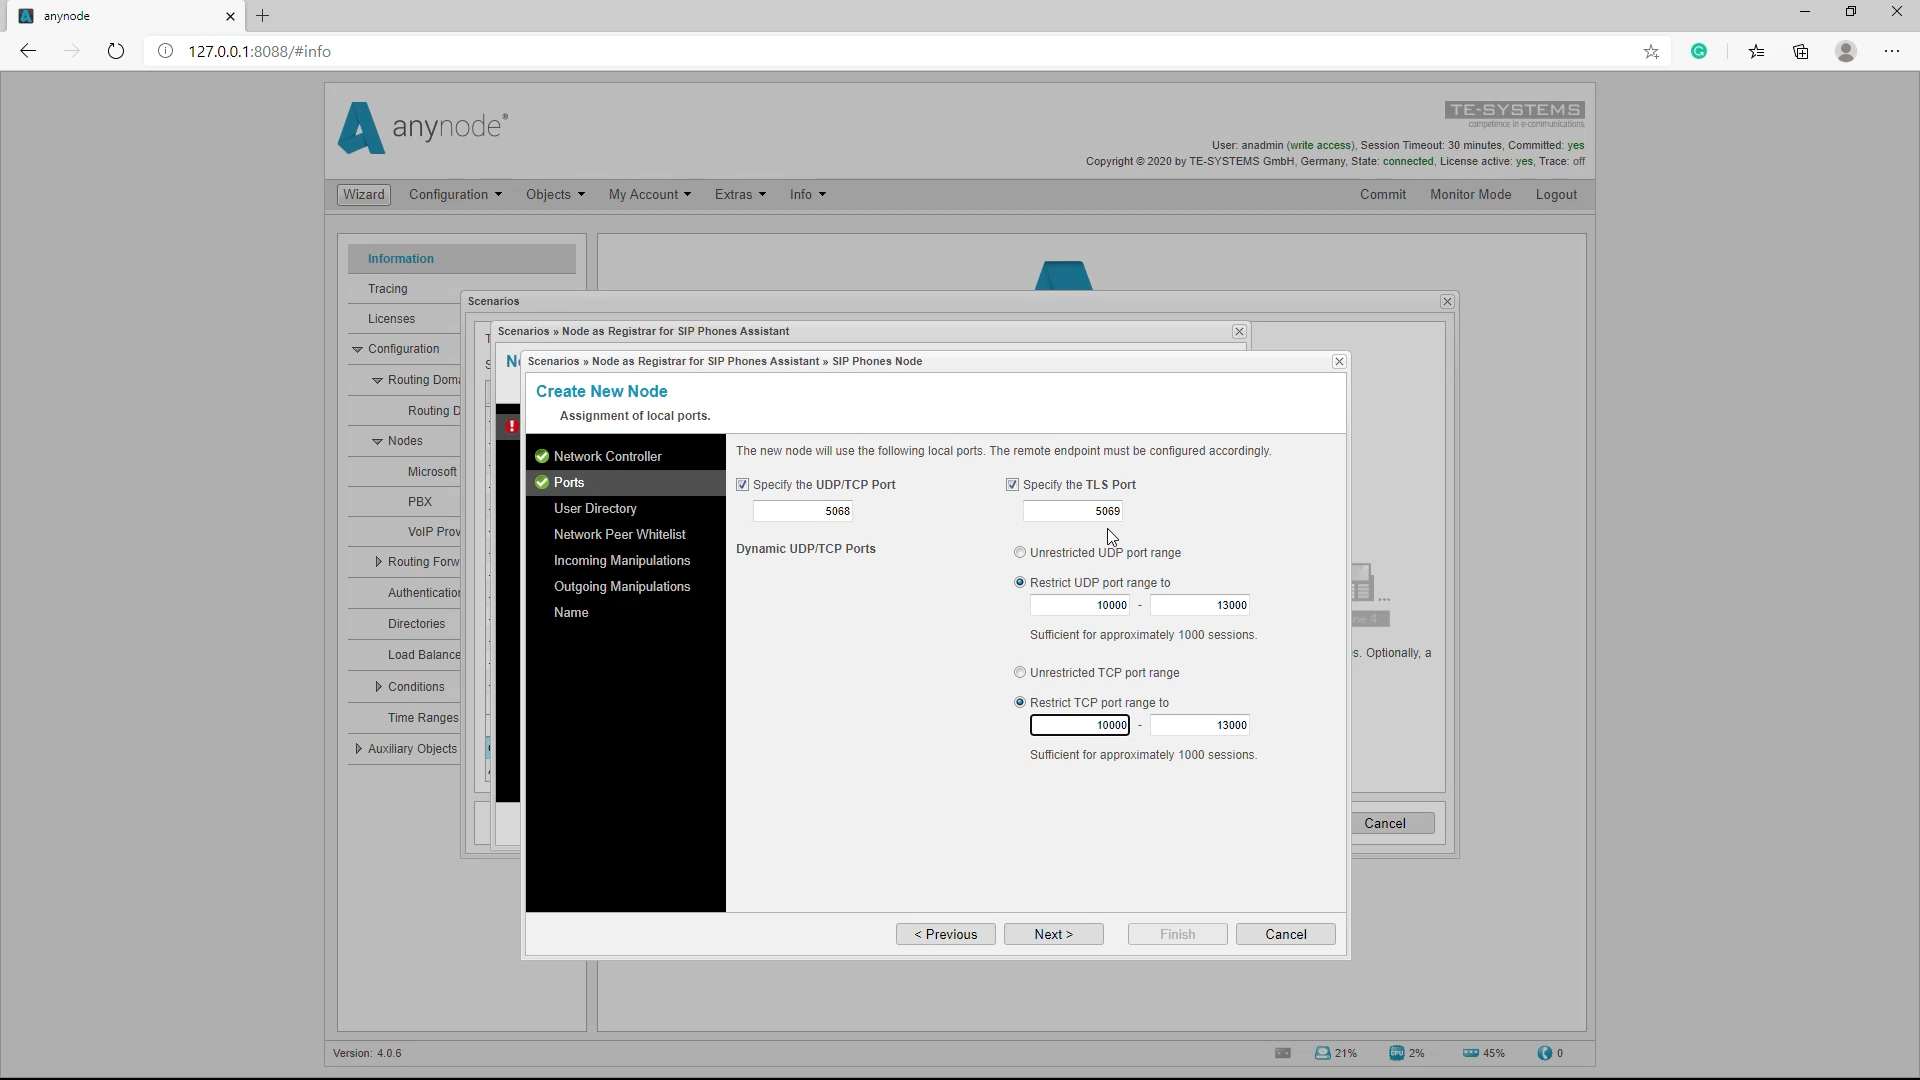
You have to make sure that the ports are not already being used by other nodes. These are the local ports on which anynode listens. In this case, we take over the ports suggested by the assistant. With the ports, it is particularly important to ensure that the end devices that are to register with this node are set so that they also send their register message to this port.
Configuration: add new directory
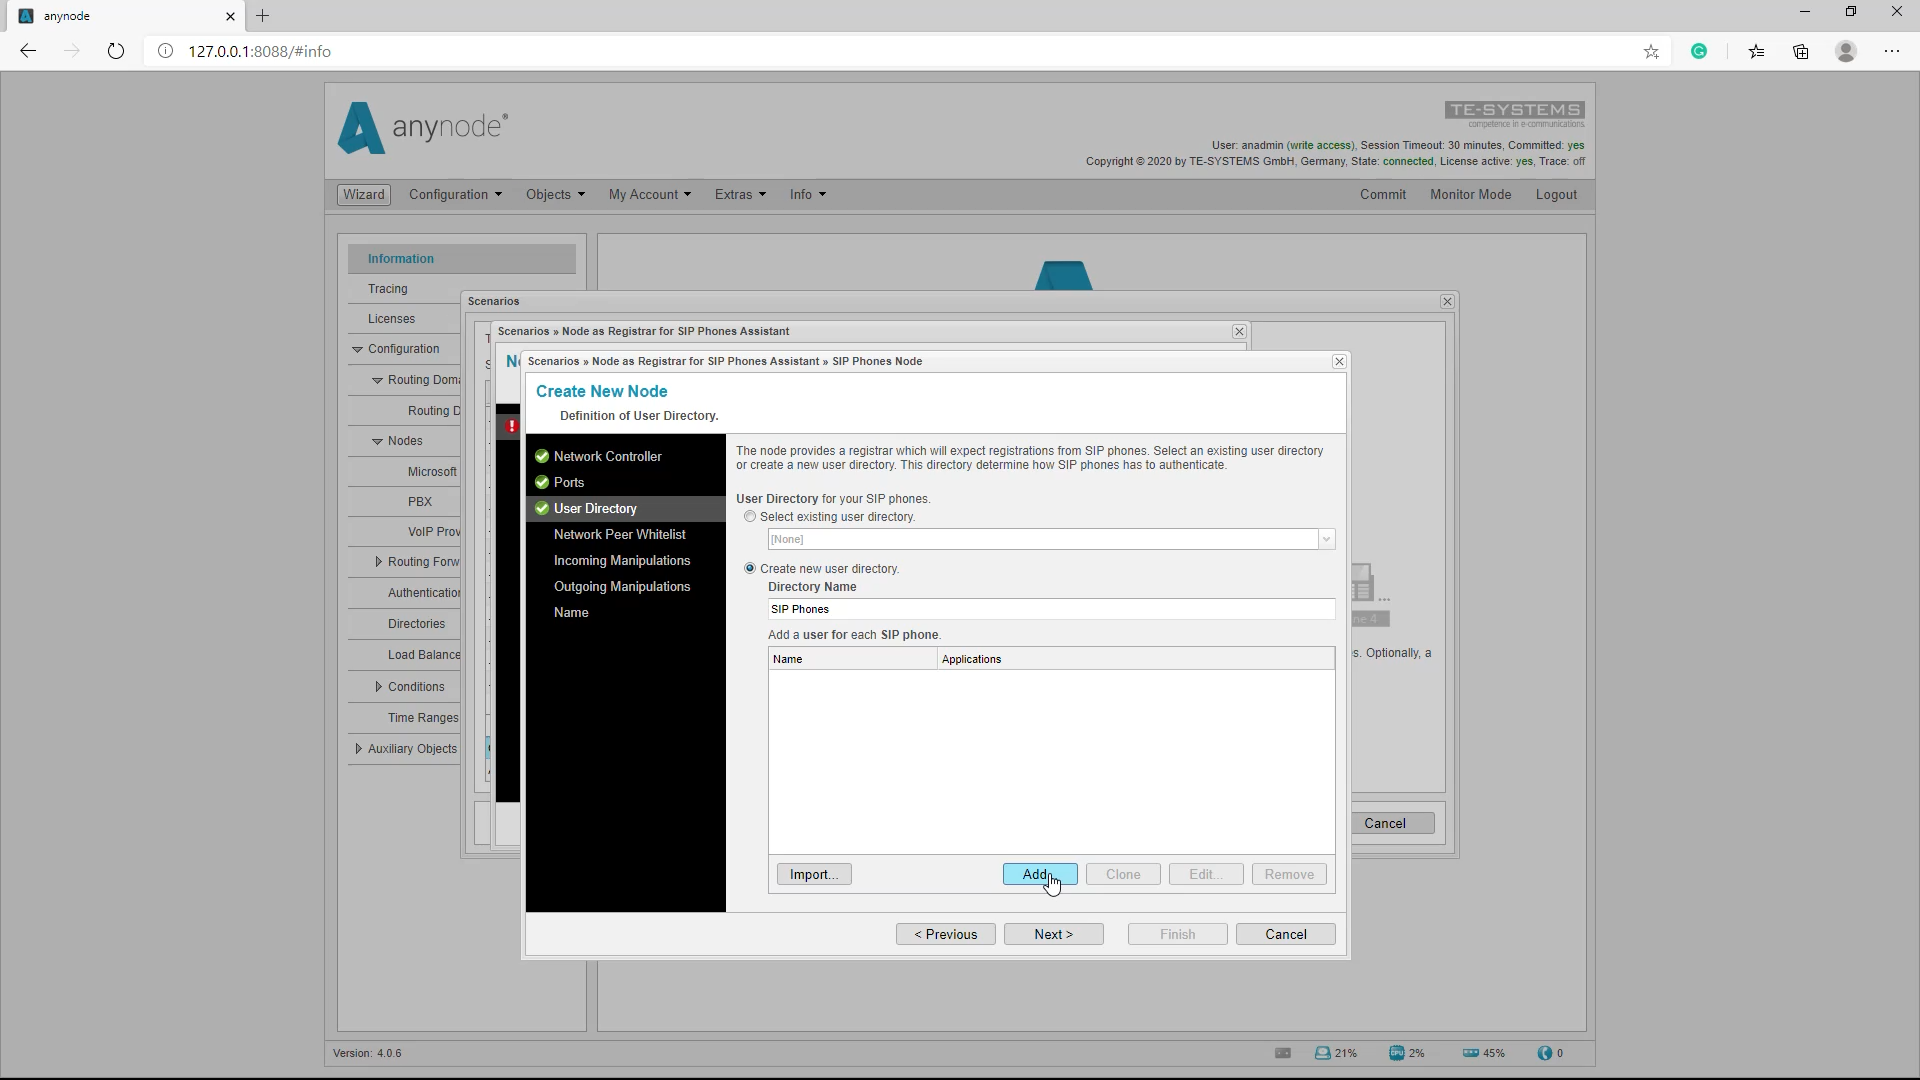
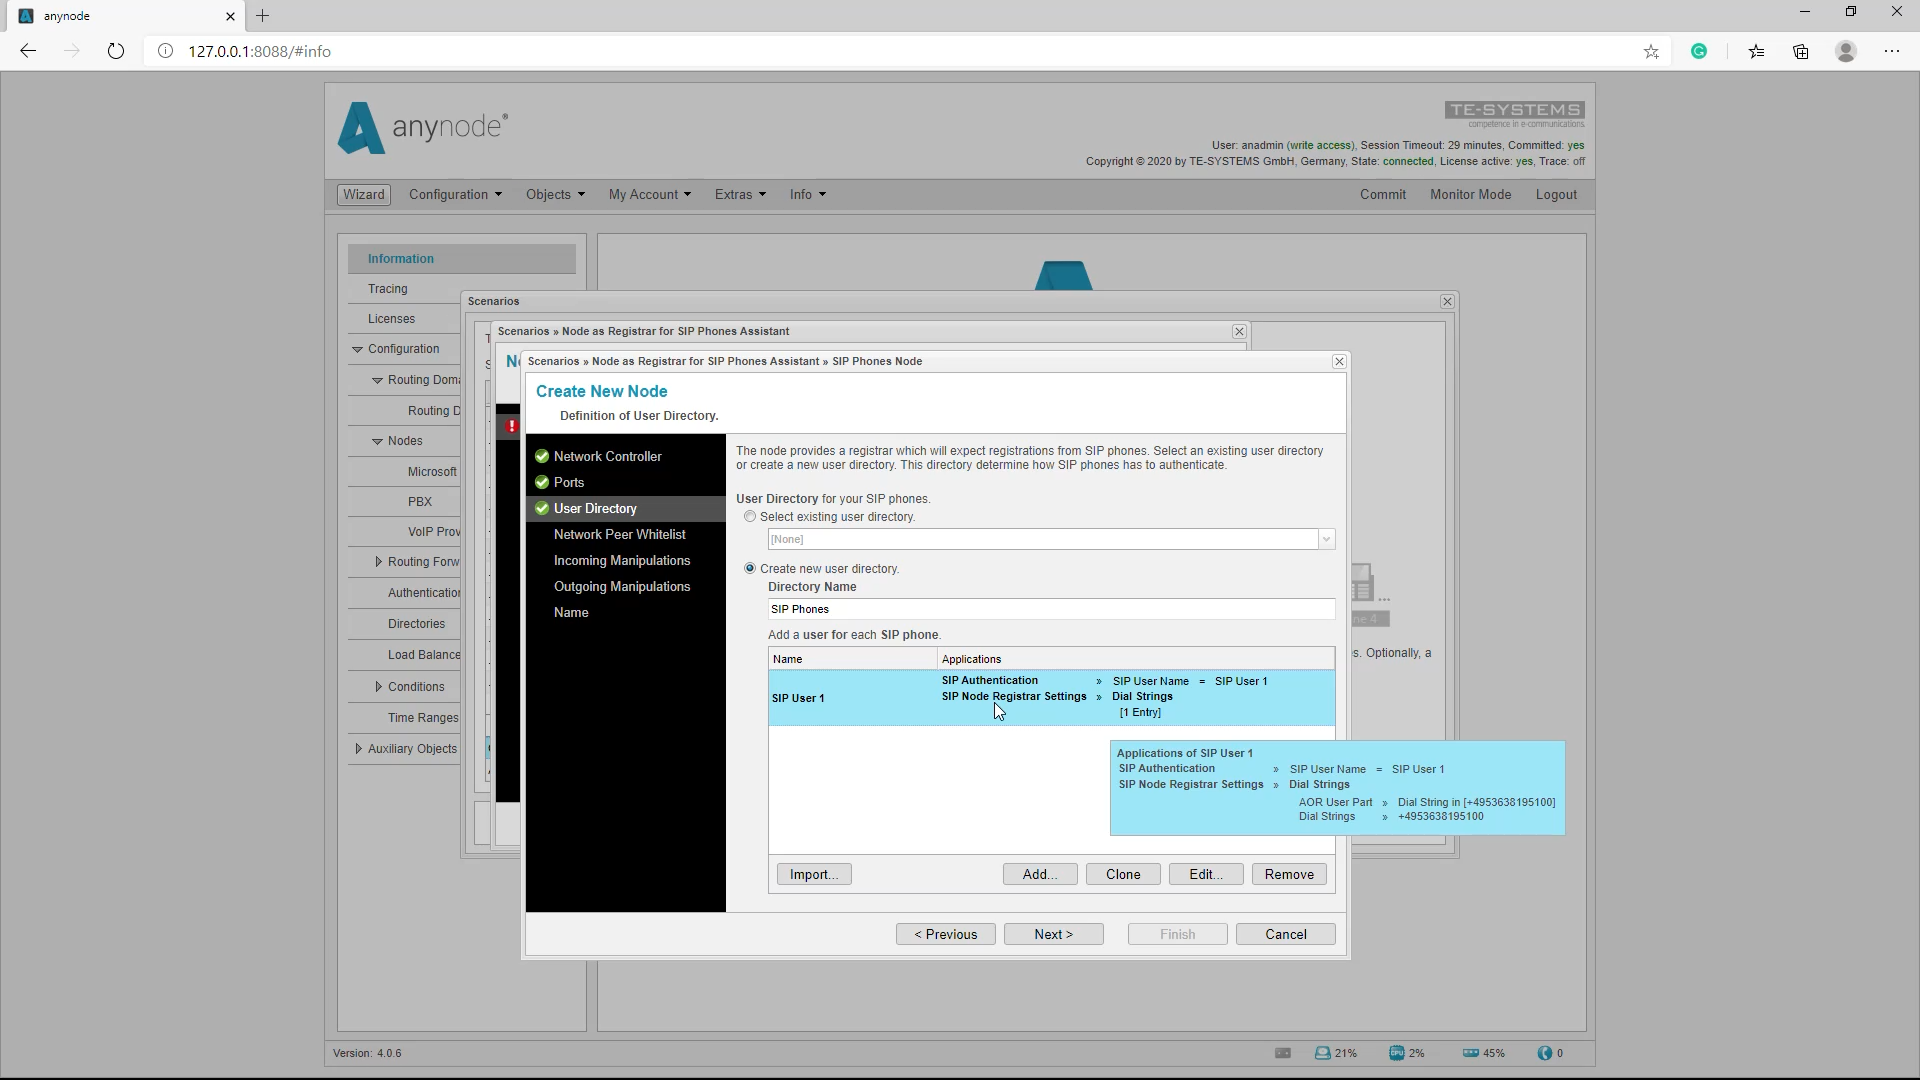
We do not yet have a user directory for the subscribers of the SIP telephones and now we have the opportunity to create a user directory with “Create new user directory”. The name of this user directory can be chosen freely. If a user directory already exists, we can select it here.
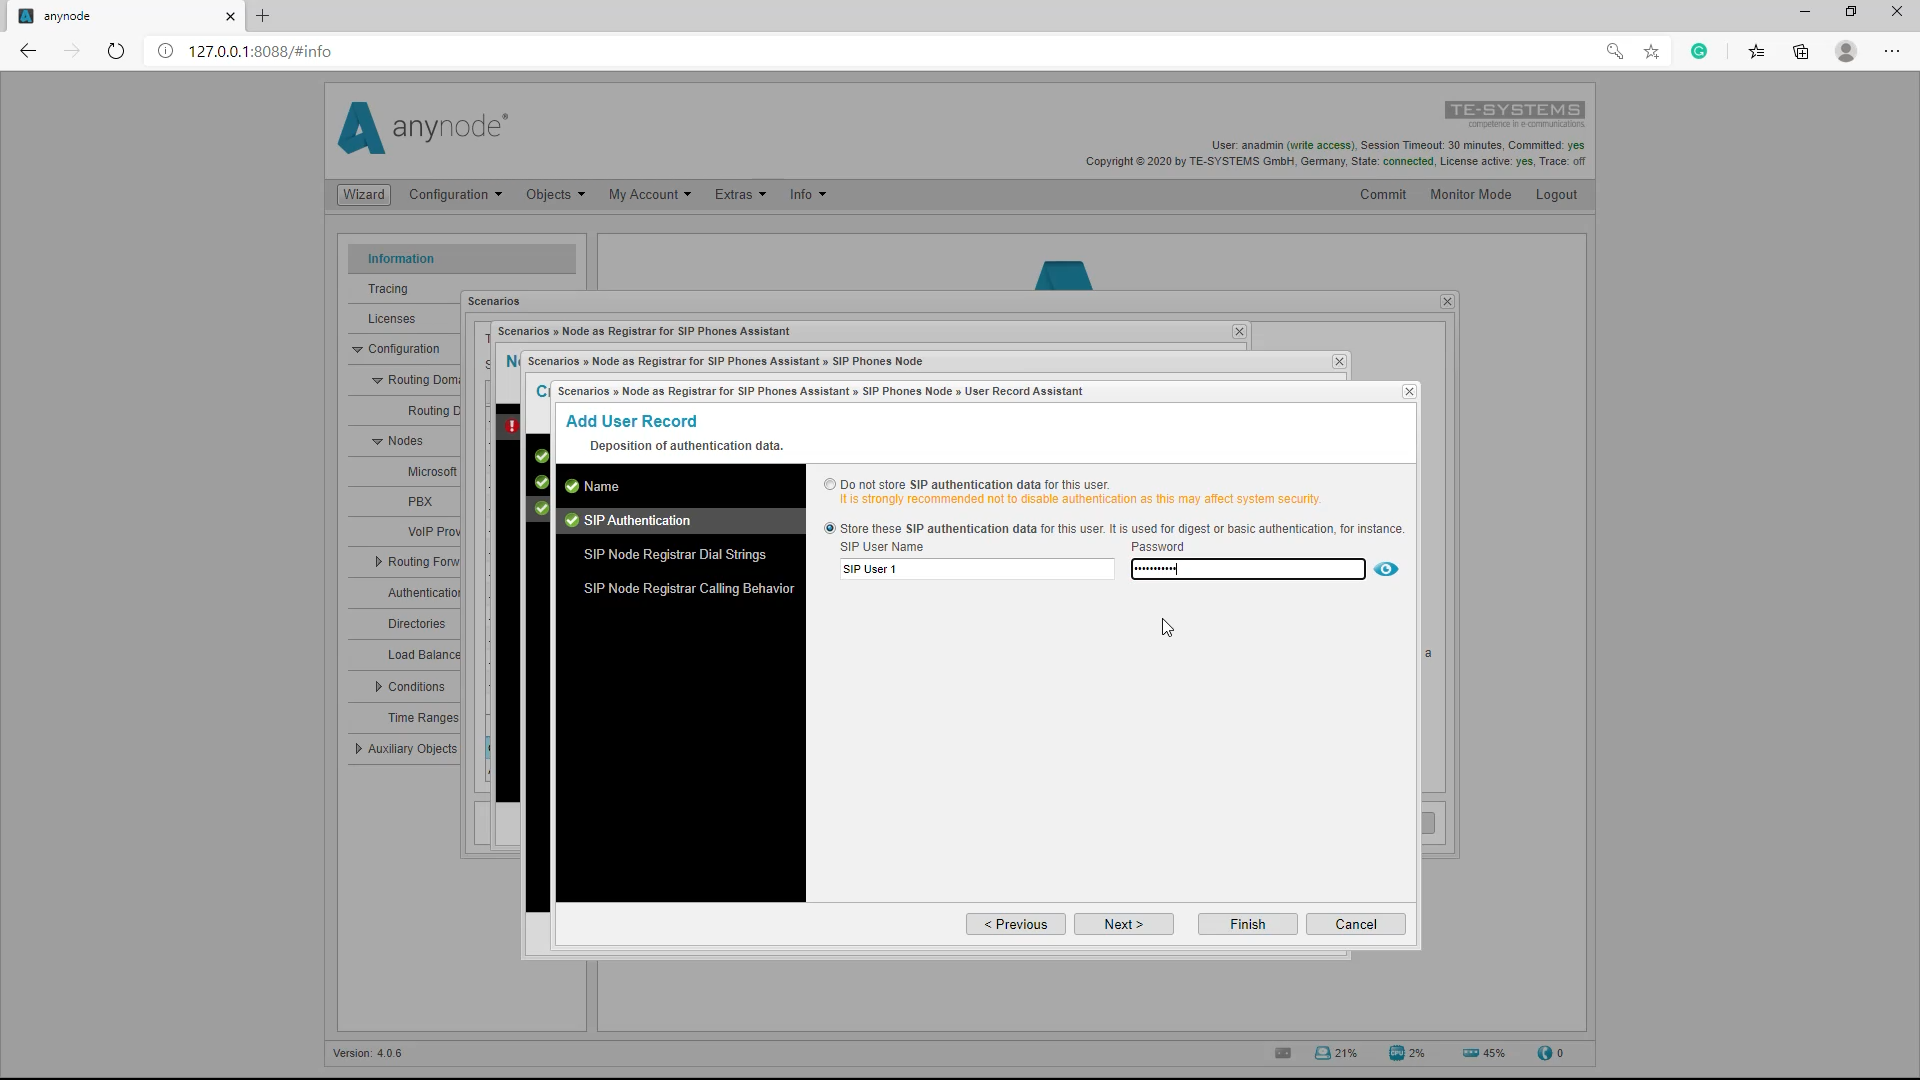
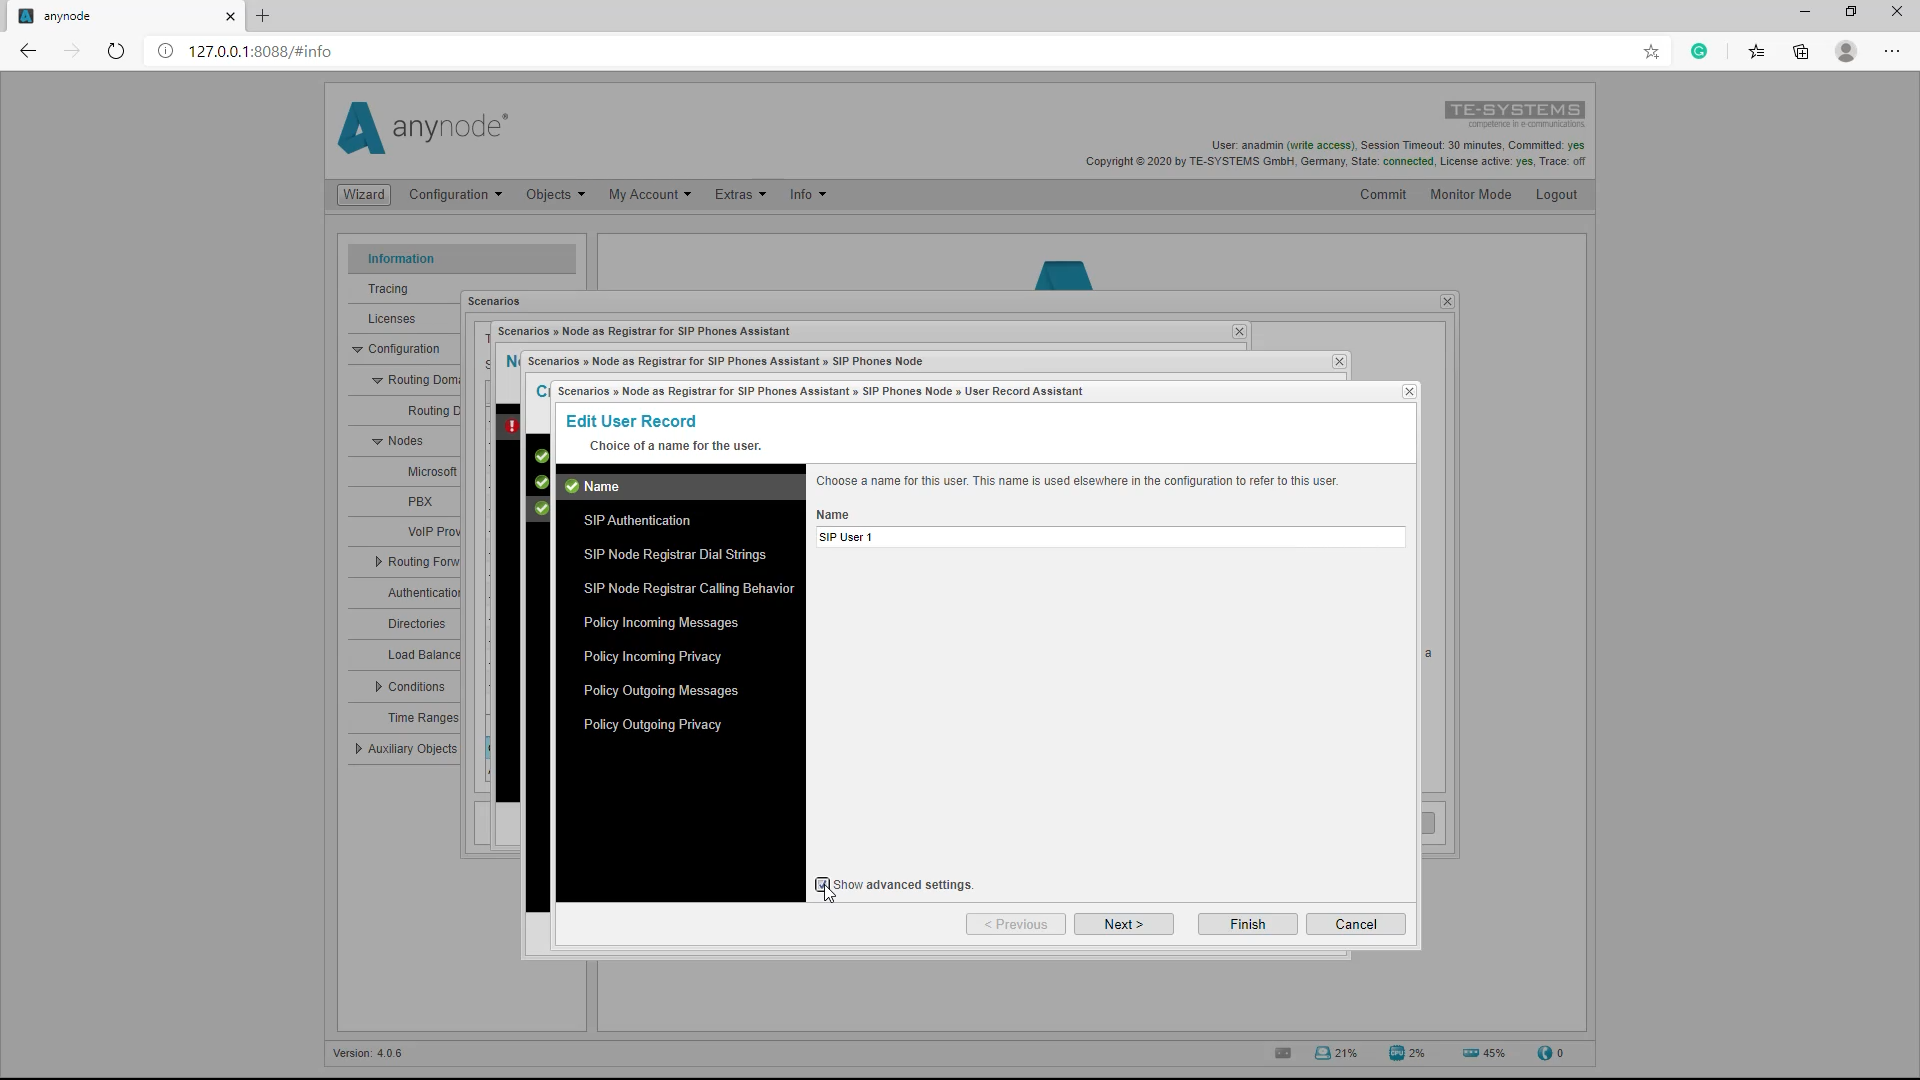
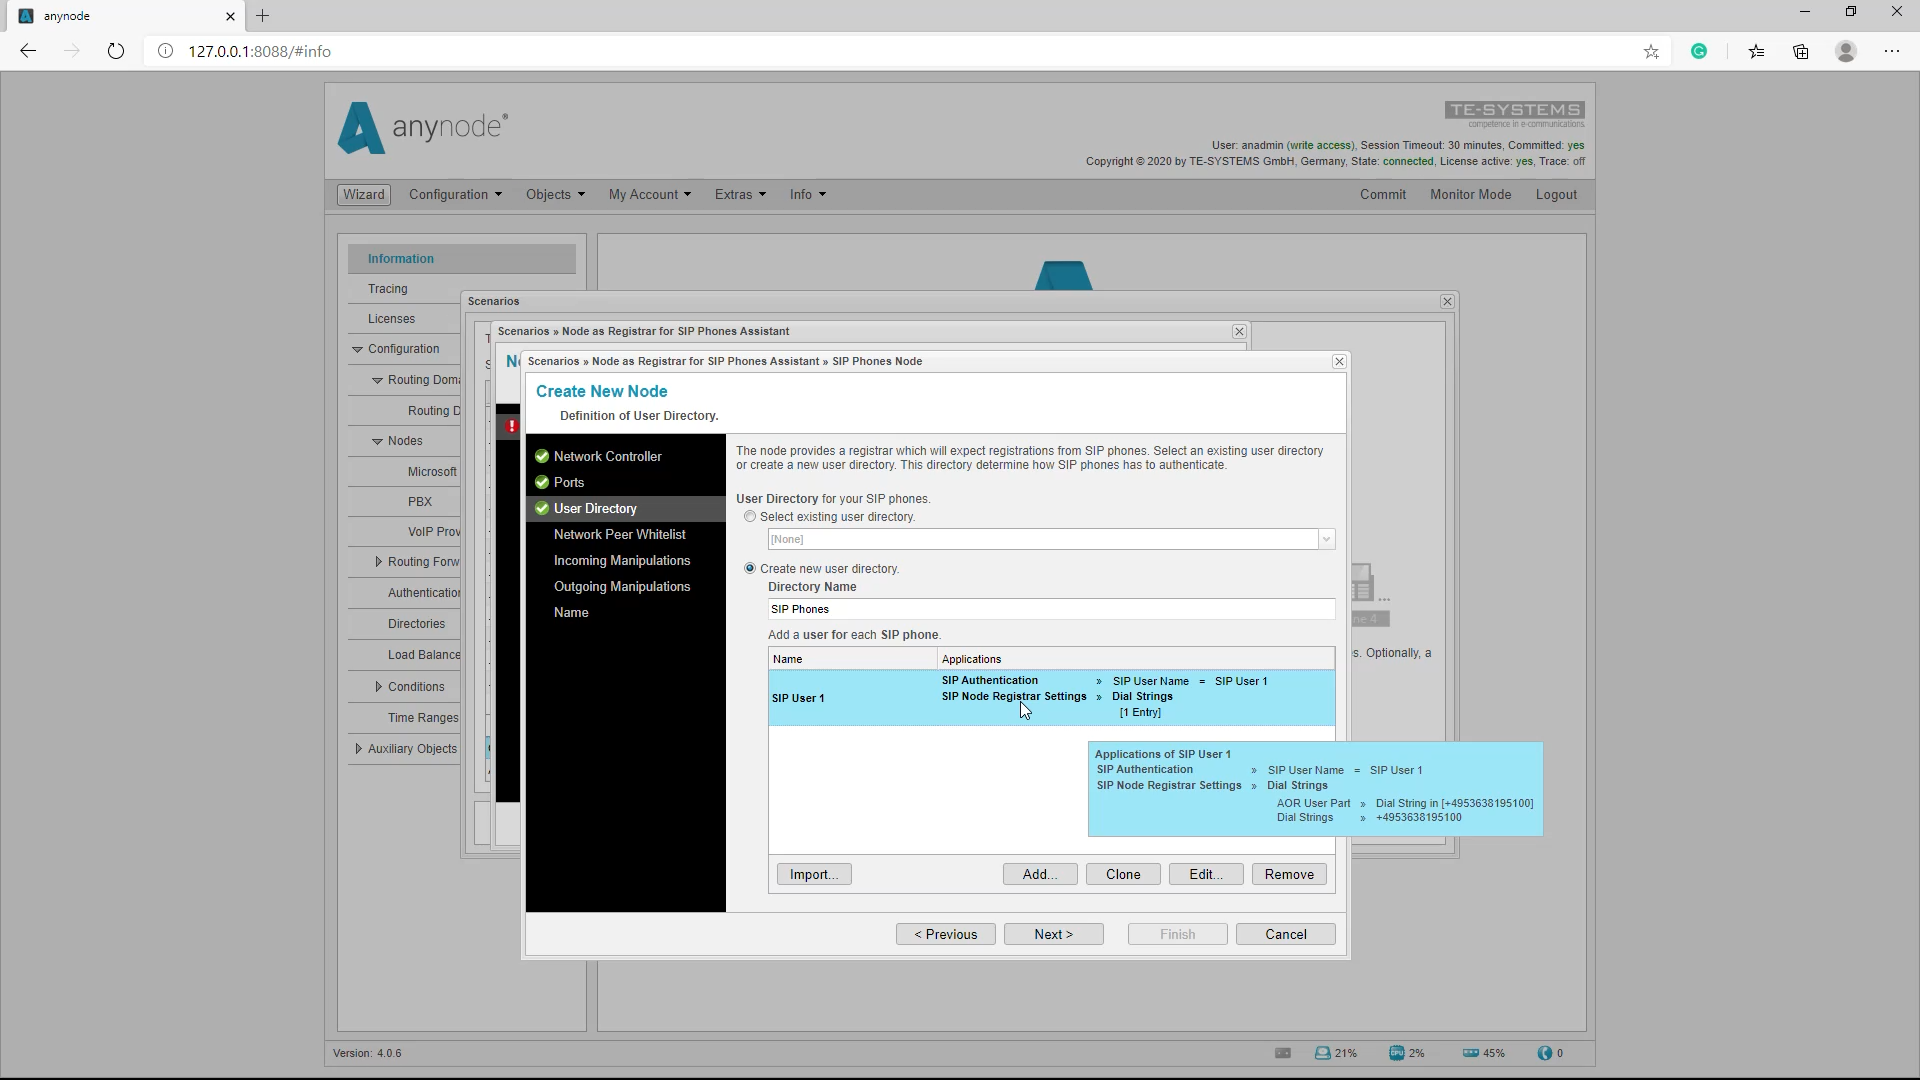
Now we define the participant data. In our example, this is SIP User 1.
We now call the entry “SIP User 1”. Below we can turn on the “Advanced Settings” for experienced users. We will go into this in more detail after completing this participant entry.
SIP Node Registrar Calling Behaviour
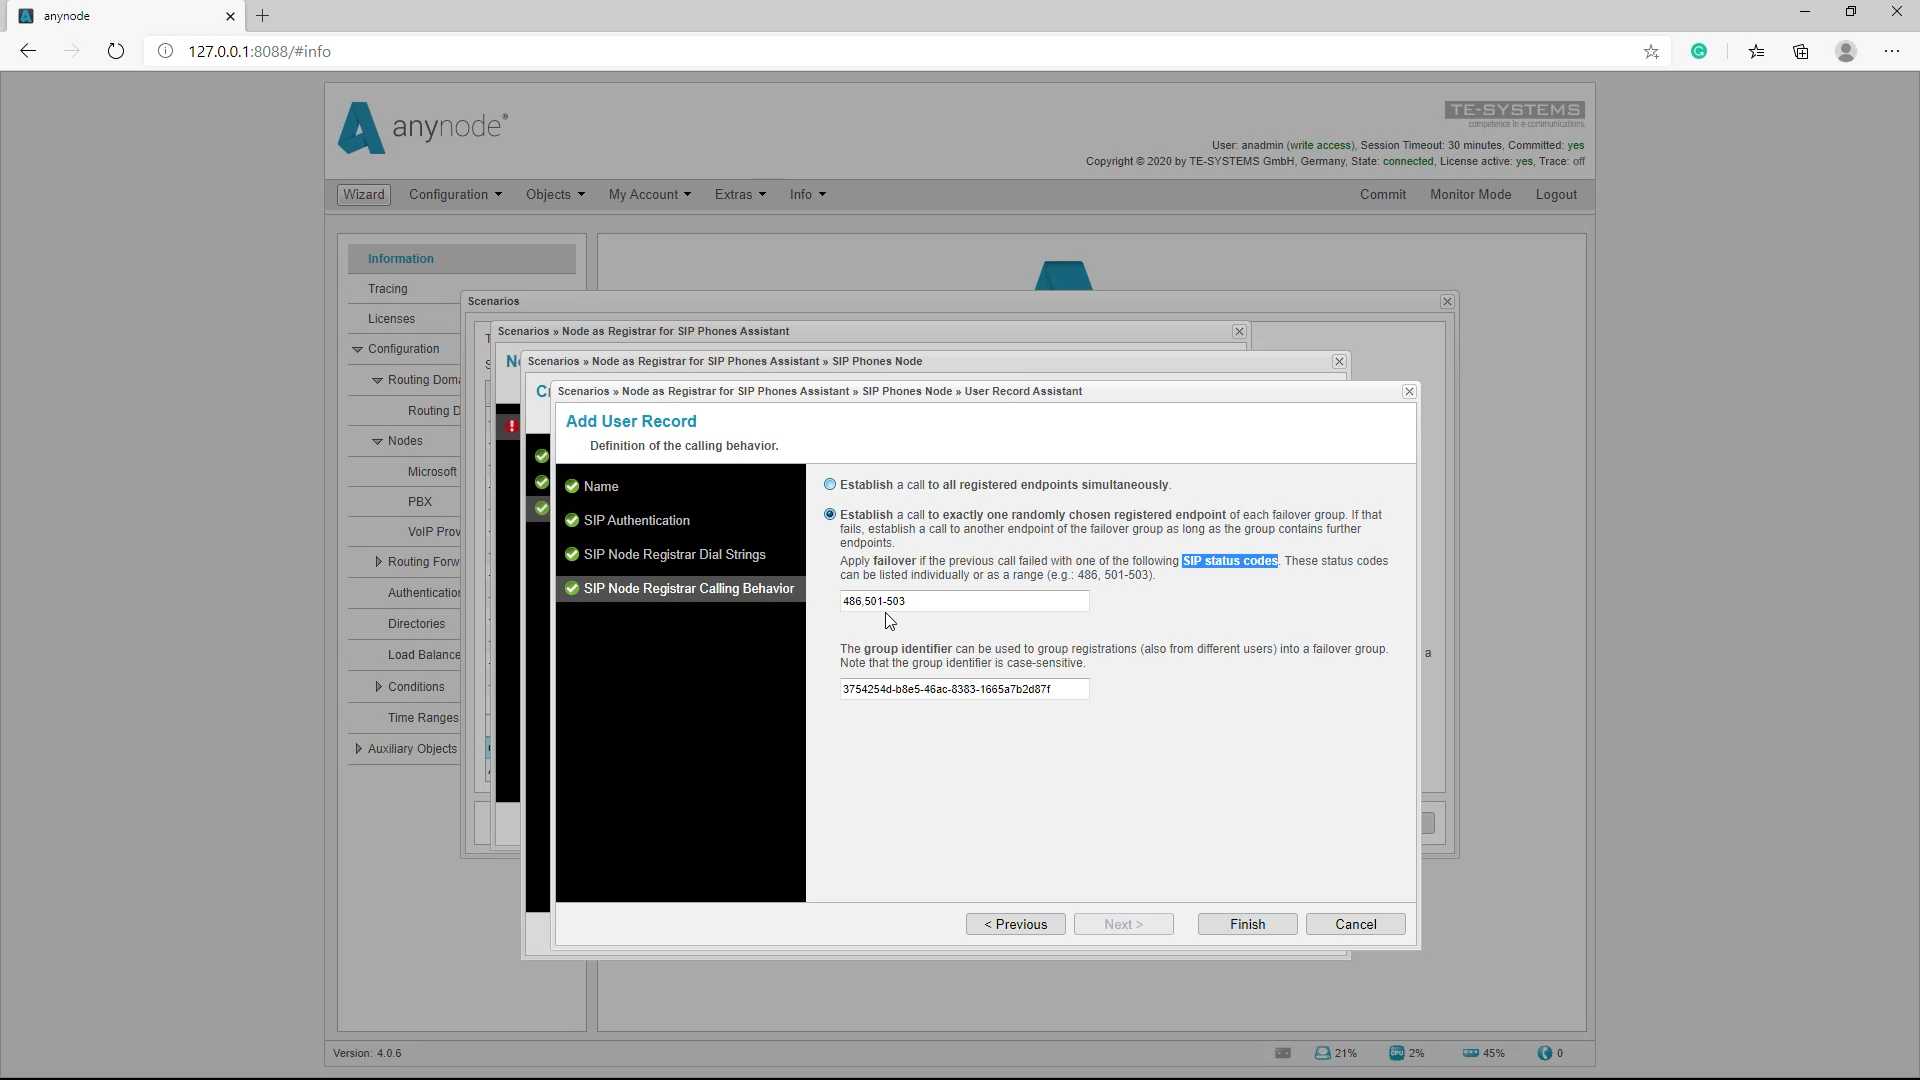
If several SIP endpoints should ring for an incoming call, you can use the default settings, where a call is routed to all registered endpoints.
Alternatively, the call can be routed randomly to a registered endpoint in the failover group. If this fails, anynode should initiate a call to another endpoint in the failover group, as long as the failover group has other endpoints.
SIP Status Codes
The SIP status codes are response codes to SIP requests from subscriber devices. anynode will initiate a failover based on this code. If you work with a gateway that has only 2 lines and these are already occupied, it will send a specific status code and the anynode then selects the next gateway based on this code.
By default, the wizard uses code 486 in this field. 486 means “Busy here” or the called party is busy. In this case, failover to the next endpoint in the failover group is initiated. You can also define SIP status code areas, the assistant uses 501 to 503 as the default value.
The group identifier can be used to group registrations from different users in a failover group. Note that the Group Identifier distinguishes between upper and lower case. We now see an intermediate overview of our previous entries.
Configuration: add new directory: advanced settings
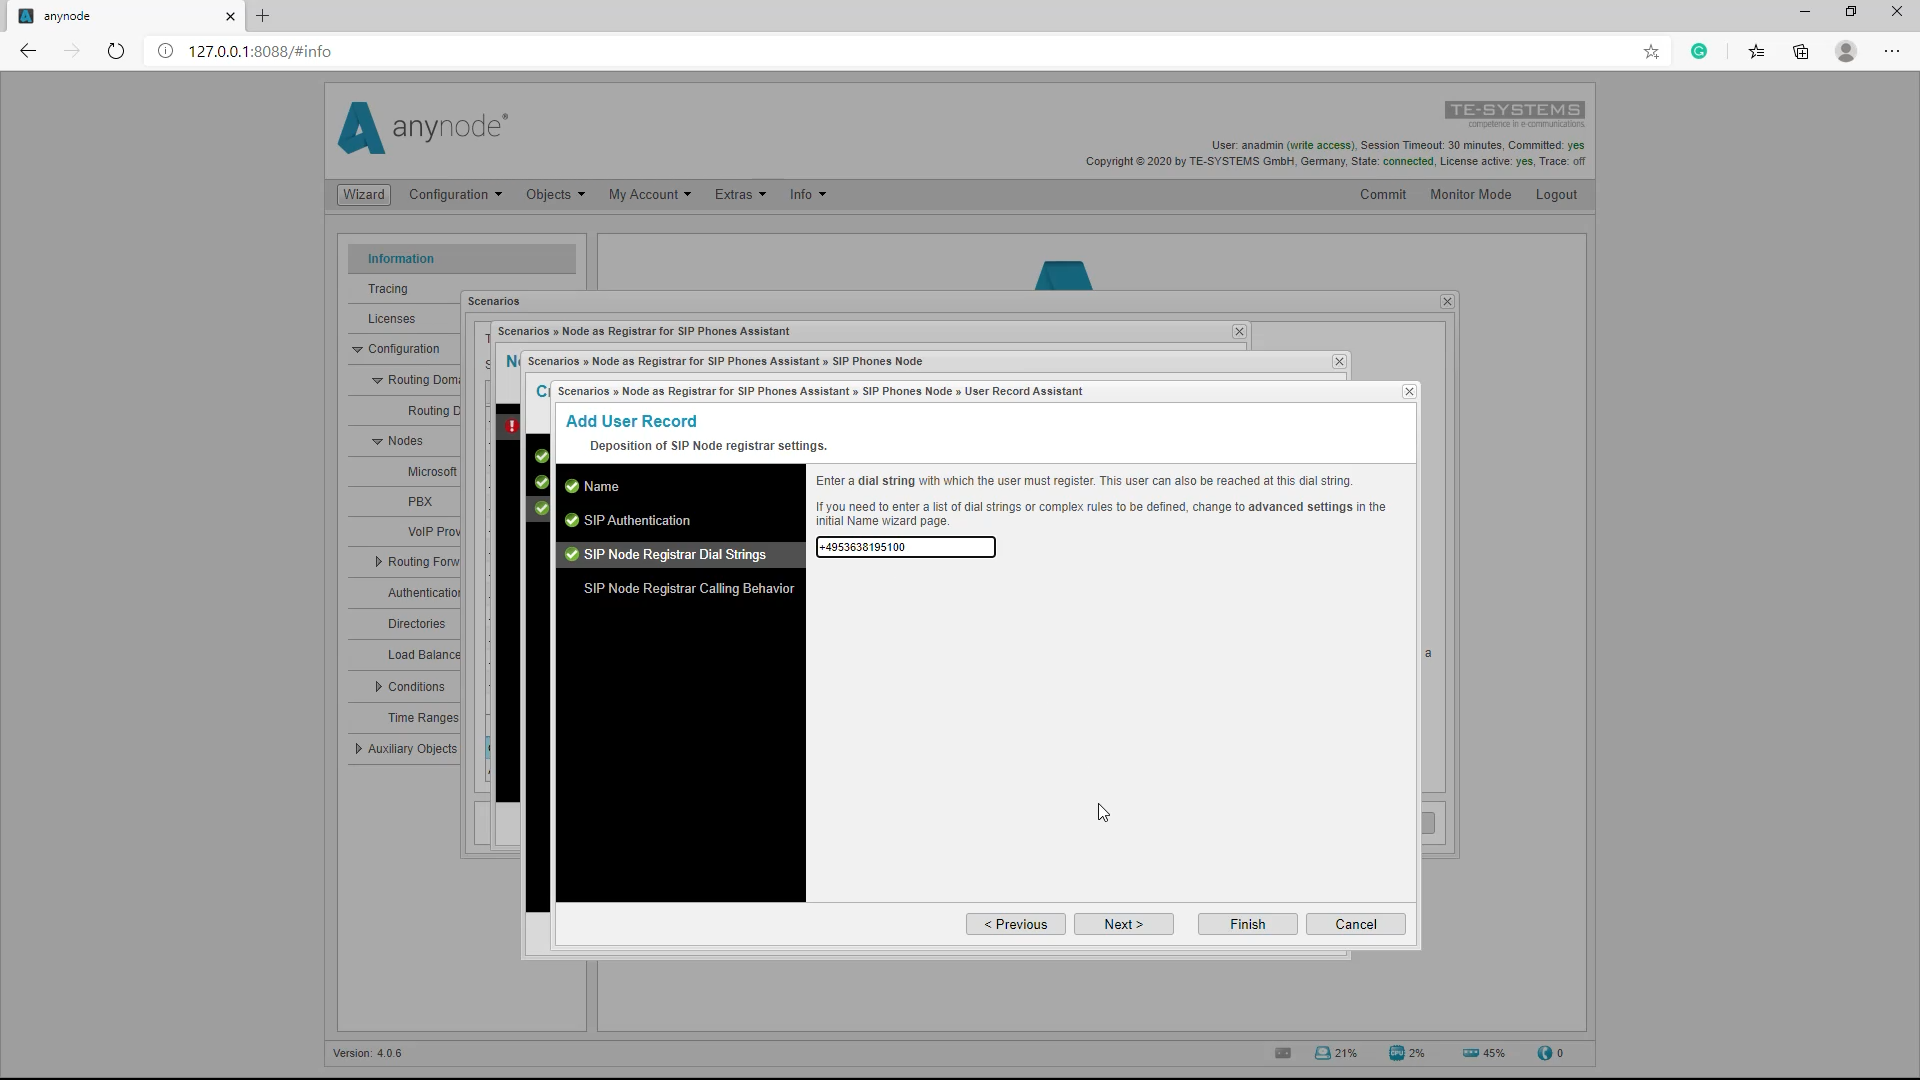
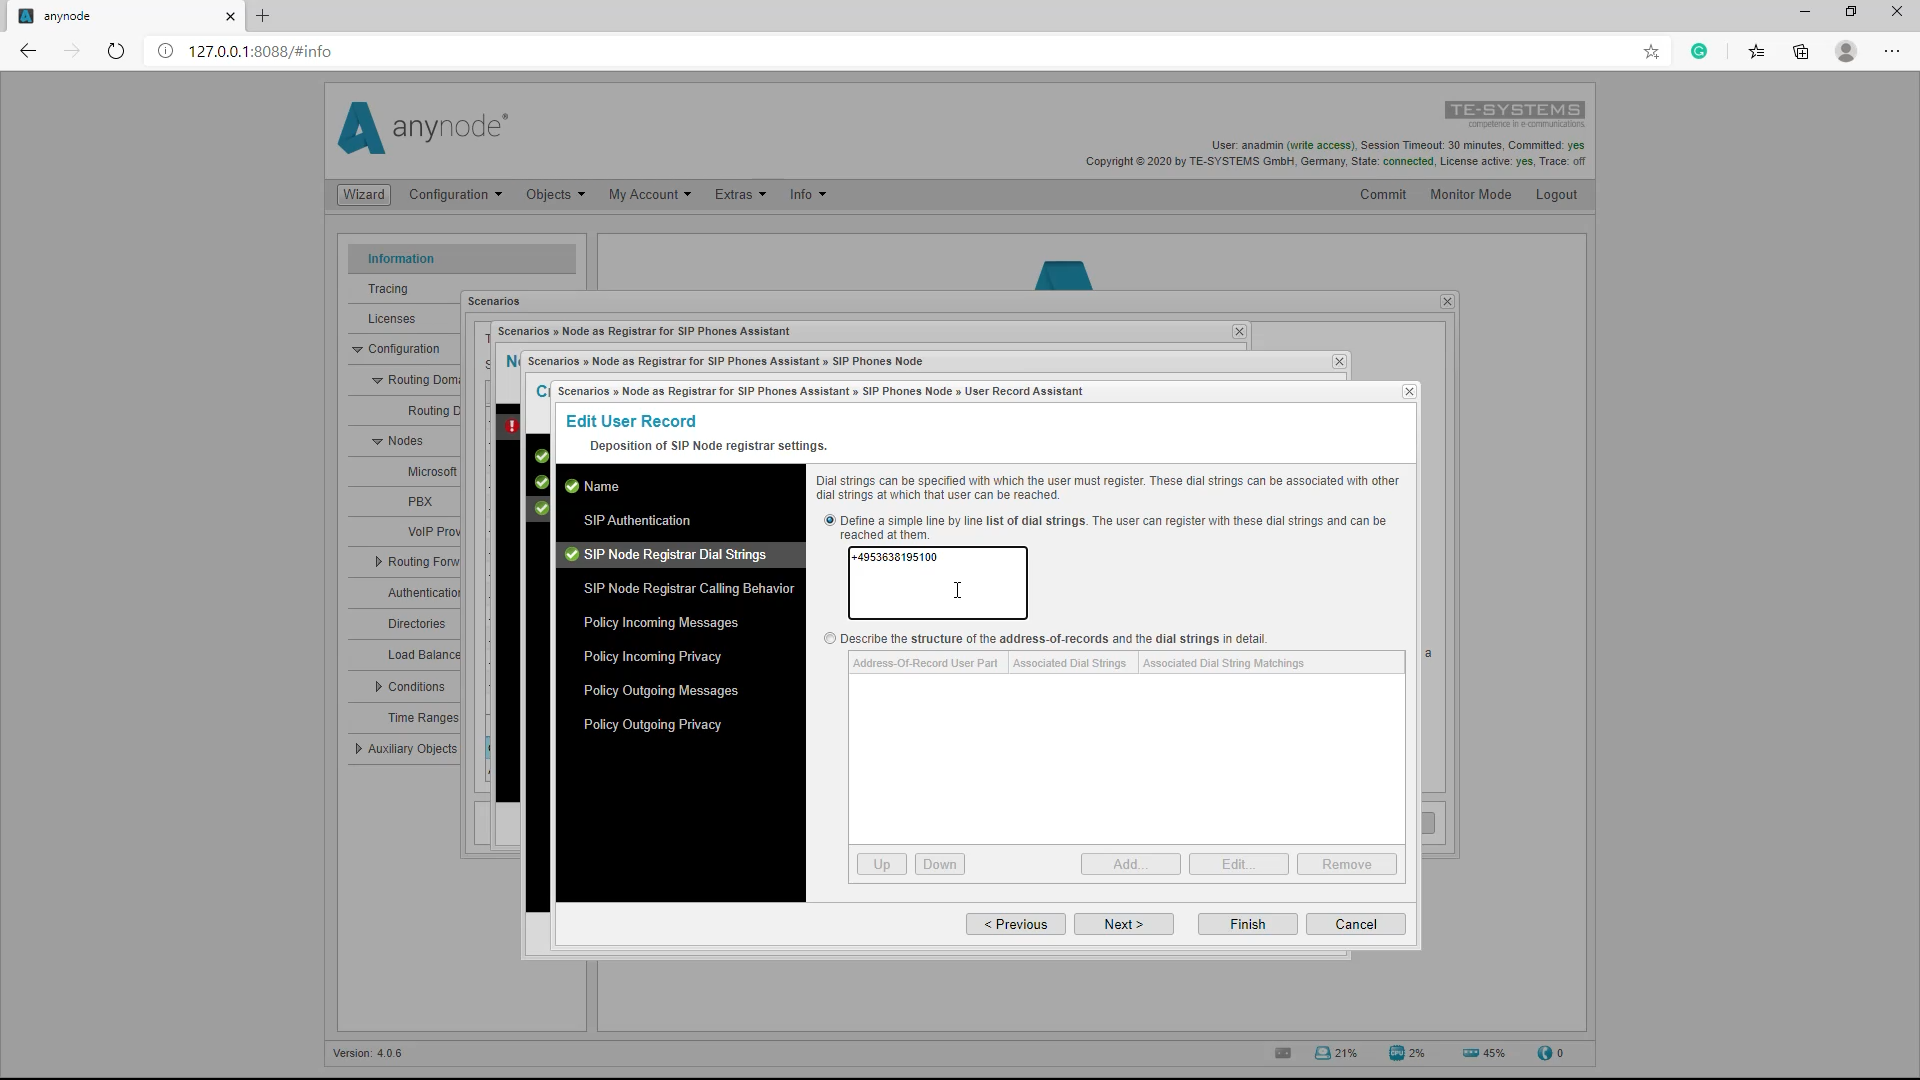
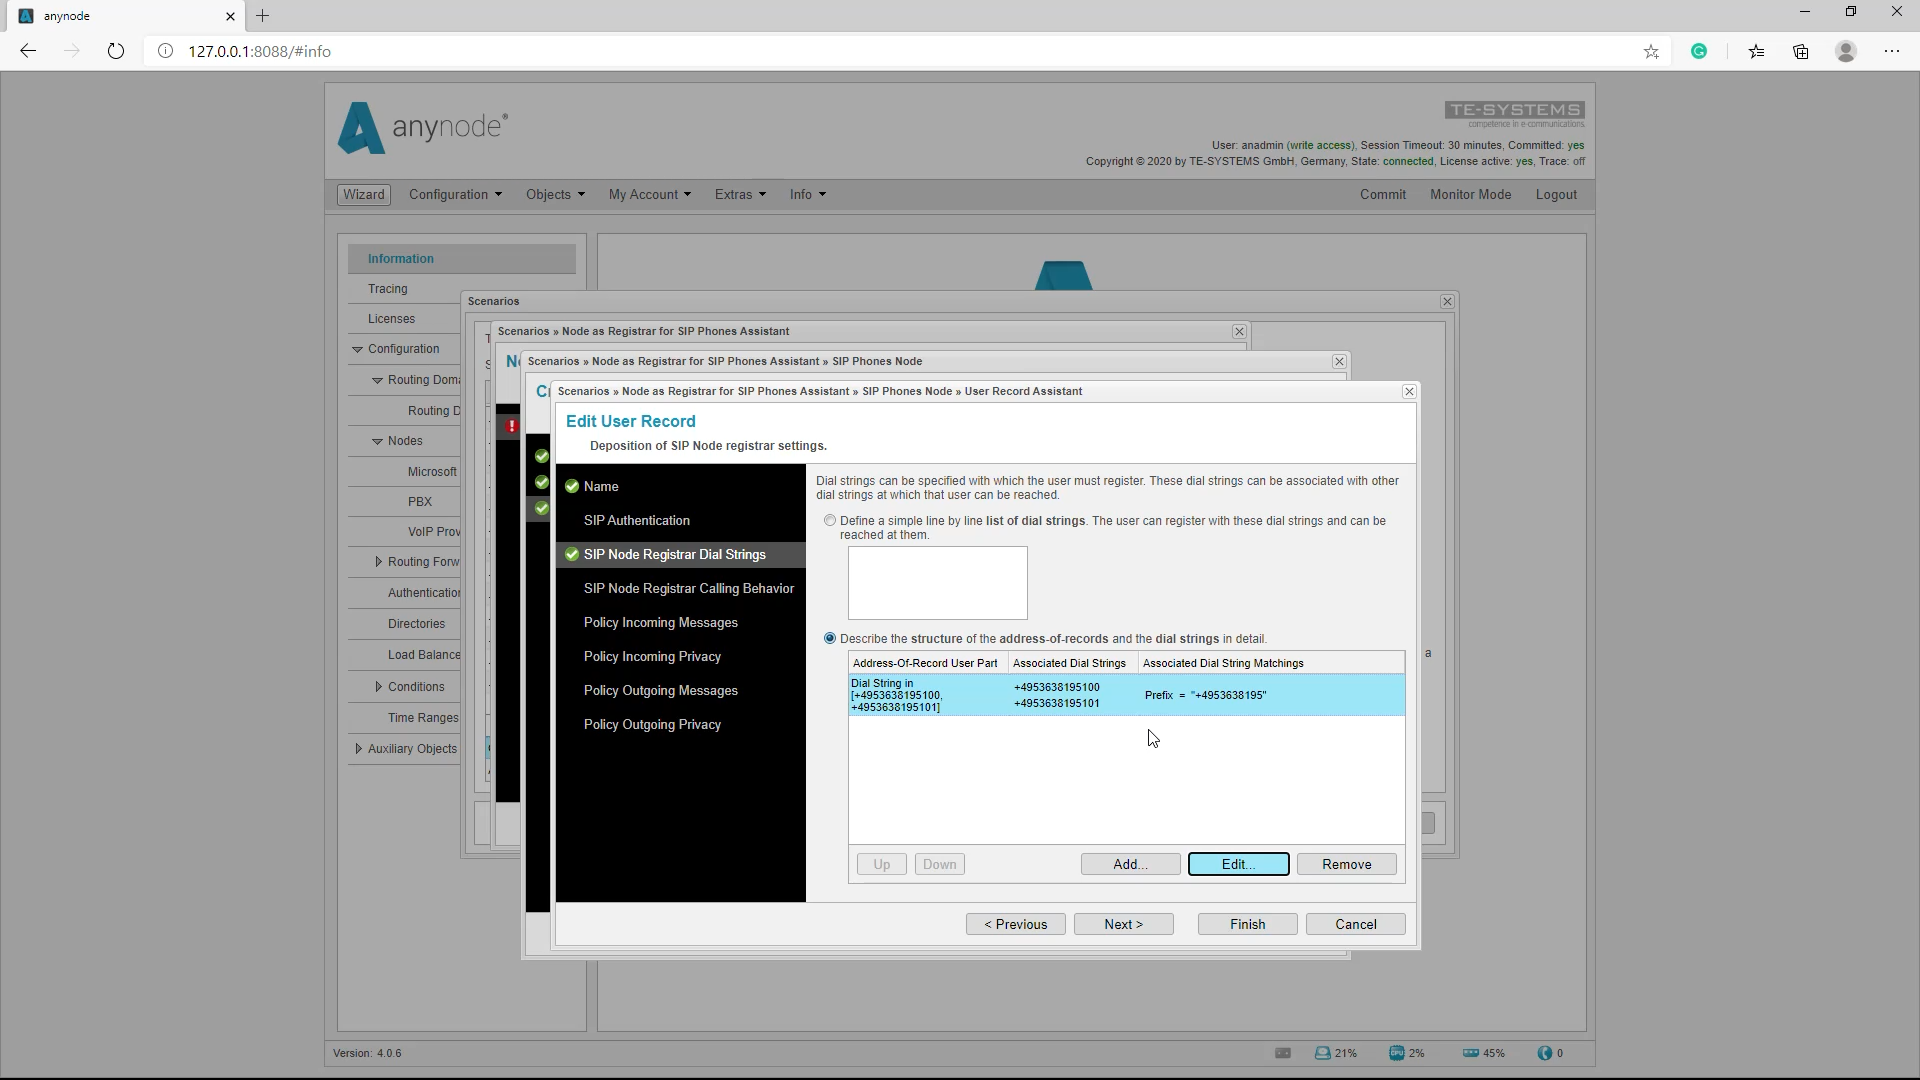
Now we go into the Advanced Settings and open the User Record Assistant. Normally, the user has one phone number in a standard installation. Here you can define several phone numbers, the User Part of the Address of Records (AOR), and the phone number under which the SIP subscriber can be reached and is set to the same value.
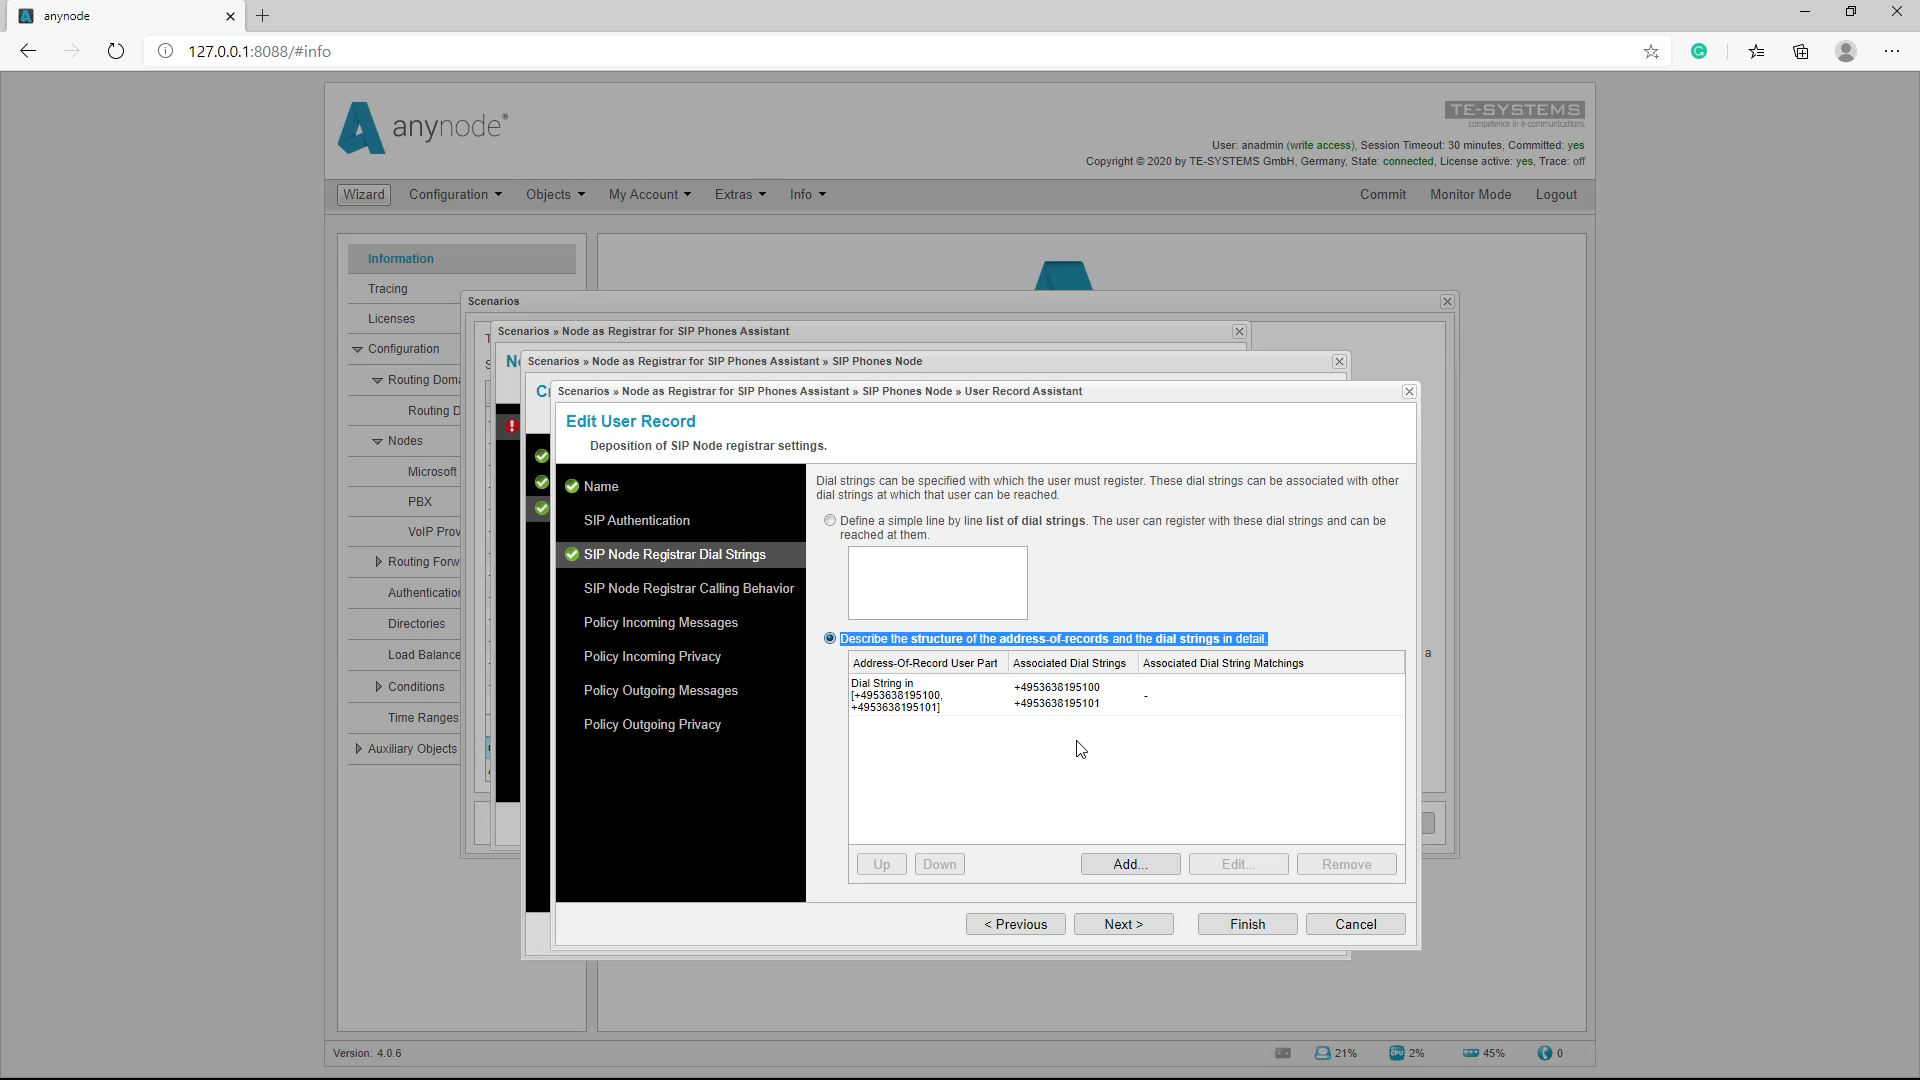
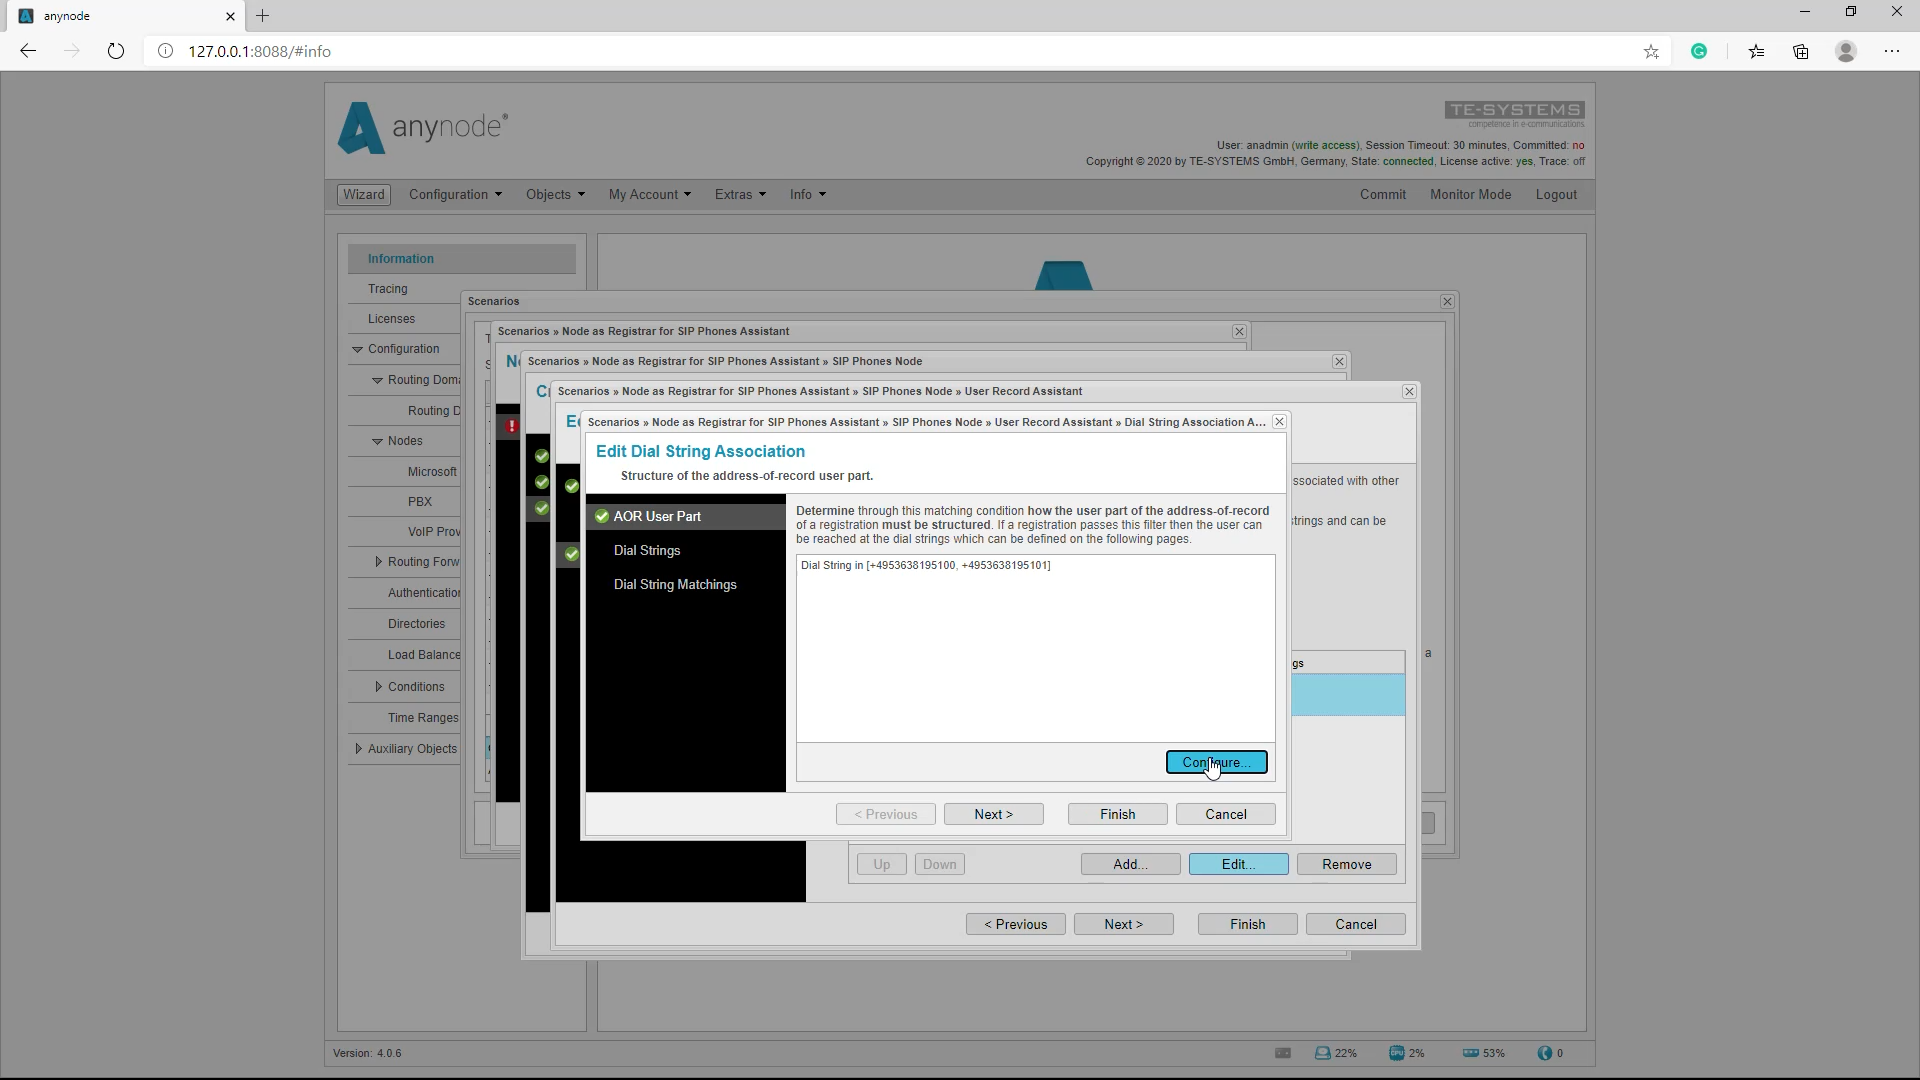
To define entire areas, we have to click on the lower area: Here you can configure the address of records, the identifier with which the phone can log on, and the associated phone numbers or entire areas differently.
The address of records can be set here. By default, this is also a dial string.
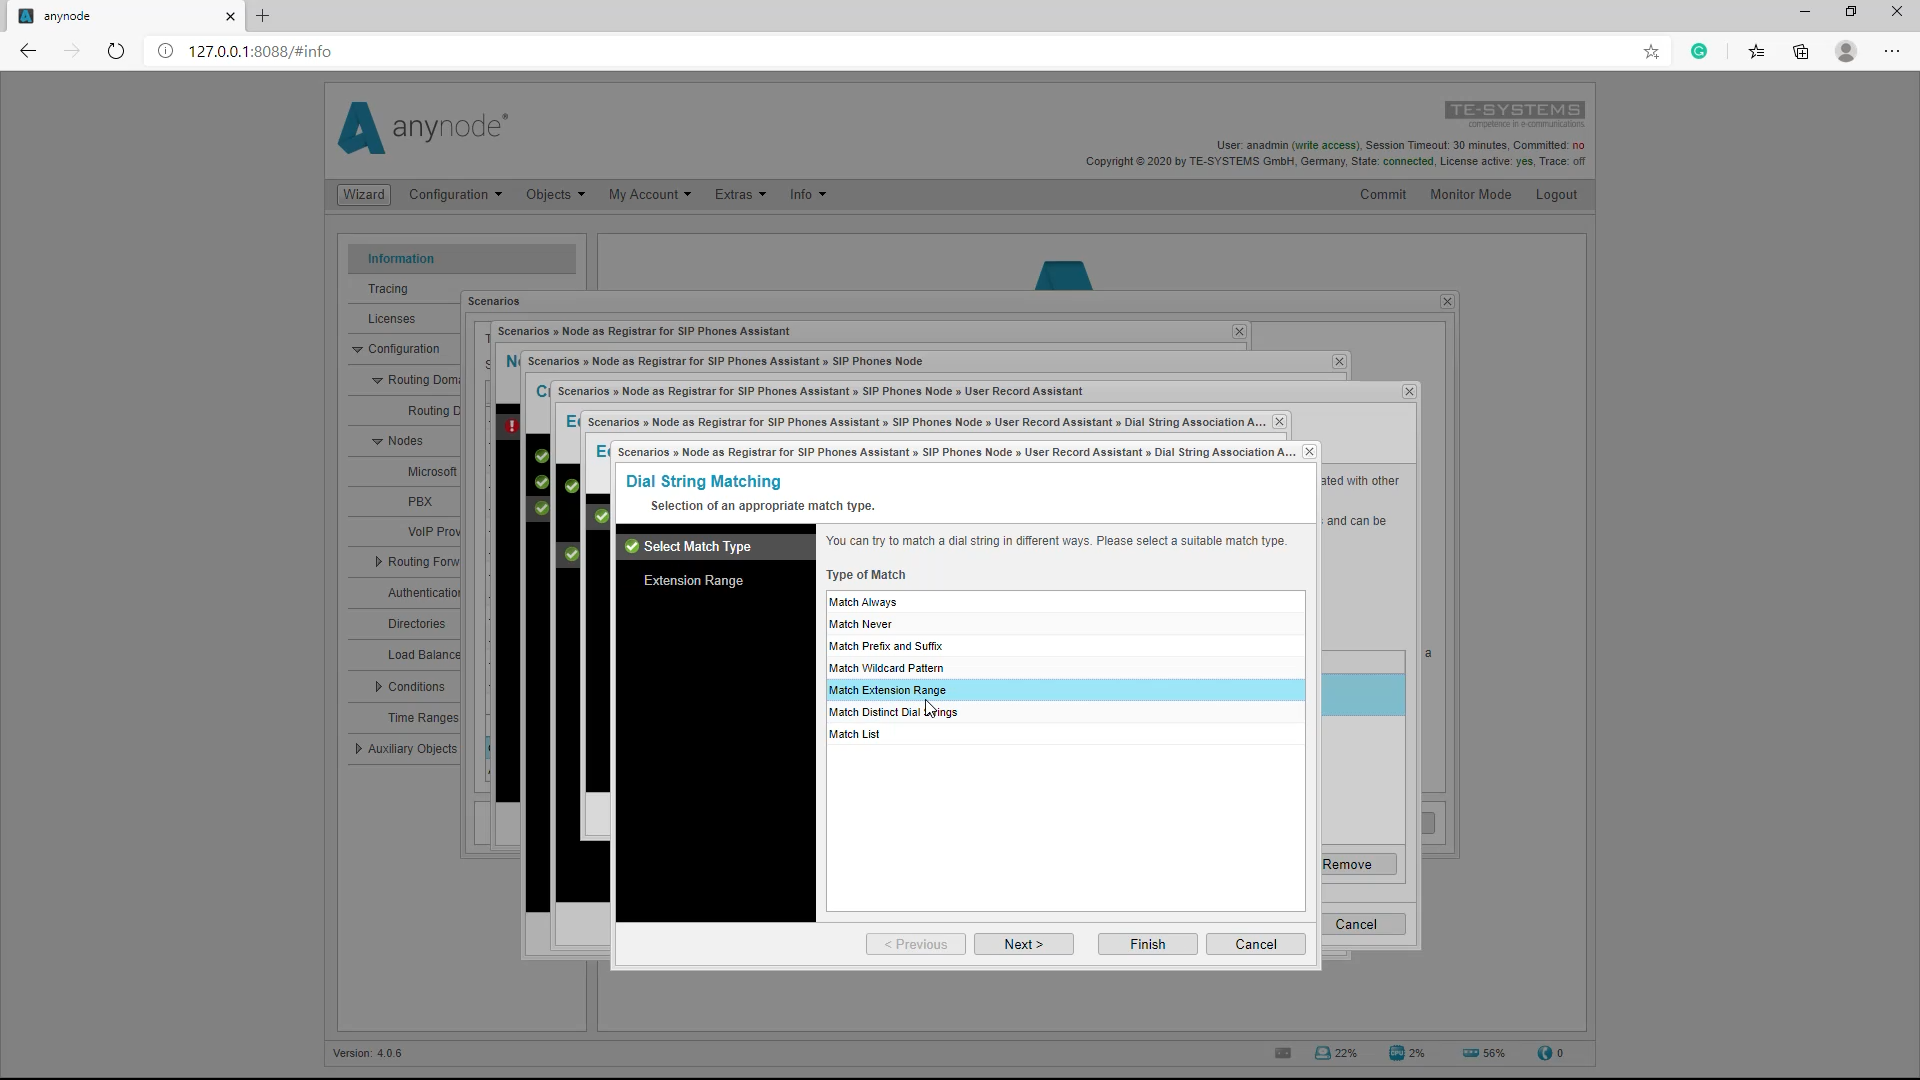
However, it is also possible to determine the address of records from a range or to start with a specific prefix.
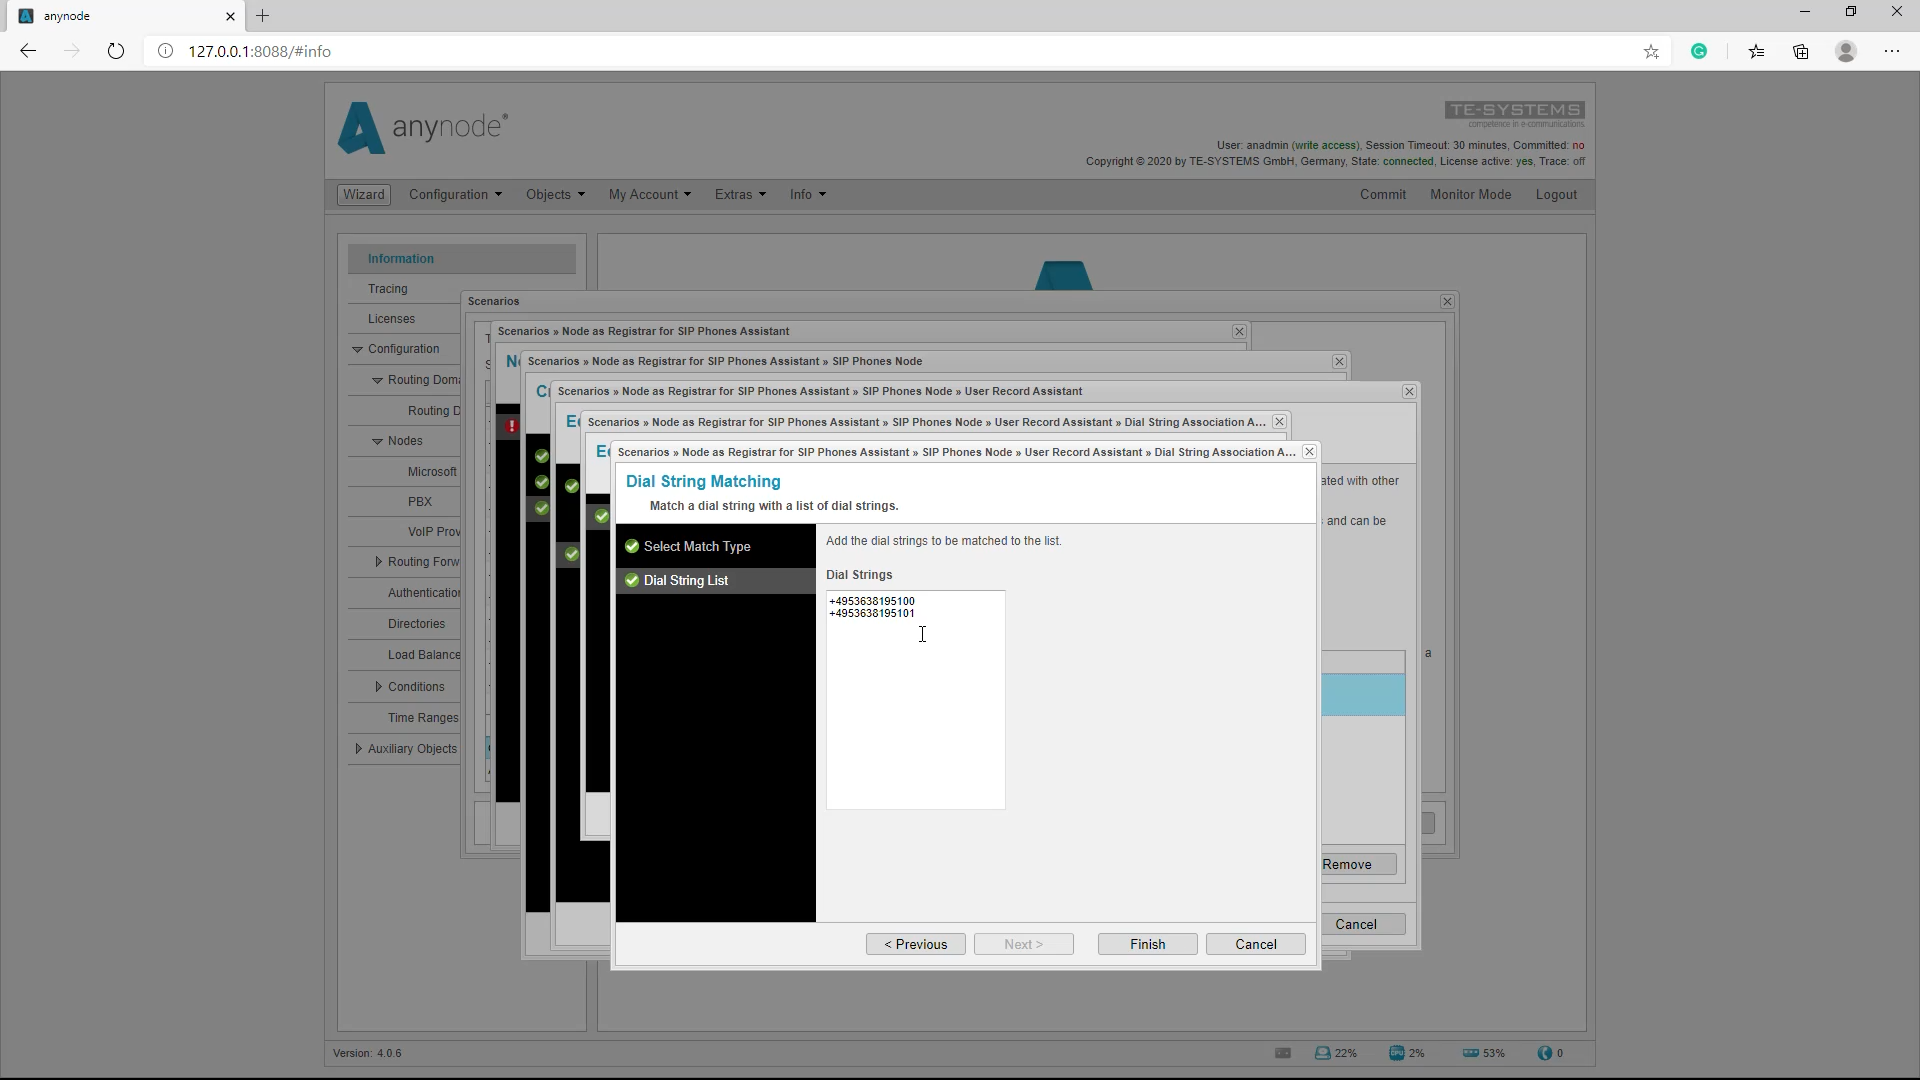
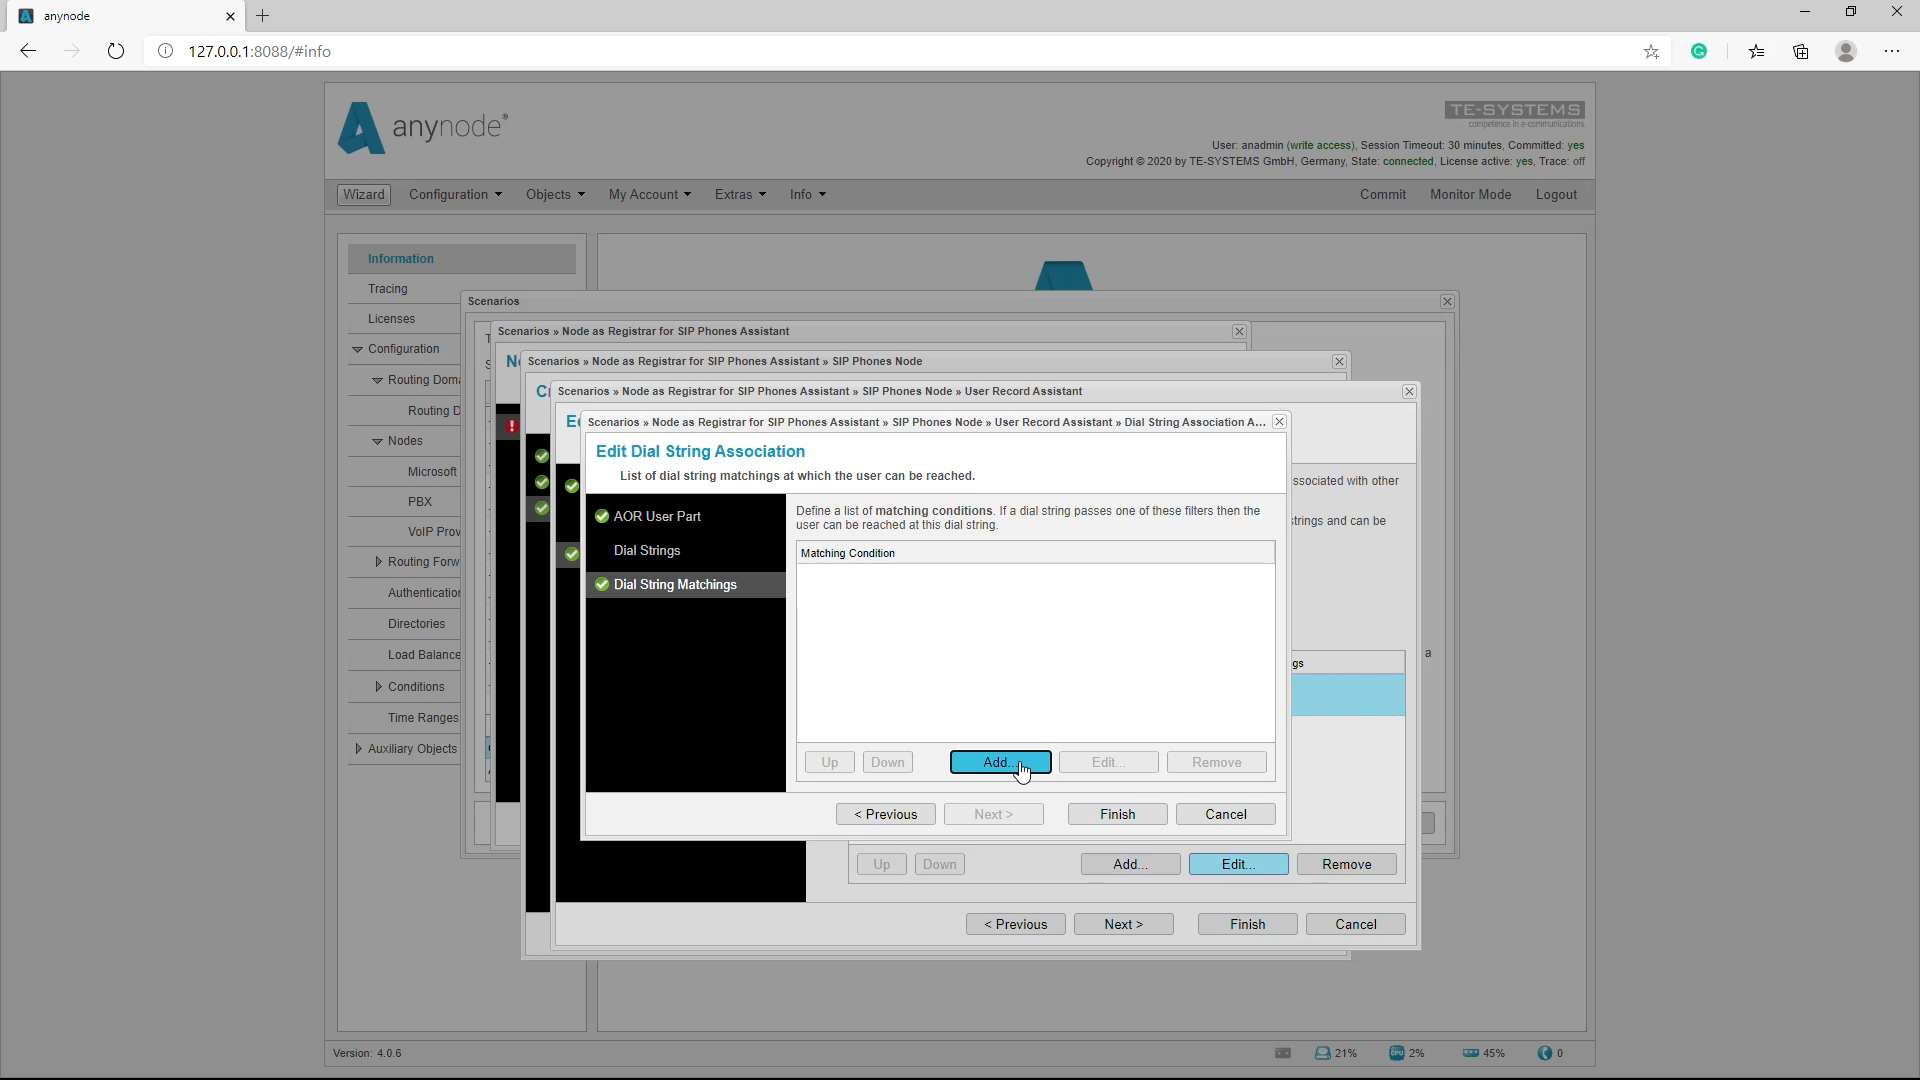
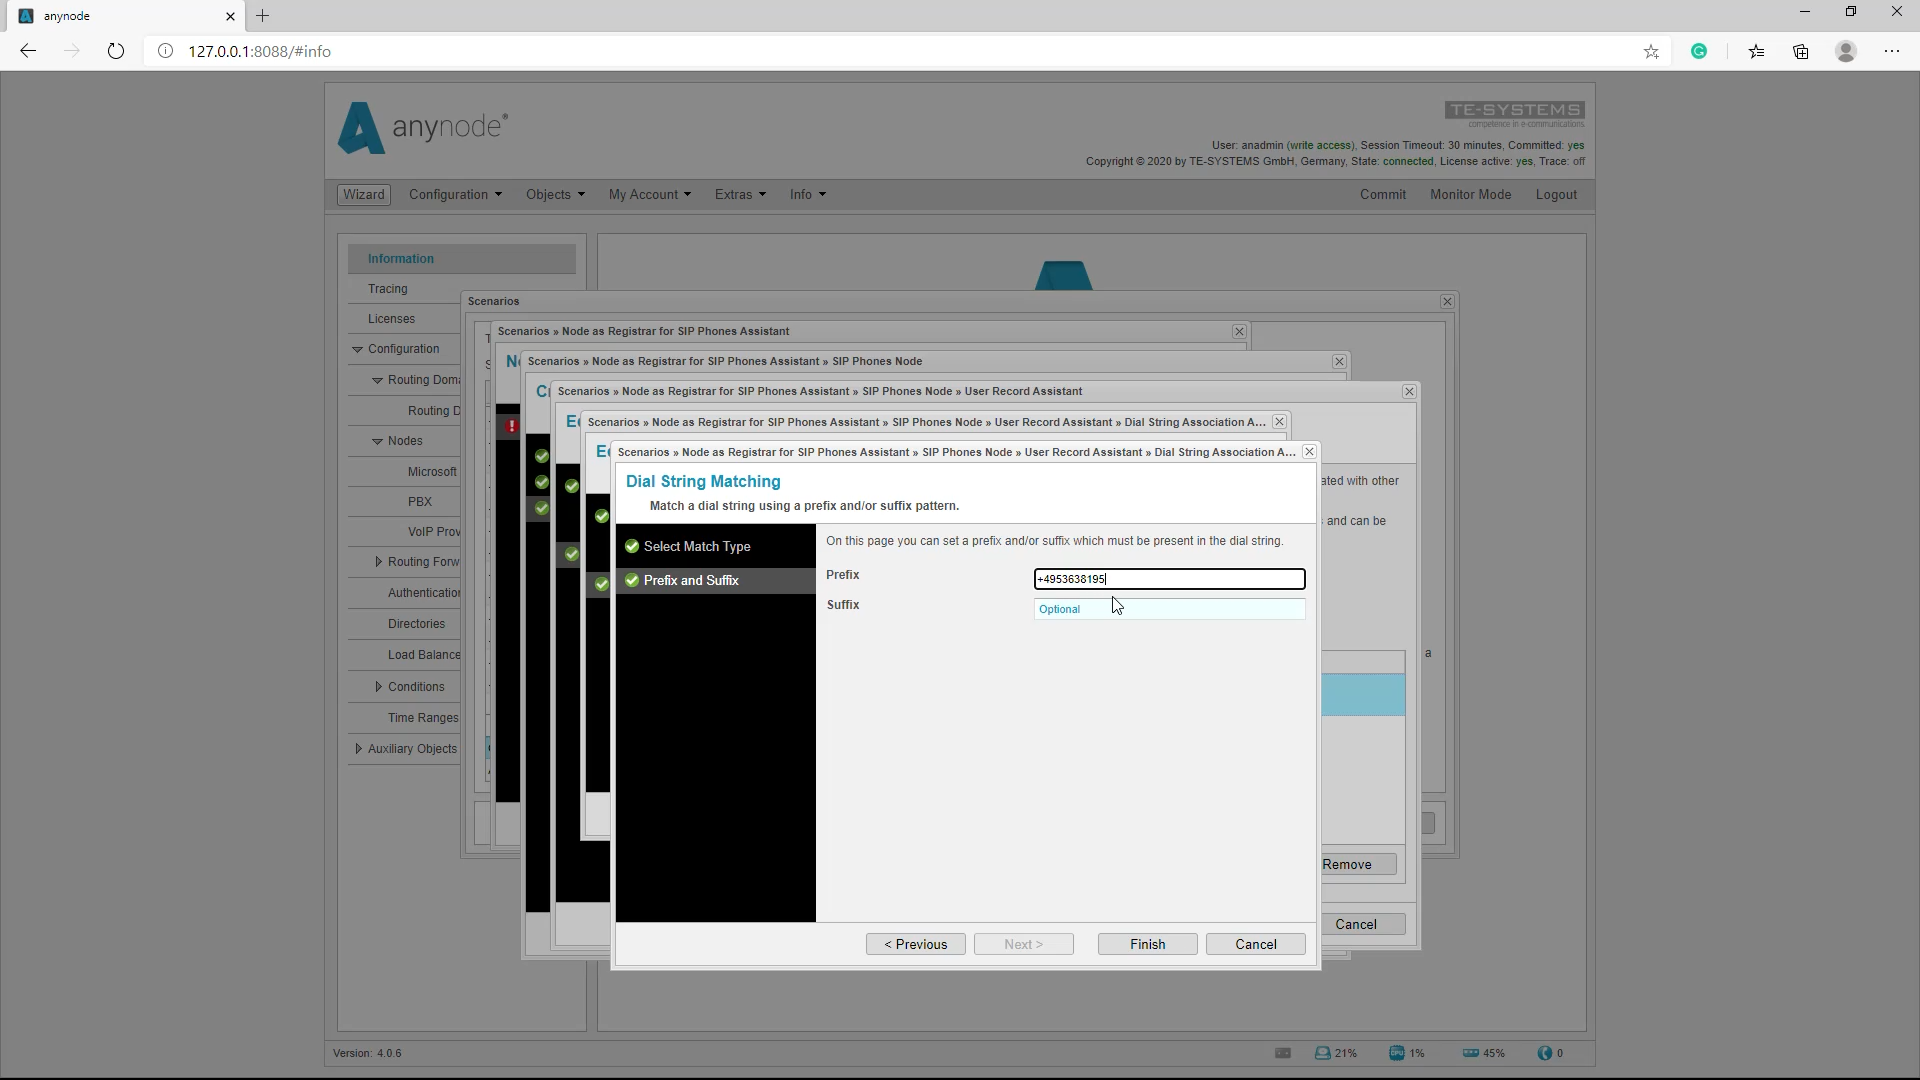
The phone numbers under which the registered subscriber can be reached can then also be specified. For example, the registered subscriber can be reached under a prefix. An example would be phone numbers with the number +4953638195 can be routed to the subscriber.
Then settings in the policies are possible. All call information or information of the session on the way to or from the SIP part of a node is subjected to a set of rules which implements a so-called policy. Since this is only necessary in special cases, we will skip this area.
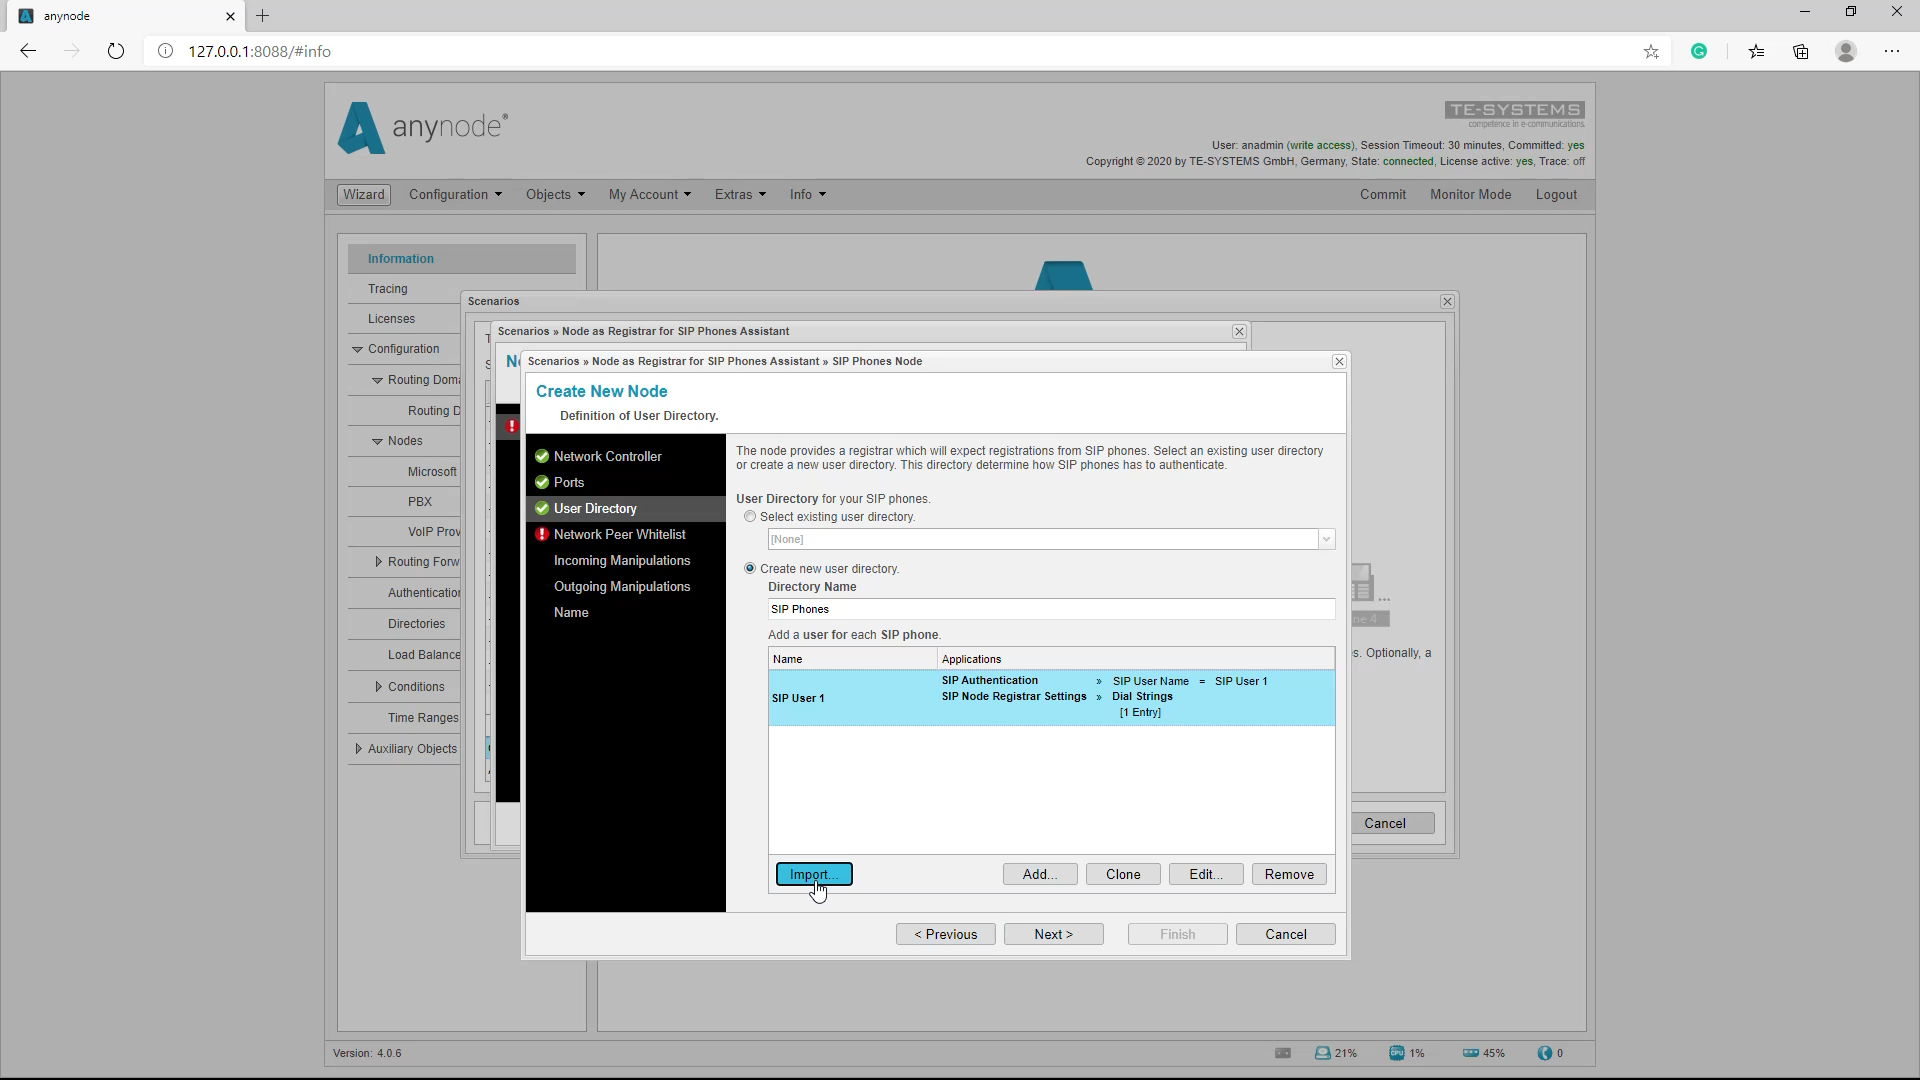
Configuration: add new directory: CSV import
If a larger number of SIP telephones are to be added, it is advisable to import the data using a CSV list, which may often already be available. You can find more information on this in our video tutorial “CSV import”.
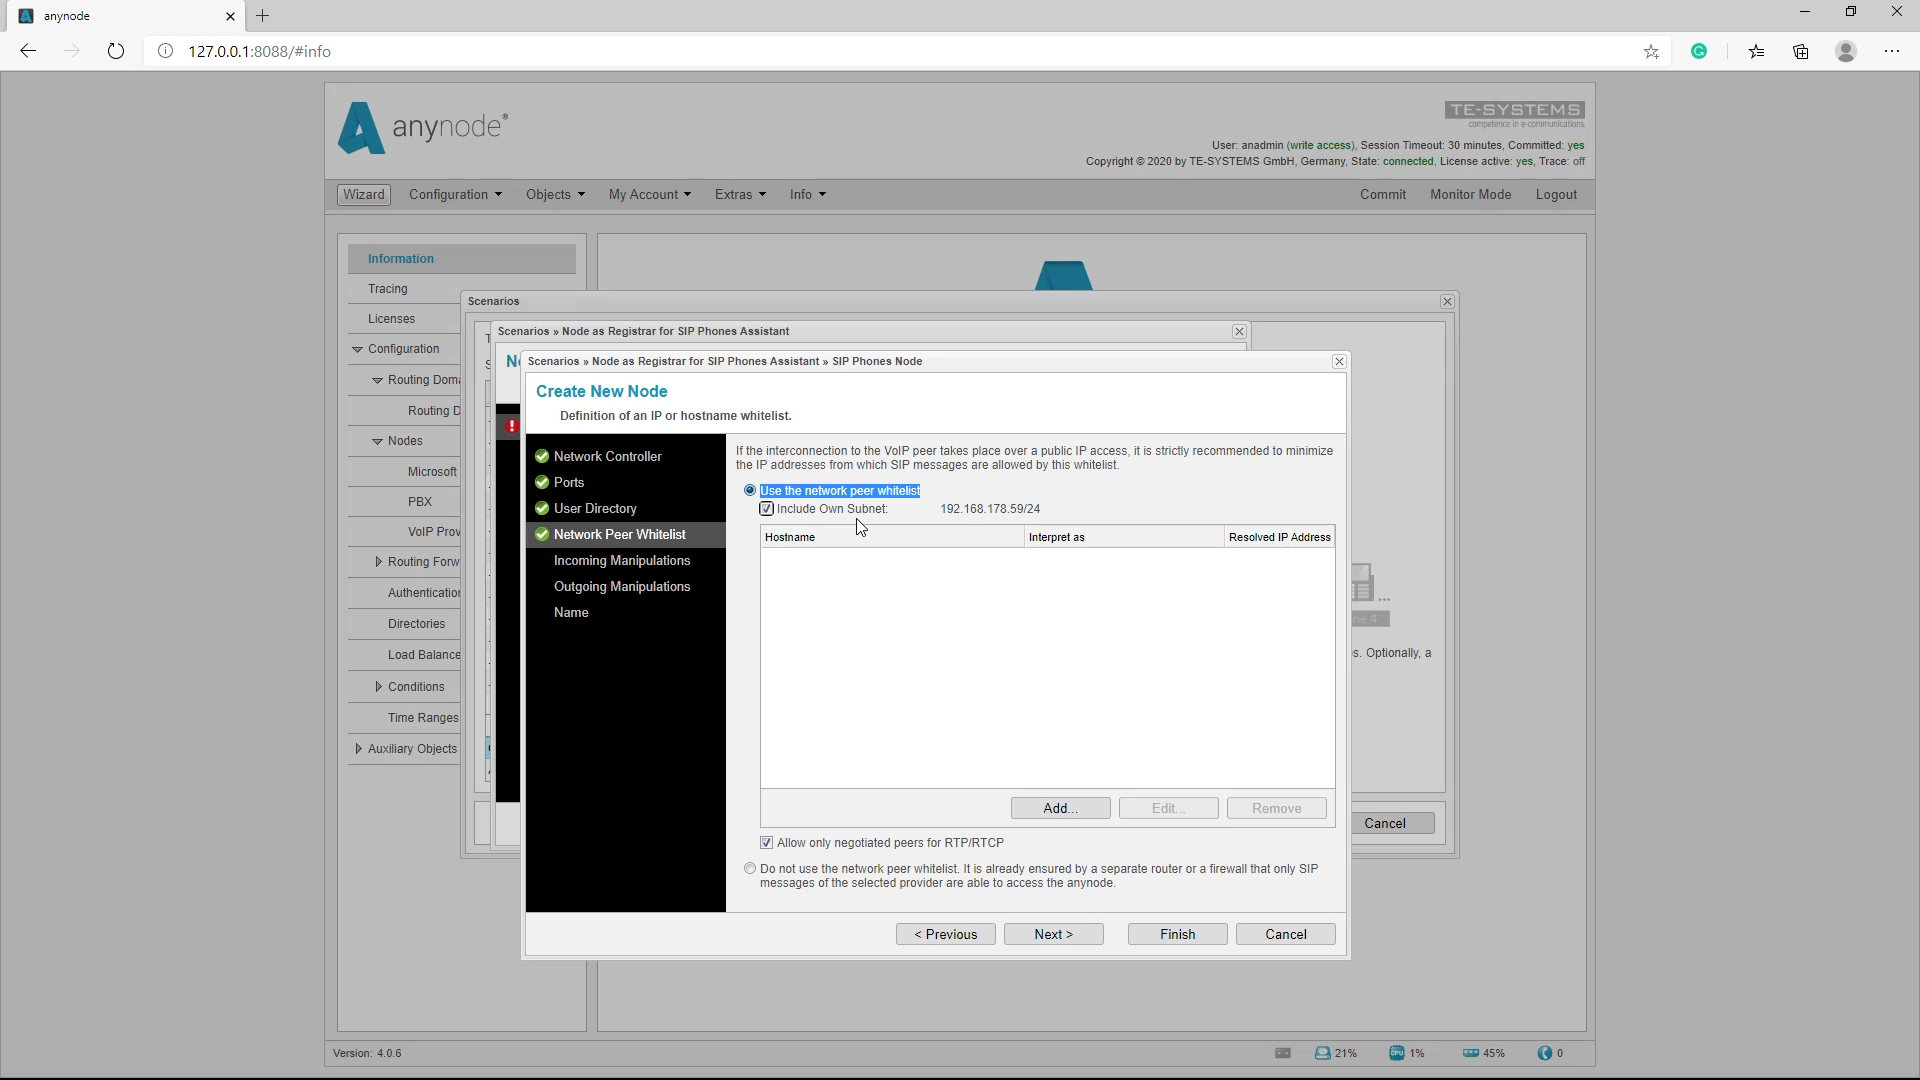
Configuration: network peer whitelist
If the connection is via public IP access, it is strongly recommended to minimize the IP addresses from which SIP messages are allowed in this whitelist. Since only your SUB network should be allowed, we check the box “Include own subnet”.
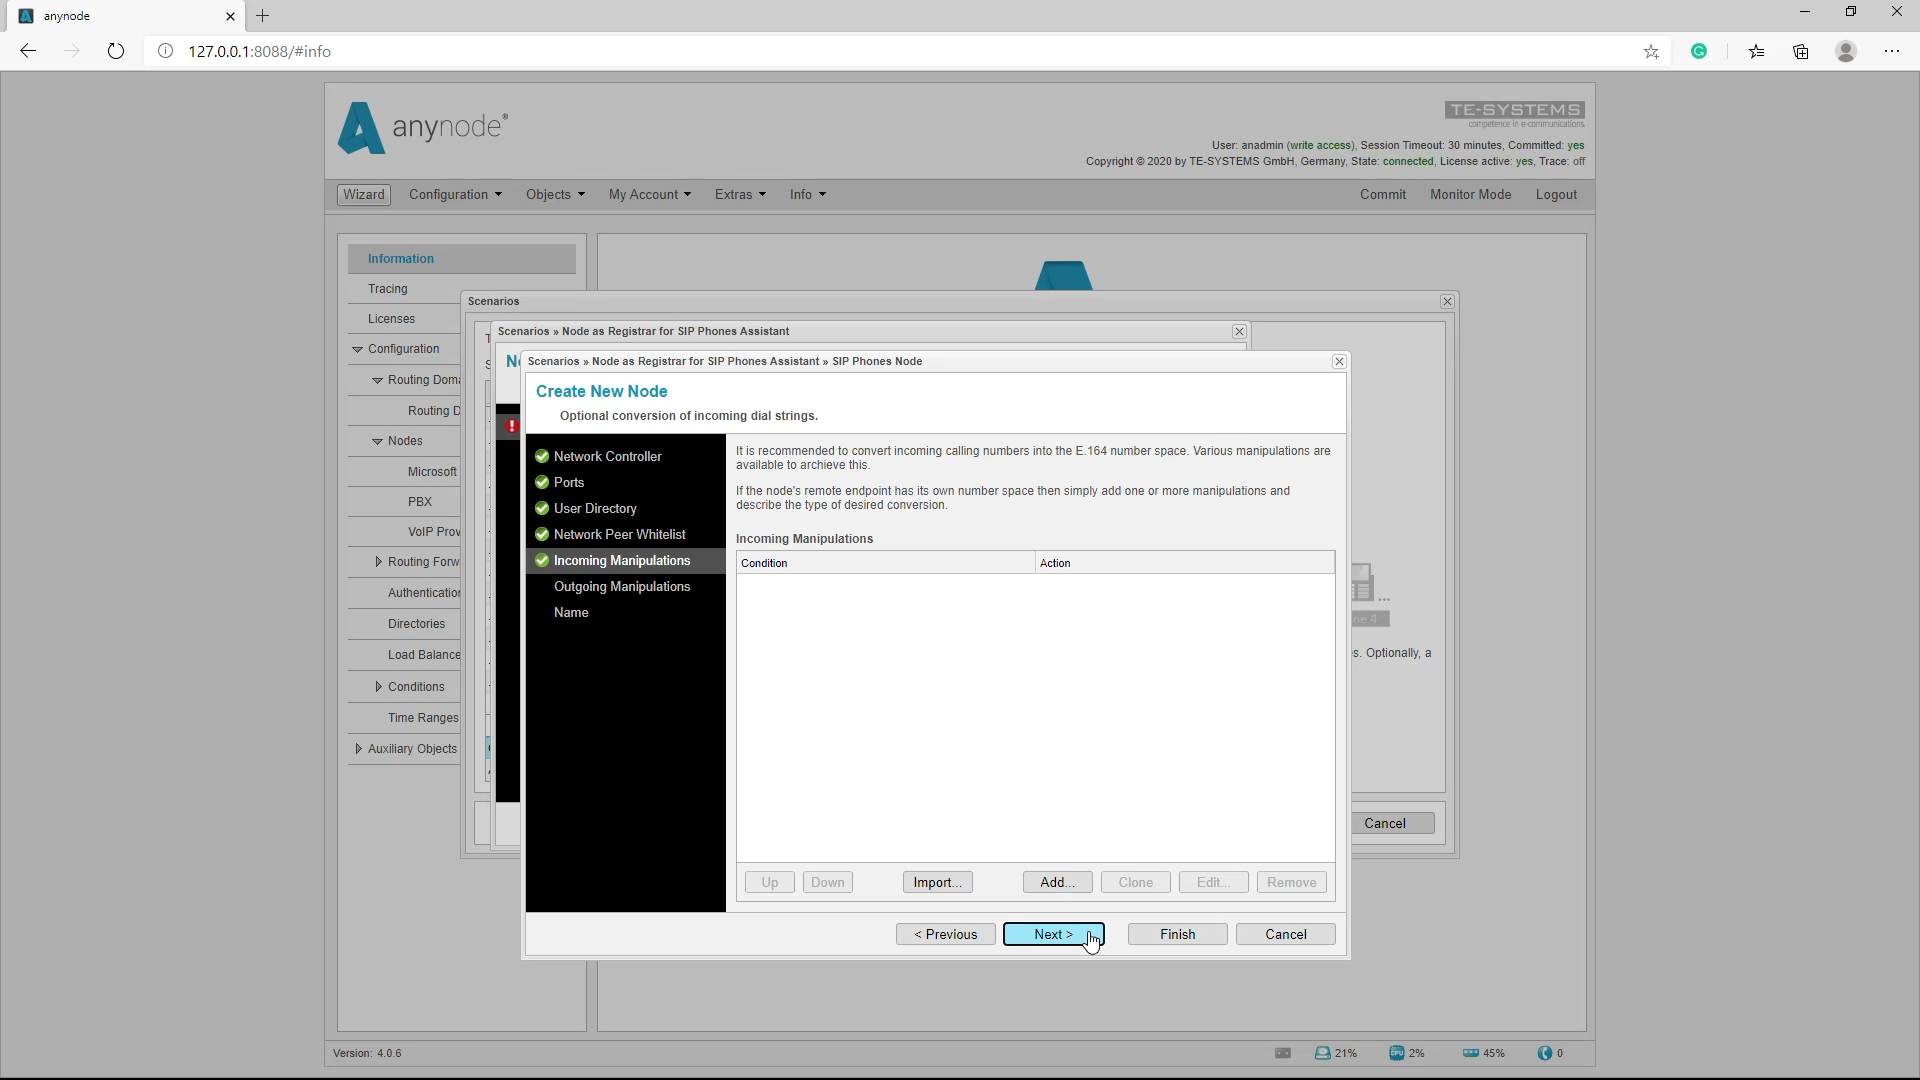
Configuration: manipulations
If converting phone numbers into the E.164 format is needed, you can do so here. . For entering manipulations, we recommend reviewing our tutorial video “Basics of Number Manipulation and Routing”.
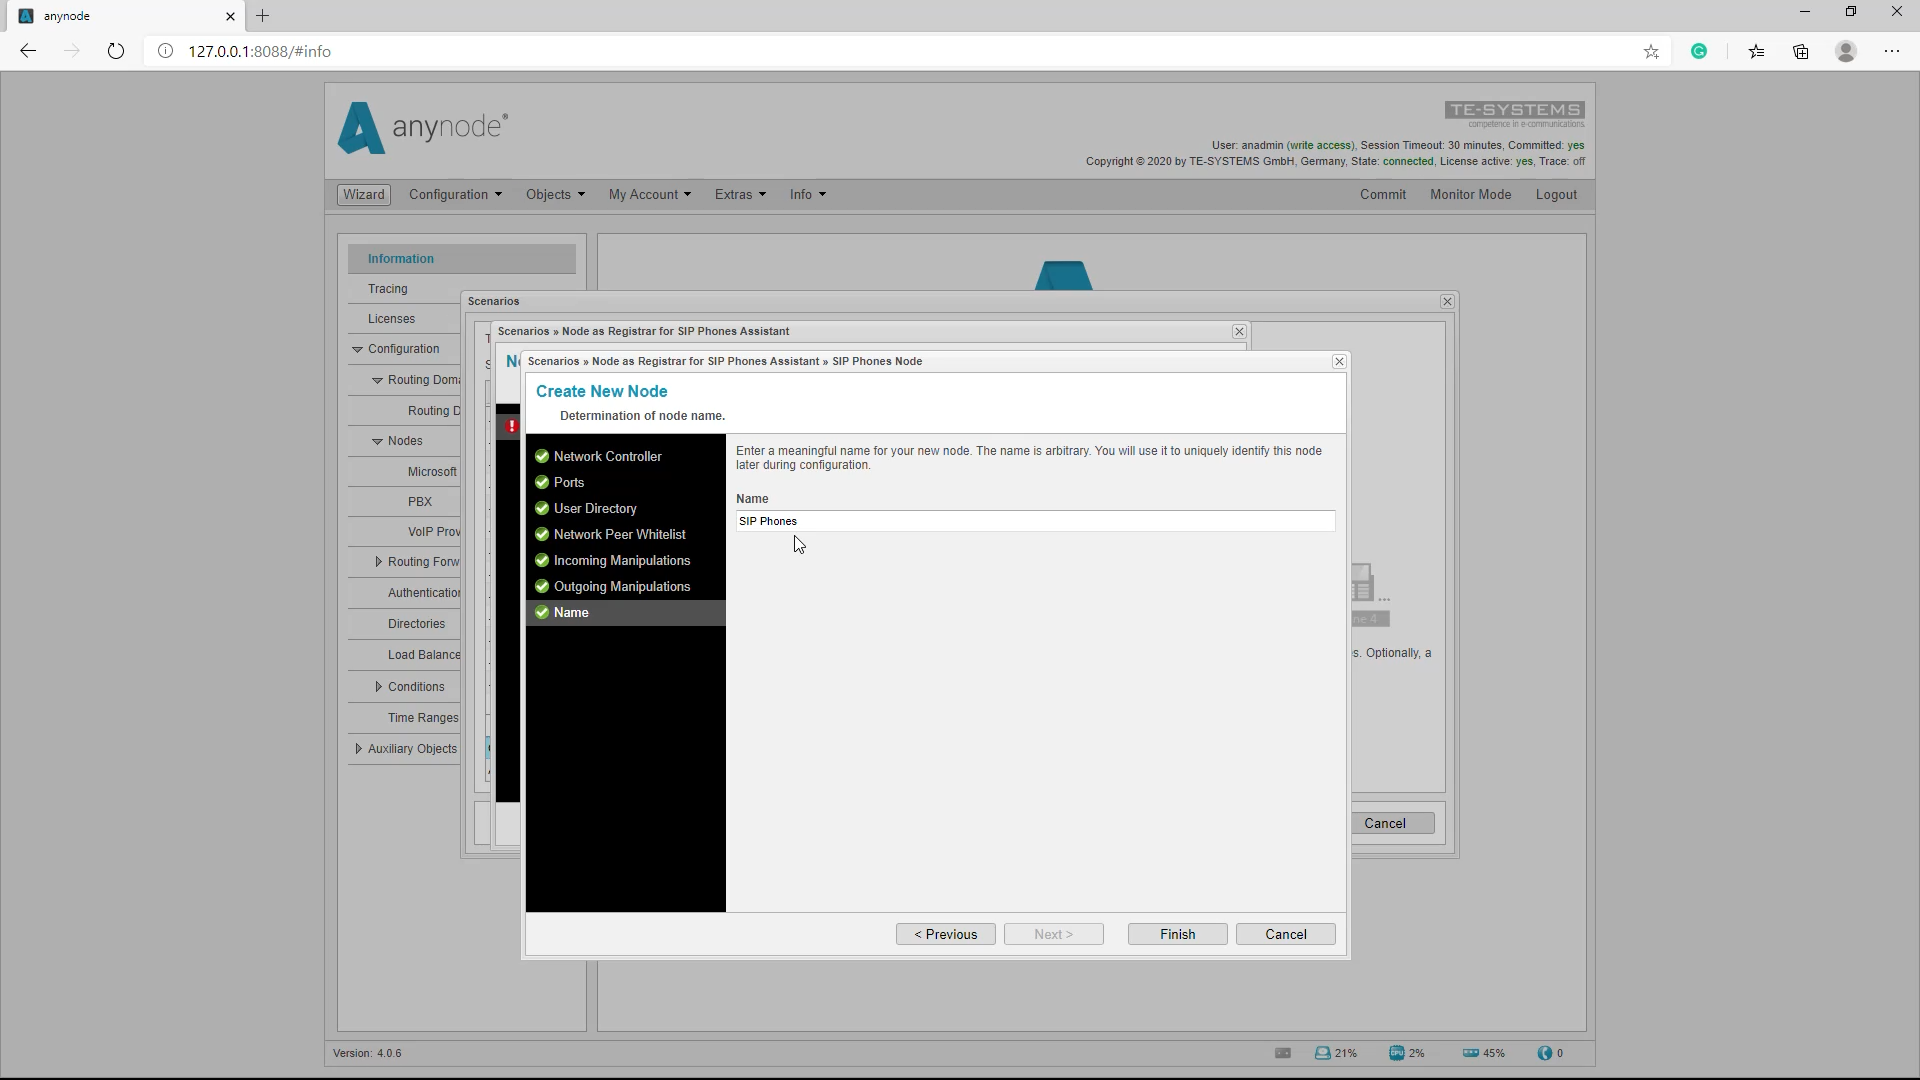
Configuration: name
We can now choose the name for the SIP Phones Node. We’ll leave it at the default.
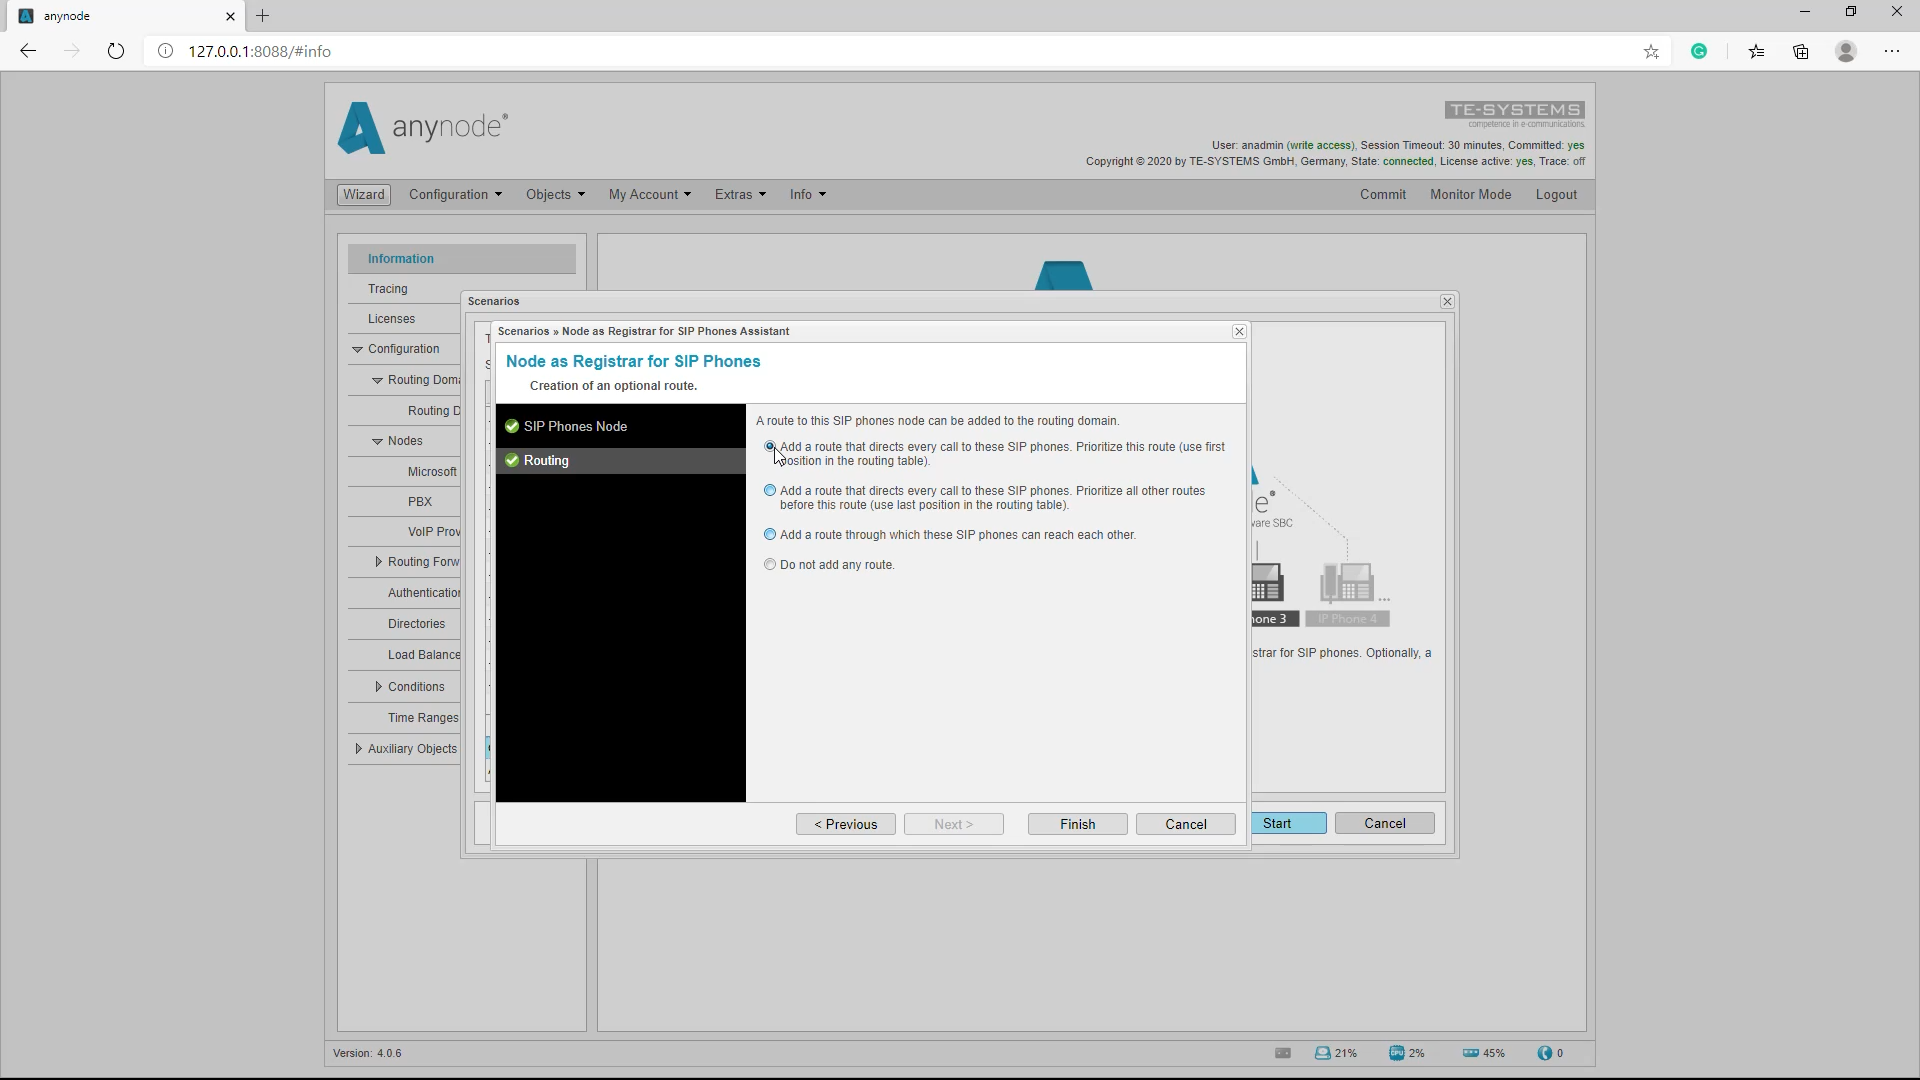
Configuration: routing
The SIP Phones Assistant can automatically create a route that leads to the SIP phones or end devices. This route is created at the top of the route table and is therefore used before all other routes. This is also the standard setting in the wizard. Other route options are: Create the route for the analog phones in the route table at the bottom and give preference to the other routes. Or a route where the SIP phones can reach each other. There is also the option of not entering a route at all. We can also enter and edit the routes in the routing domain after completing the wizard.
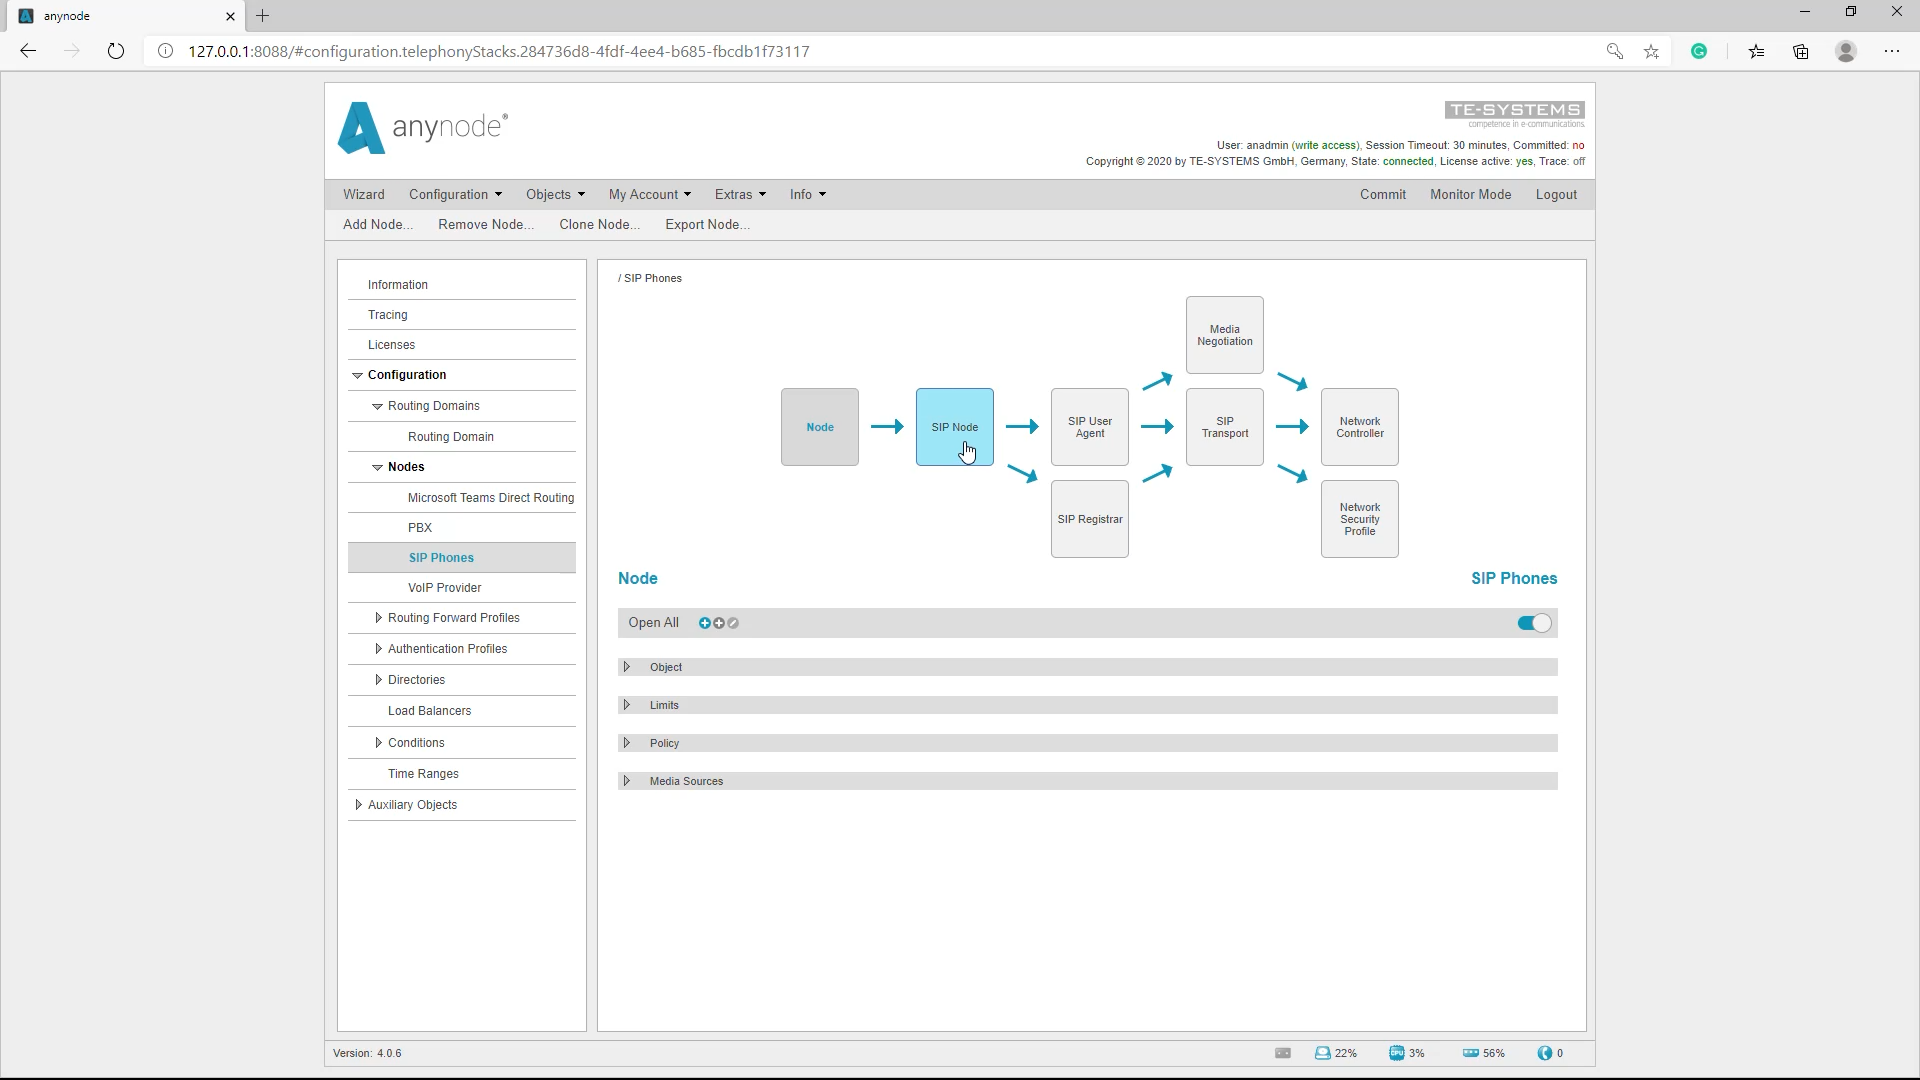
Configuration: SIP phones node navigation
With a click on commit, we finalize the configuration. We can then navigate through the various settings in our newly created SIP Phones Node.
Routing Domain
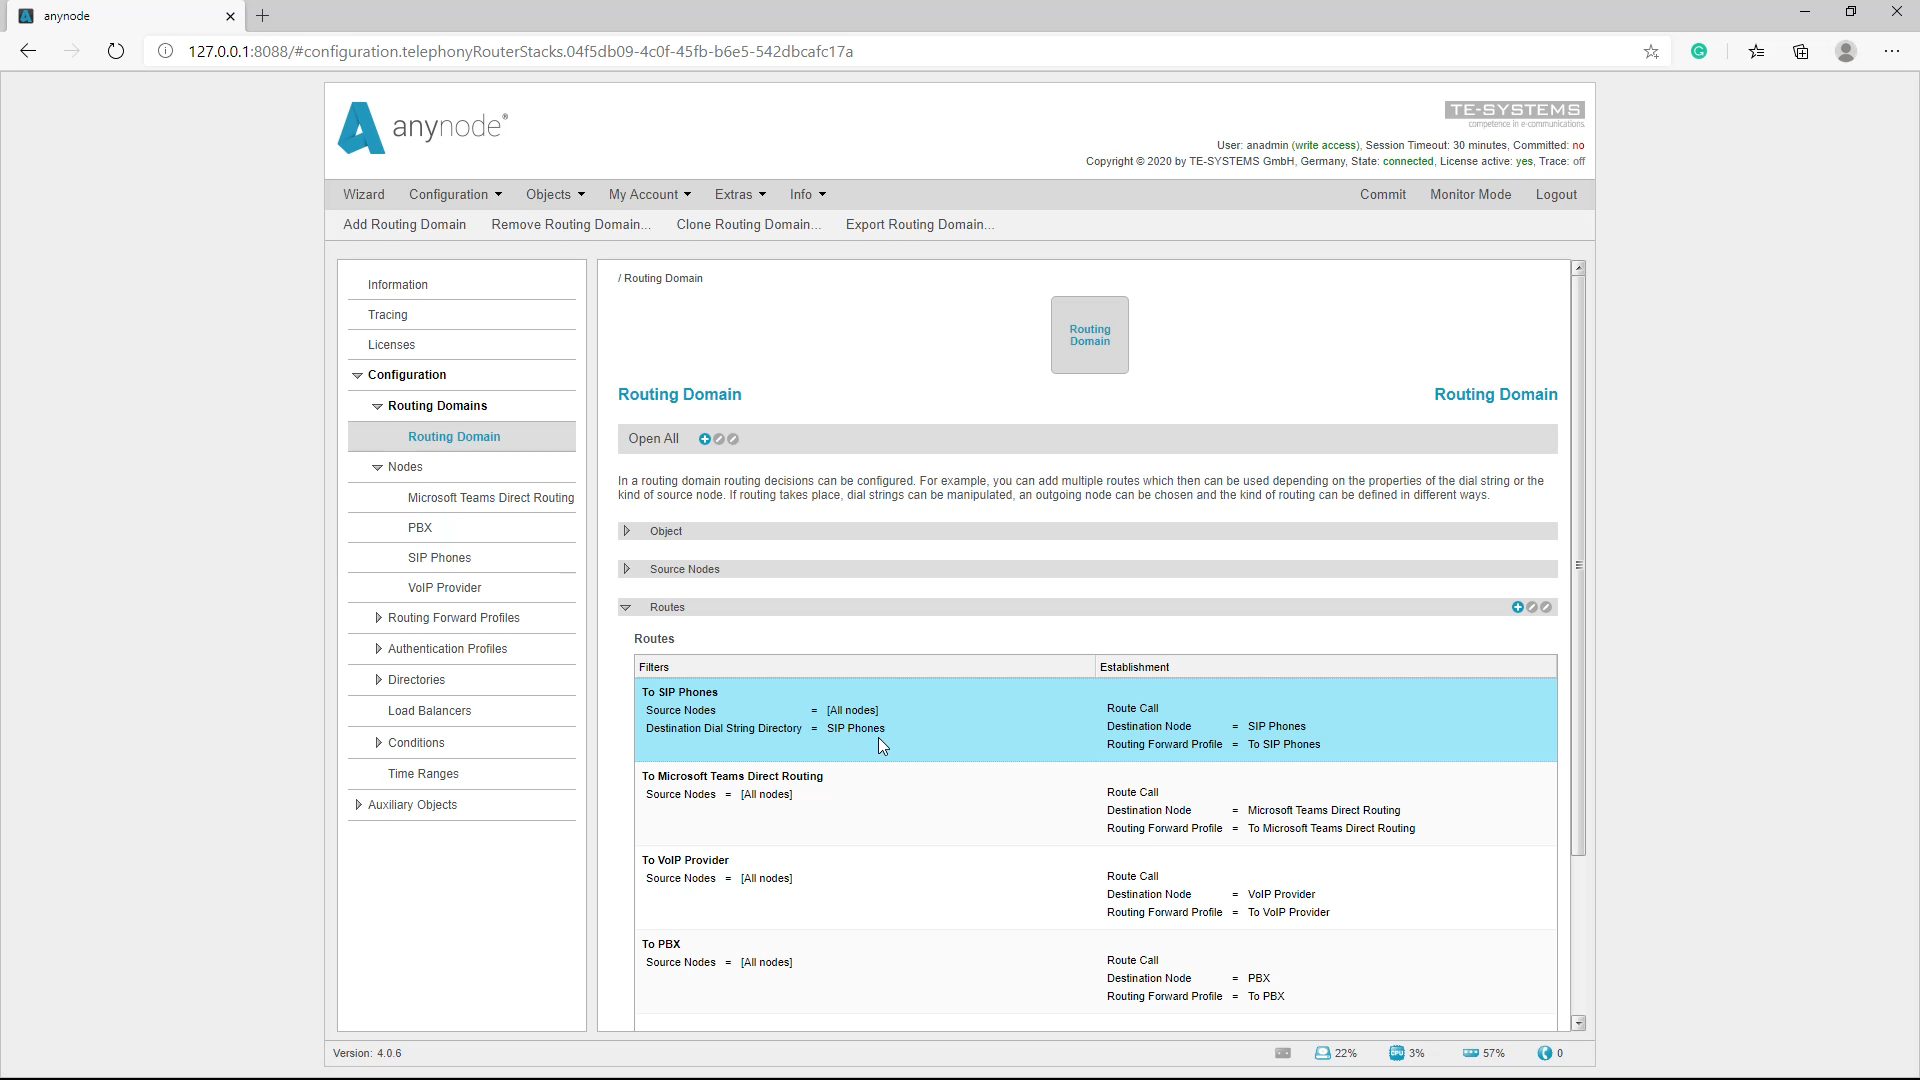
In the routing domain, we see that the assistant has already completed the entry and has selected our SIP Phones User Directory as Destination Dial String Directory. Bei einem eingehenden Ruf wird also nachgeschaut, ob der Teilnehmer im Directory steht und der Ruf wird entsprechend geroutet.
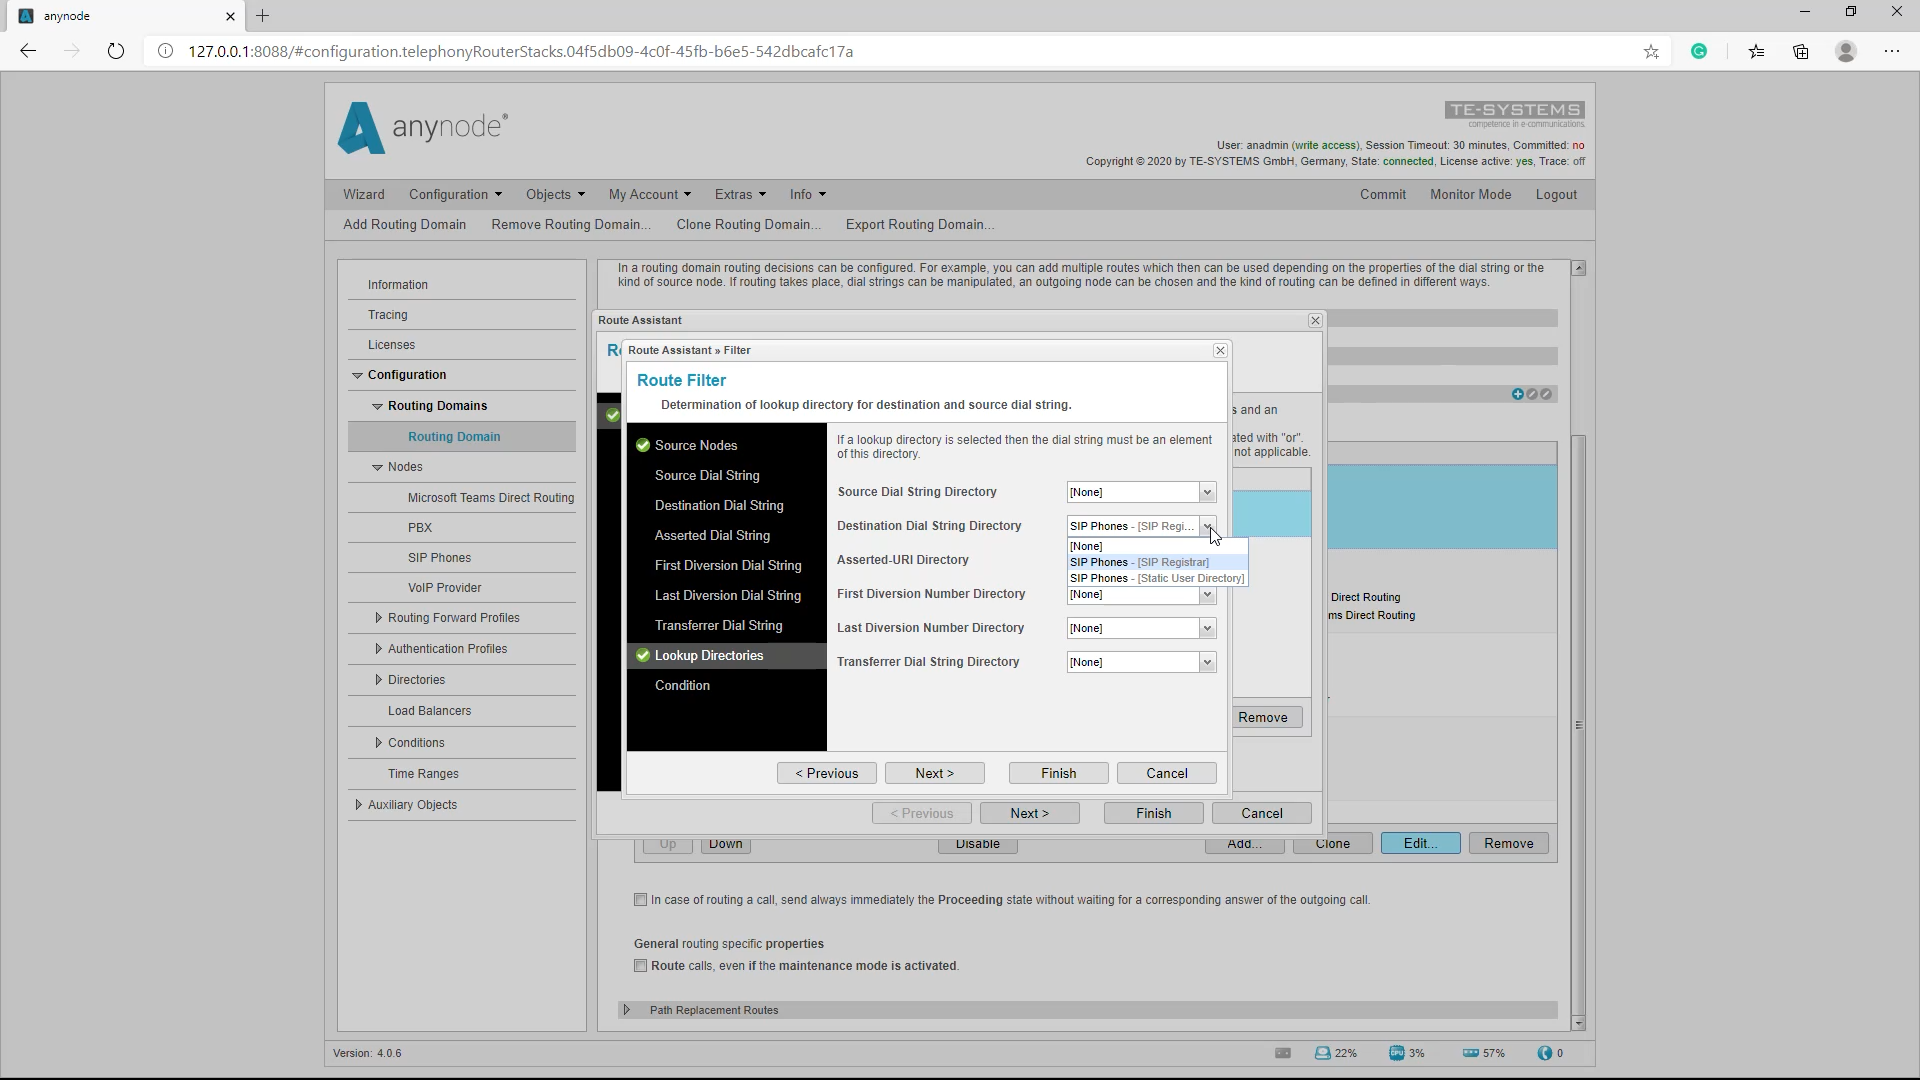
Routing Domain Lookup Directory
At this point, we can select two associated directories: the Static User Directory or the Registrar Directory. The static directory contains all phone numbers and areas that have been created in a user directory. The Registrar Directory only contains the currently registered participants. So you have to consider whether the call should be routed to the node if a phone is not registered at all. . In this case, the caller would quickly notice that the phone cannot be reached. Alternatively, if you want to route the call differently in such a case, it makes more sense to use the Registrar Directory.
If the user directory in the route is used as a “Destination Dial String Directory” in a route, this route only takes effect if the desired destination shows active registration. Otherwise, this route is ignored and the lower routes are searched for a match. As a rule, the call would then be routed to the provider.
With a click on “Commit” we finally take over the configuration.
Add new users via directories
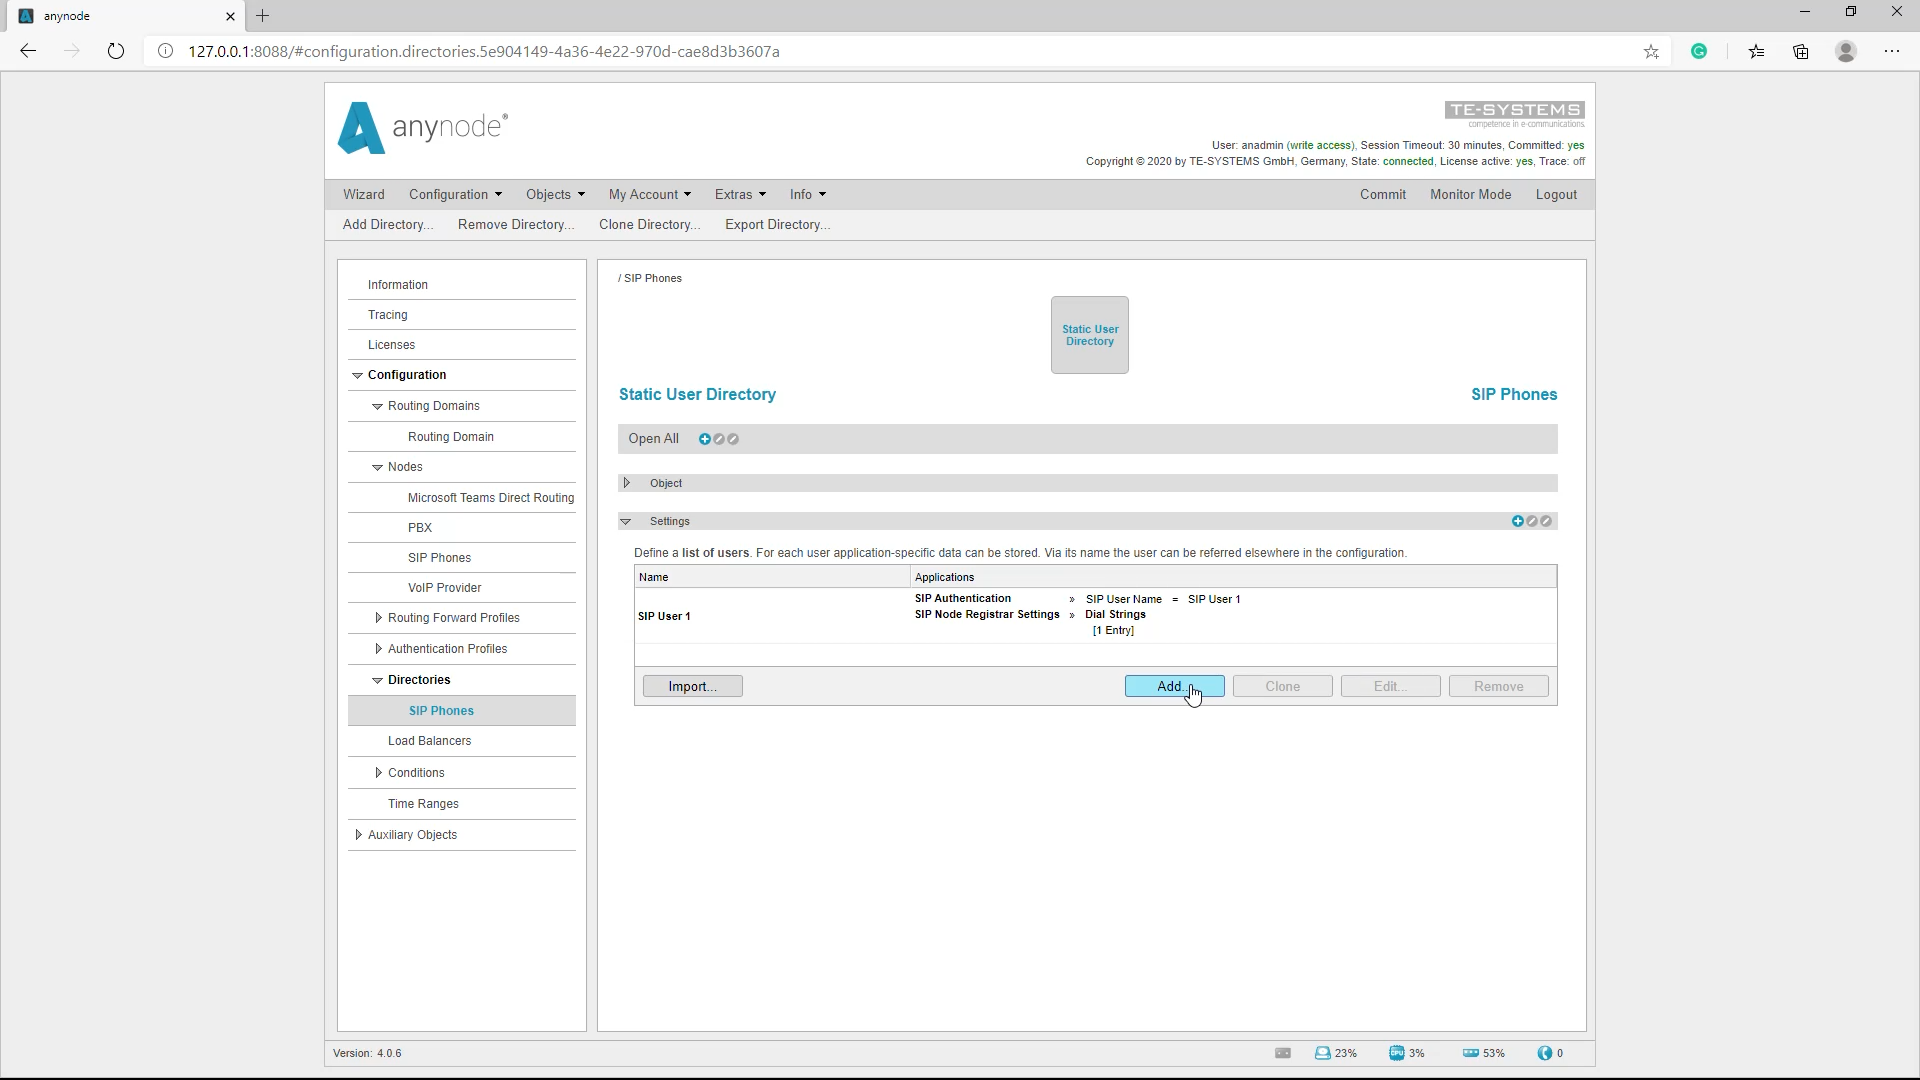
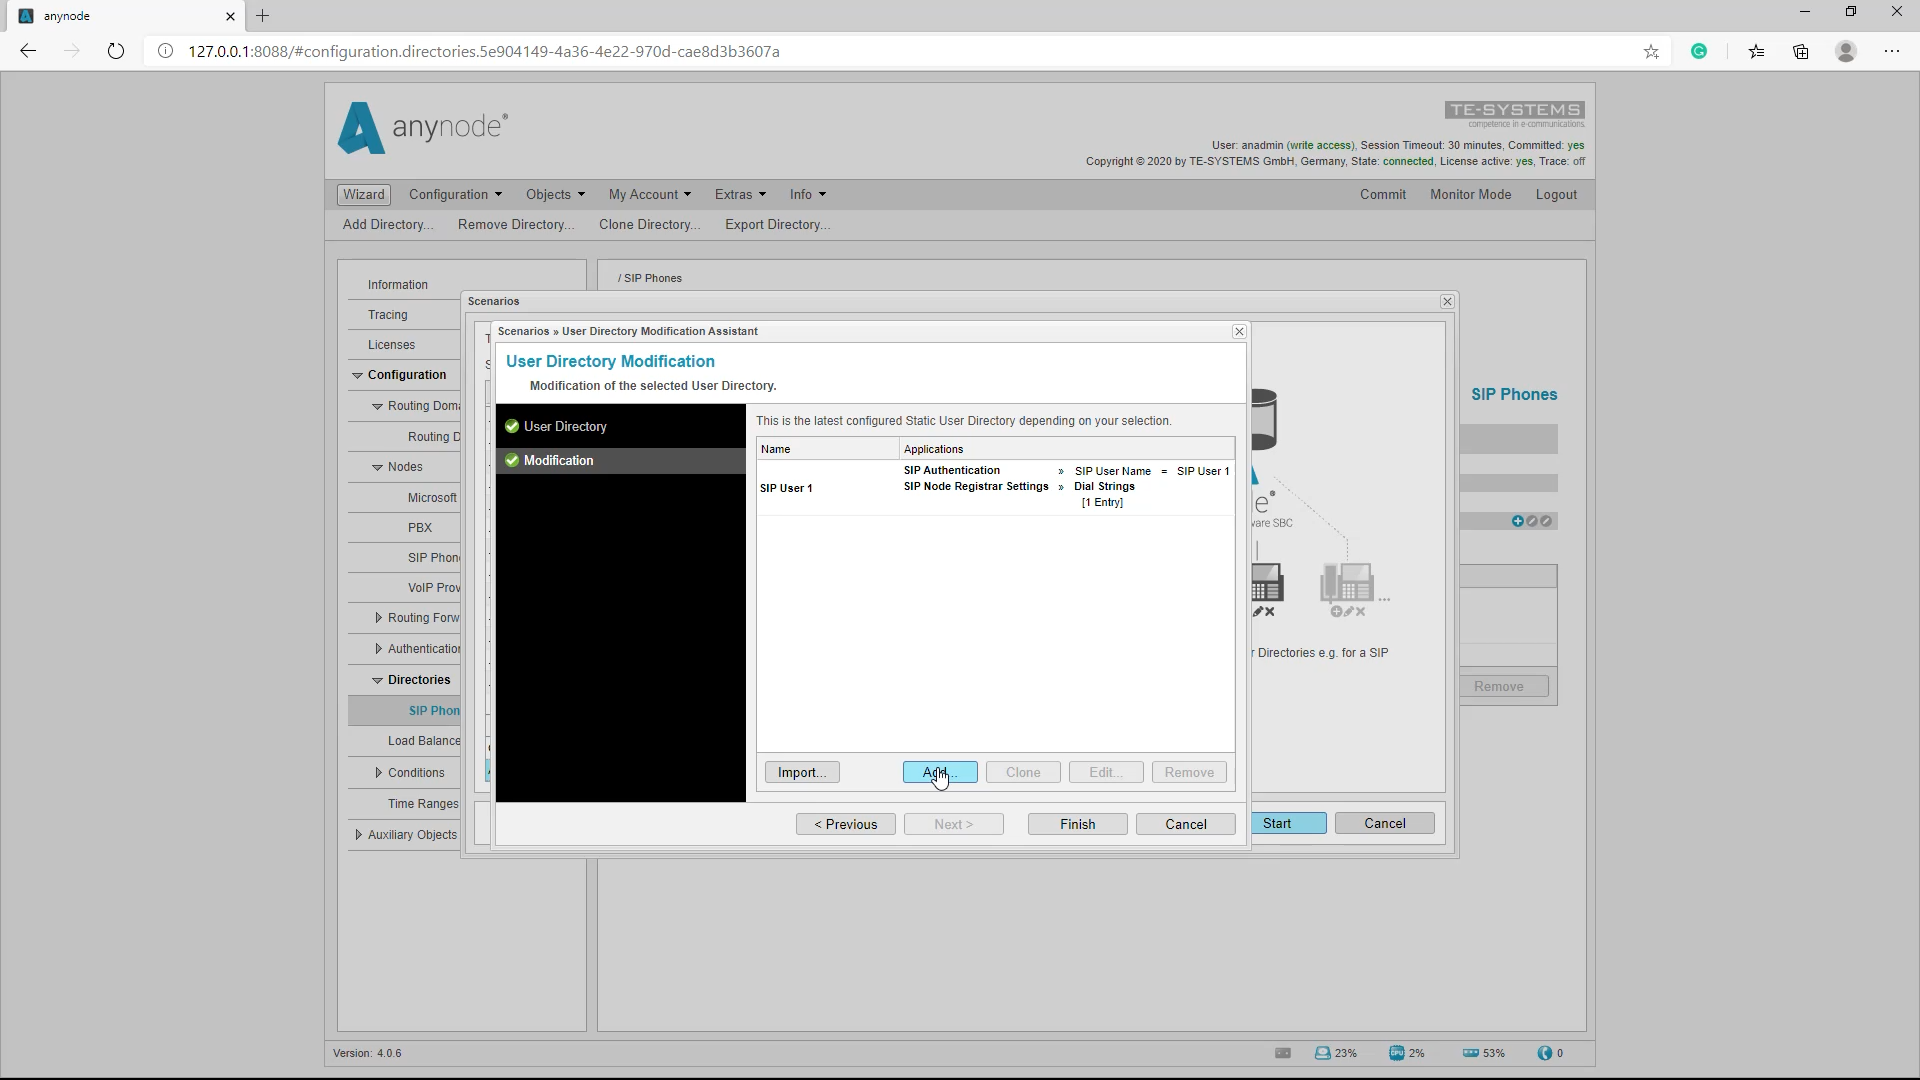
The directory created with the users of the SIP telephones can be easily edited or more subscribers added. We find the created directory under “Directories”. With the “Add” command we can add the user’s SIP phones. The newly added users are then generally routed under the Static User Directory and can be specified as Destination Dial String Directory in the route filter. This simplifies the routing.
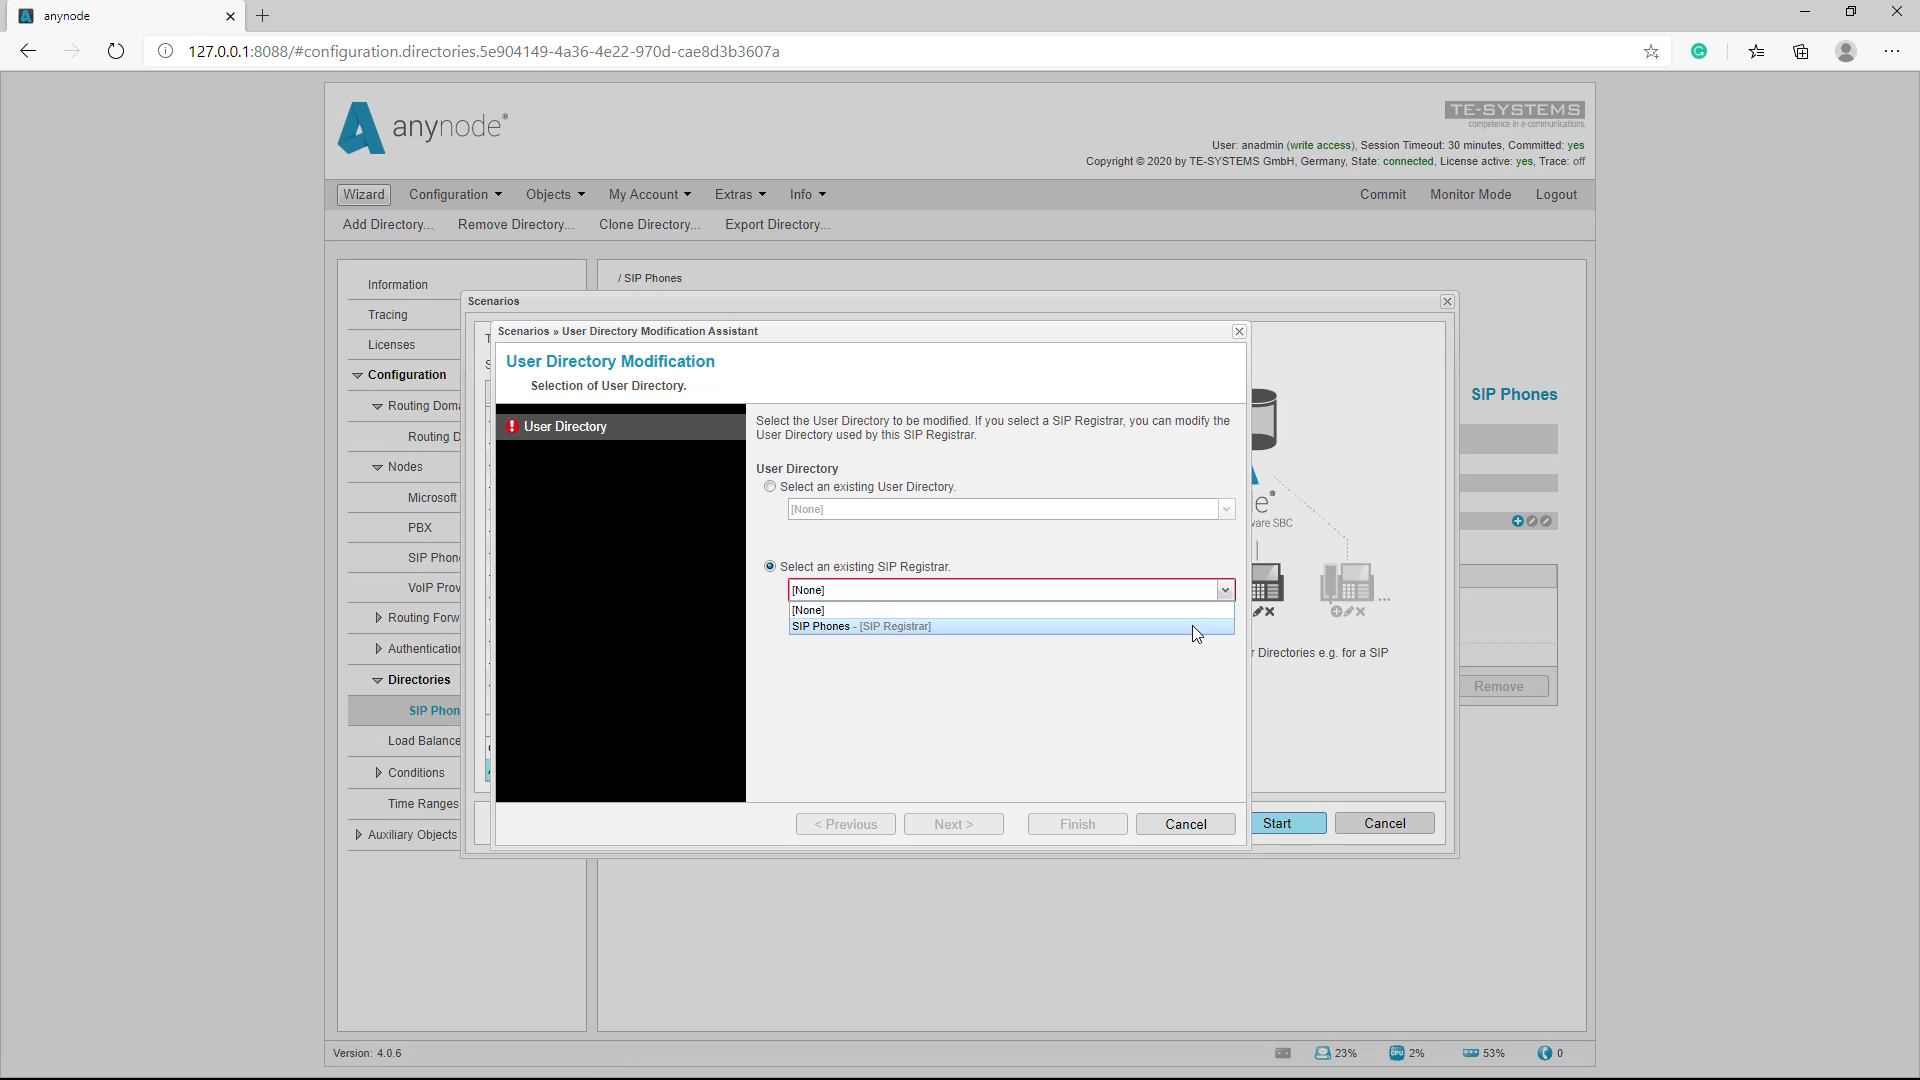
Add new users via scenario wizard
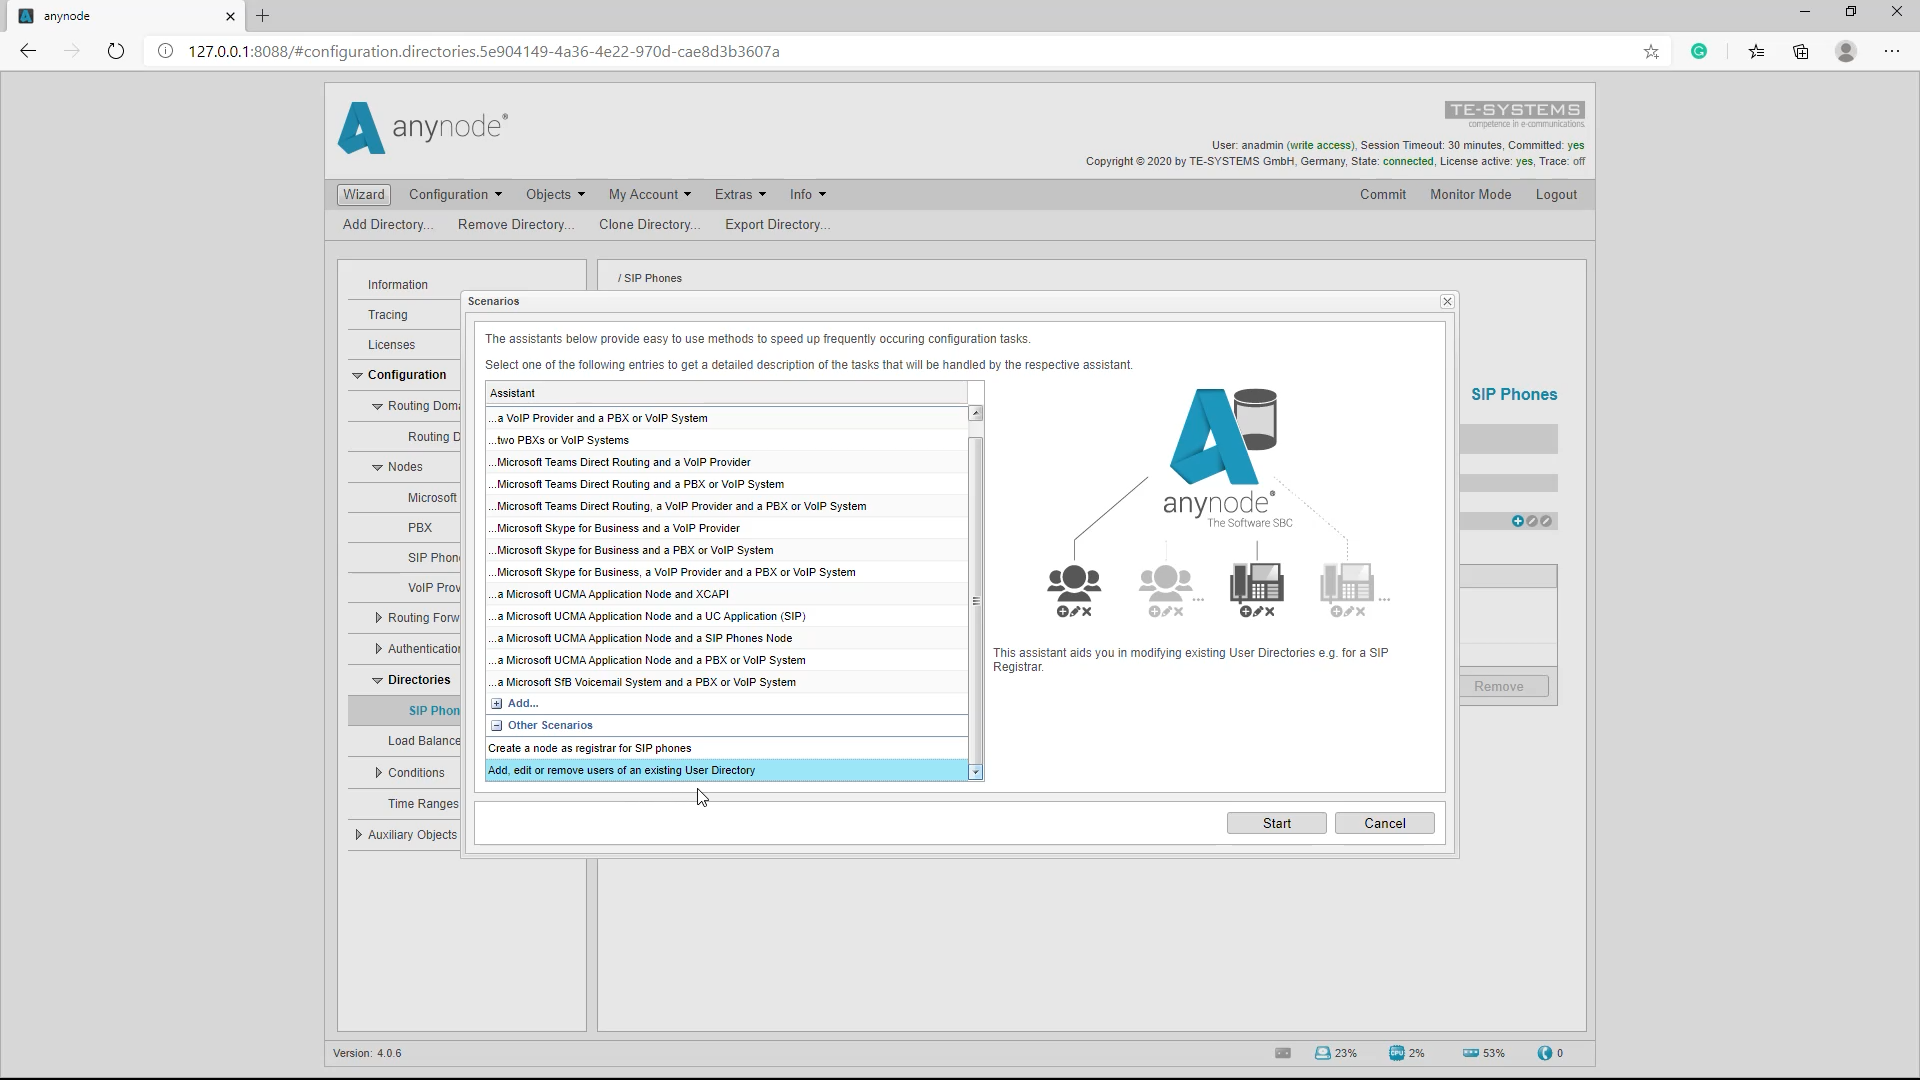
Alternatively, there is the option of calling up and editing directories directly via the Scenario Wizard.
Check configuration: dashboard
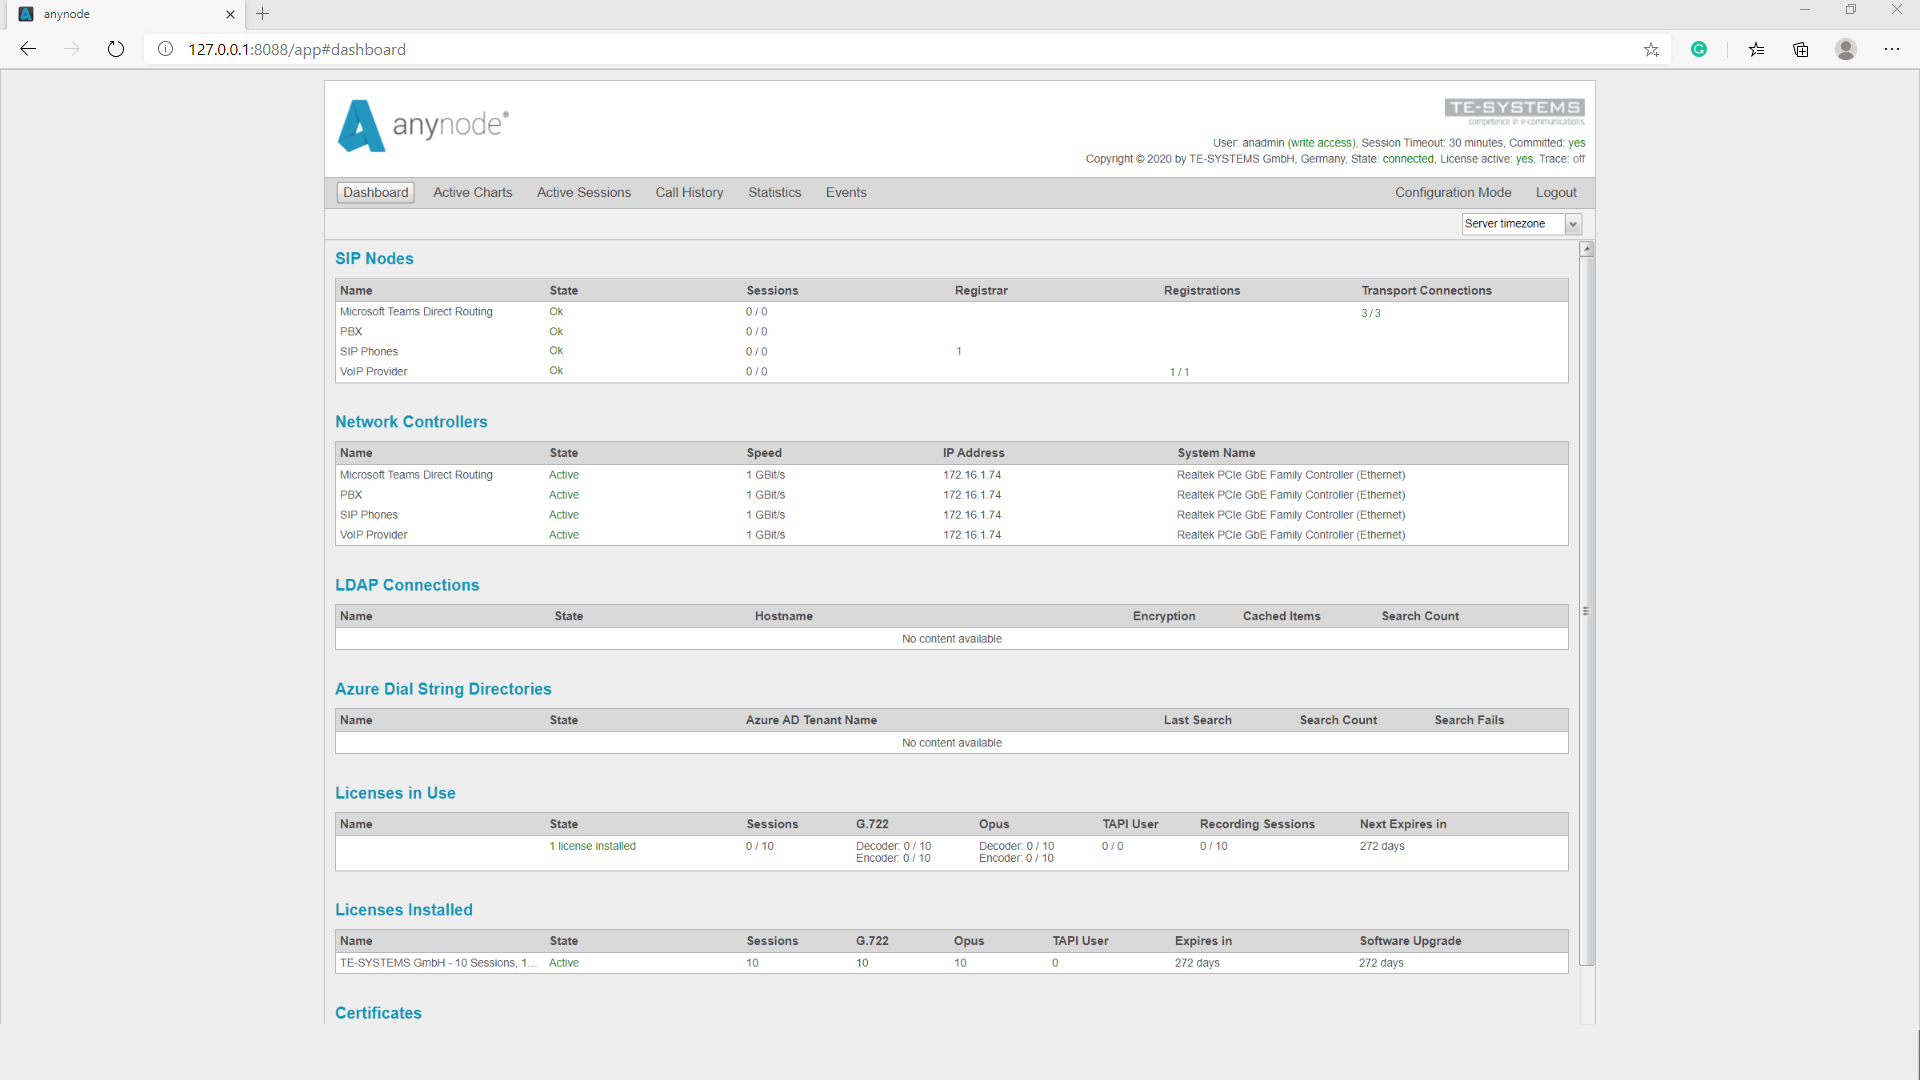
We can quickly check the functionality of our configuration with a look at the anynode dashboard.
The “OK” status of the SIP Phones Node will change from orange to green as soon as a subscriber has successfully registered. Of course, this can also take some time, as the remote stations must first register with anynode.
Expiration Time
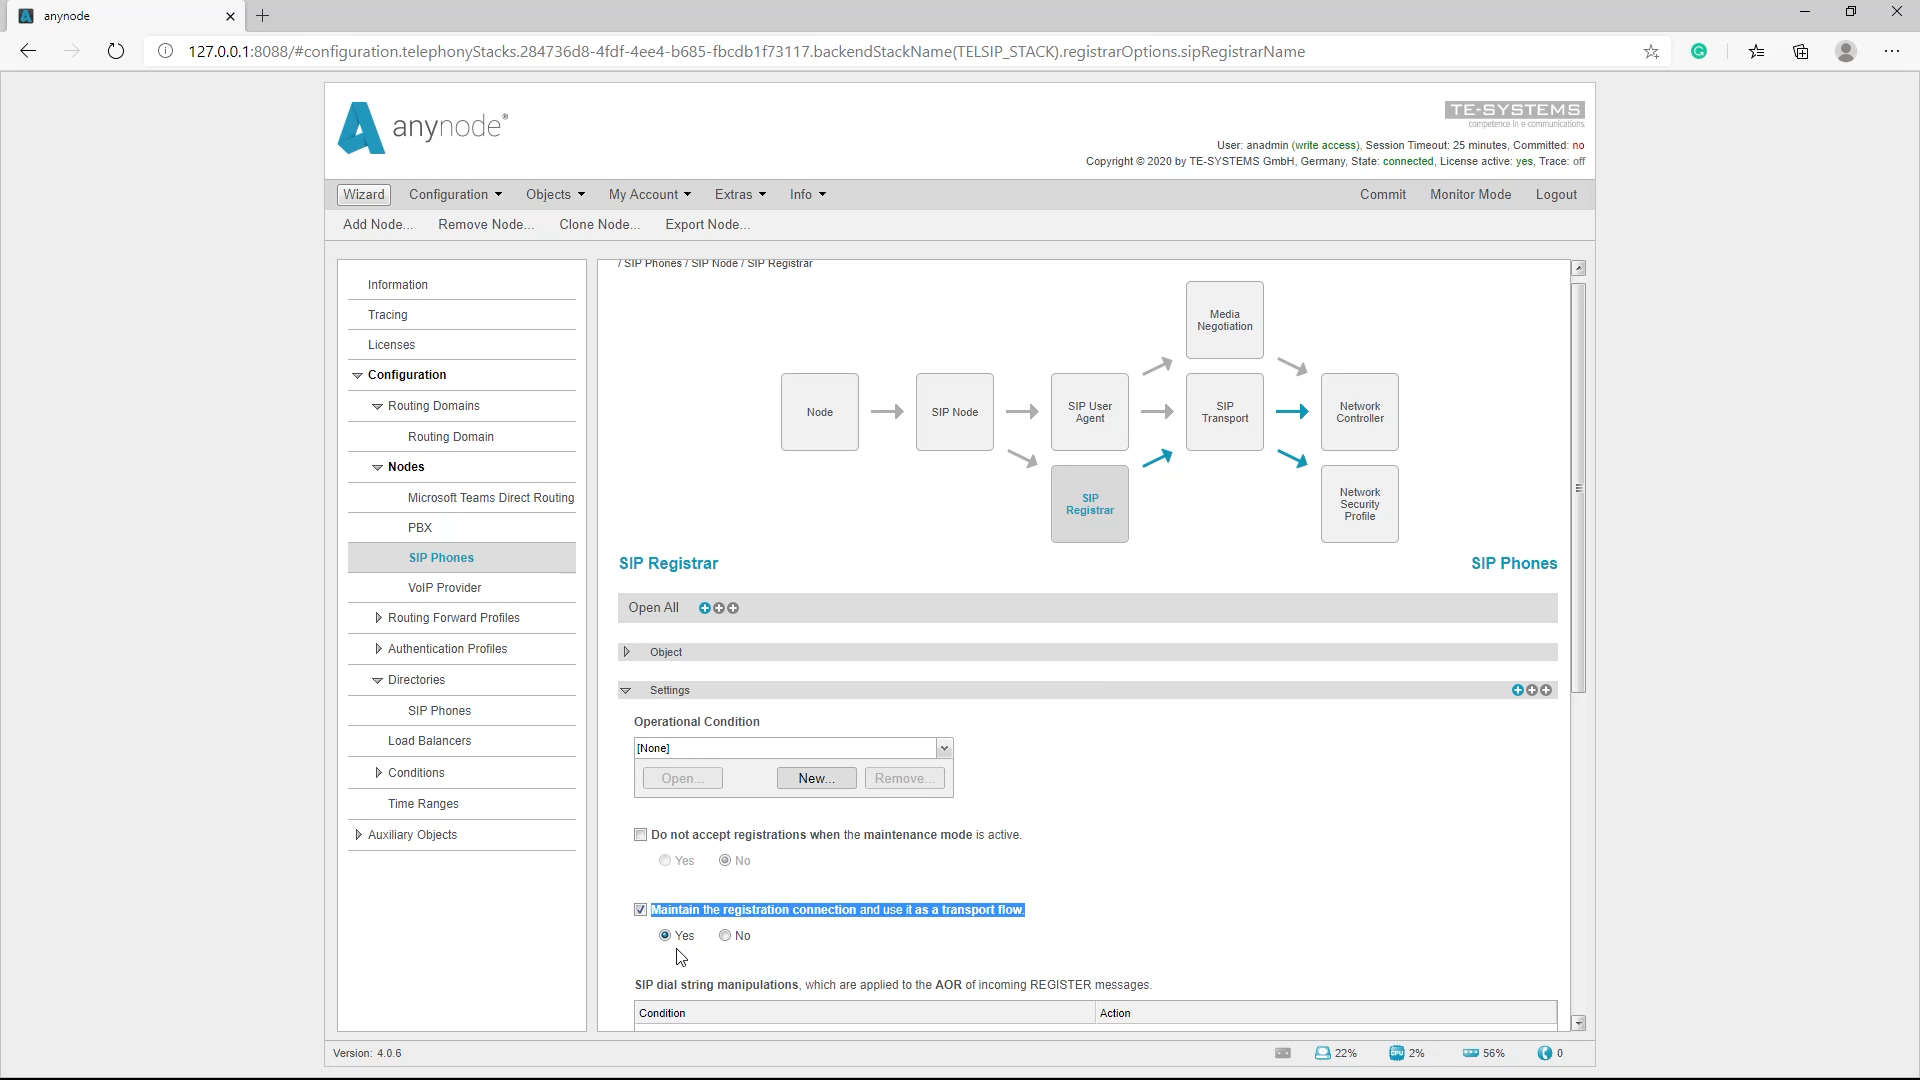
At the end of this tutorial, we would like to go into some special settings for the registration time for maintaining the registration connection and for latching. We can configure these settings in the navigation in the newly created SIP registrar.
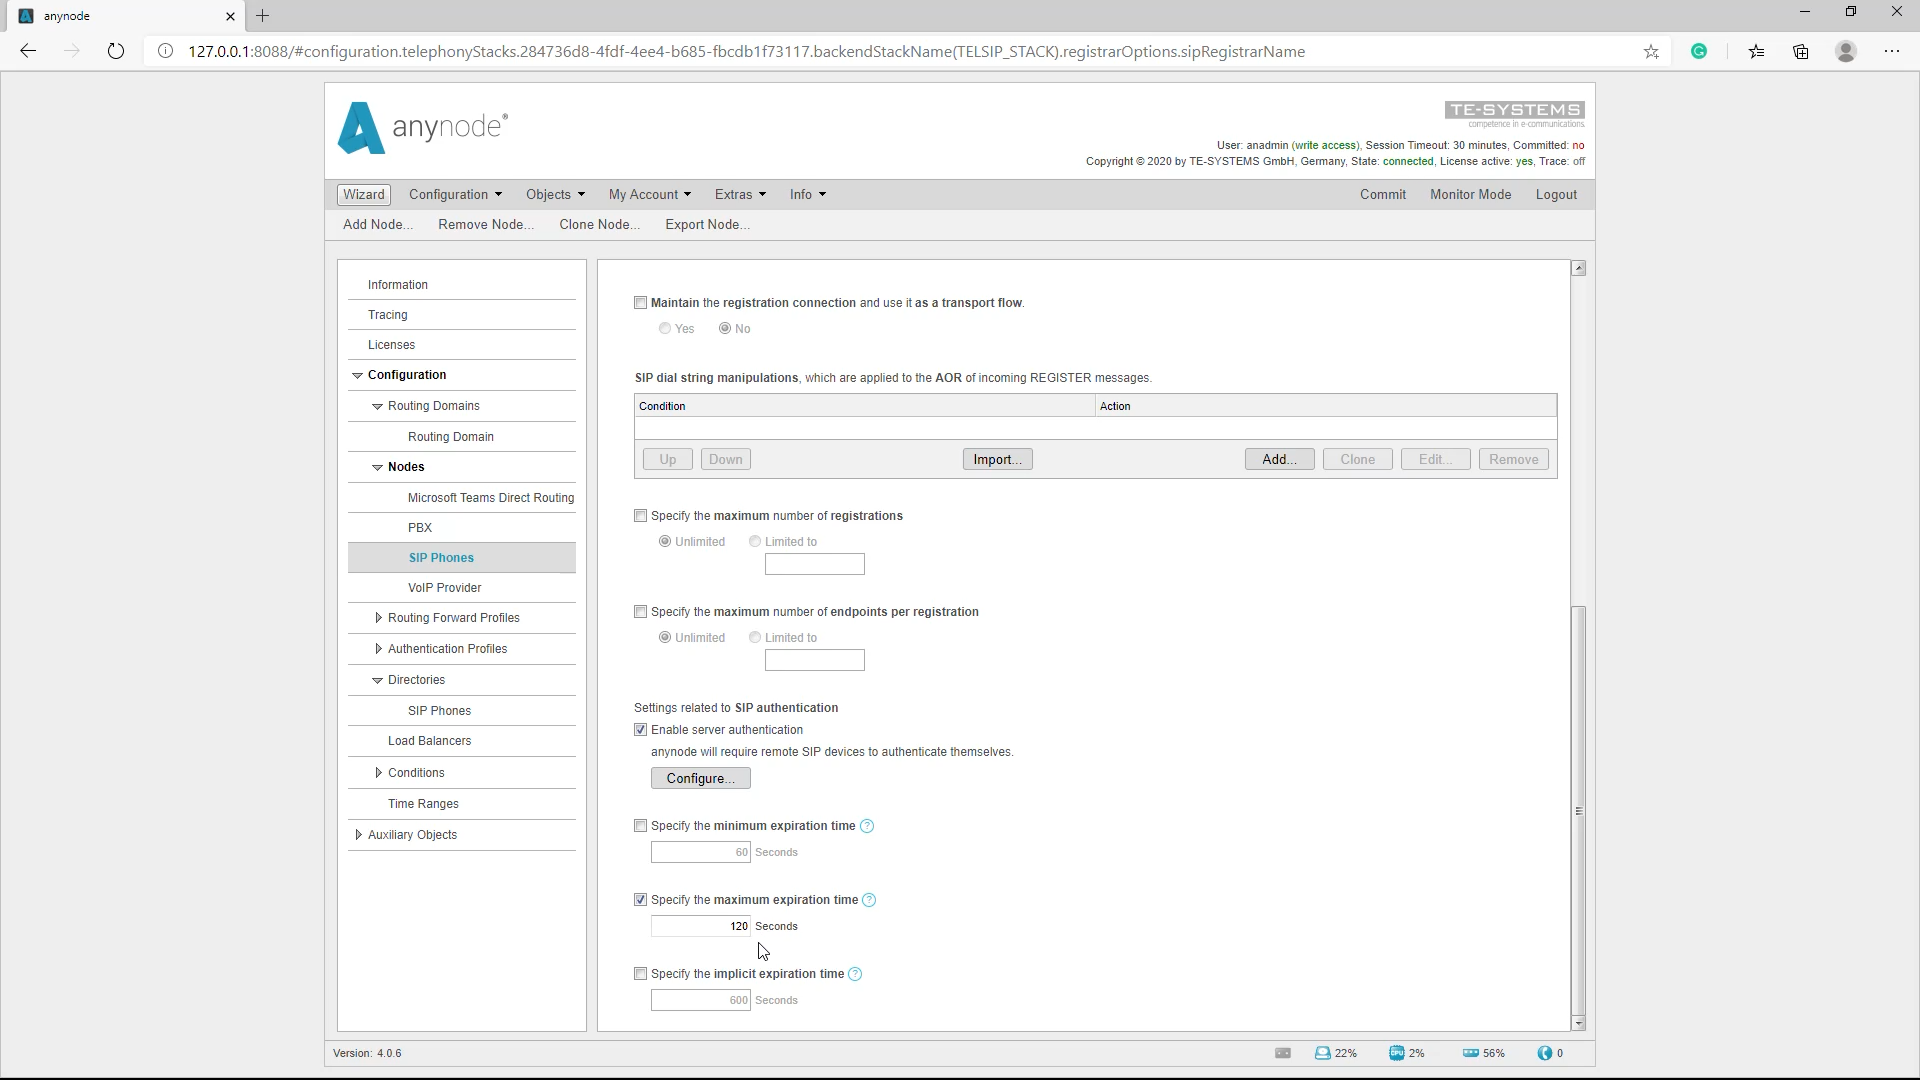
The period of validity of a registration in anynode can be configured. The standard value is a fairly high value of 86400 seconds or 24 hours. In practice, this can lead to problems if a client itself sends no or a high expired time in the register.
If the connection between anynode and client is lost, an undefined state can result. In practice, this can happen, for example, when restarting anynode for maintenance reasons during an update. In this case, the SIP phones can only be reached again after they have reregistered with the anynode. Since anynode does not have the option to tell the phones when they shut down that they have to register again, they have to wait until the SIP phones have run out of time and register again.
The status would only be correct again when the expiration time has expired. To keep the time as short as possible in this case, it is advisable to set the standard value to a smaller value. A good value is 120 seconds.
Maintain Registration
Under “SIP Registrar” we find another important setting to maintain the registration connection: If the end devices are in a network other than anynode and no NAT settings are adopted in the configuration of the end devices, we recommend you enable the “Maintain the Registration Connection and use it as a transport flow” function with “Yes”. With this switch, anynode can remember the external IP address that was used during registration and use it for outgoing SIP messages instead of the local IP address that was sent.
Latching
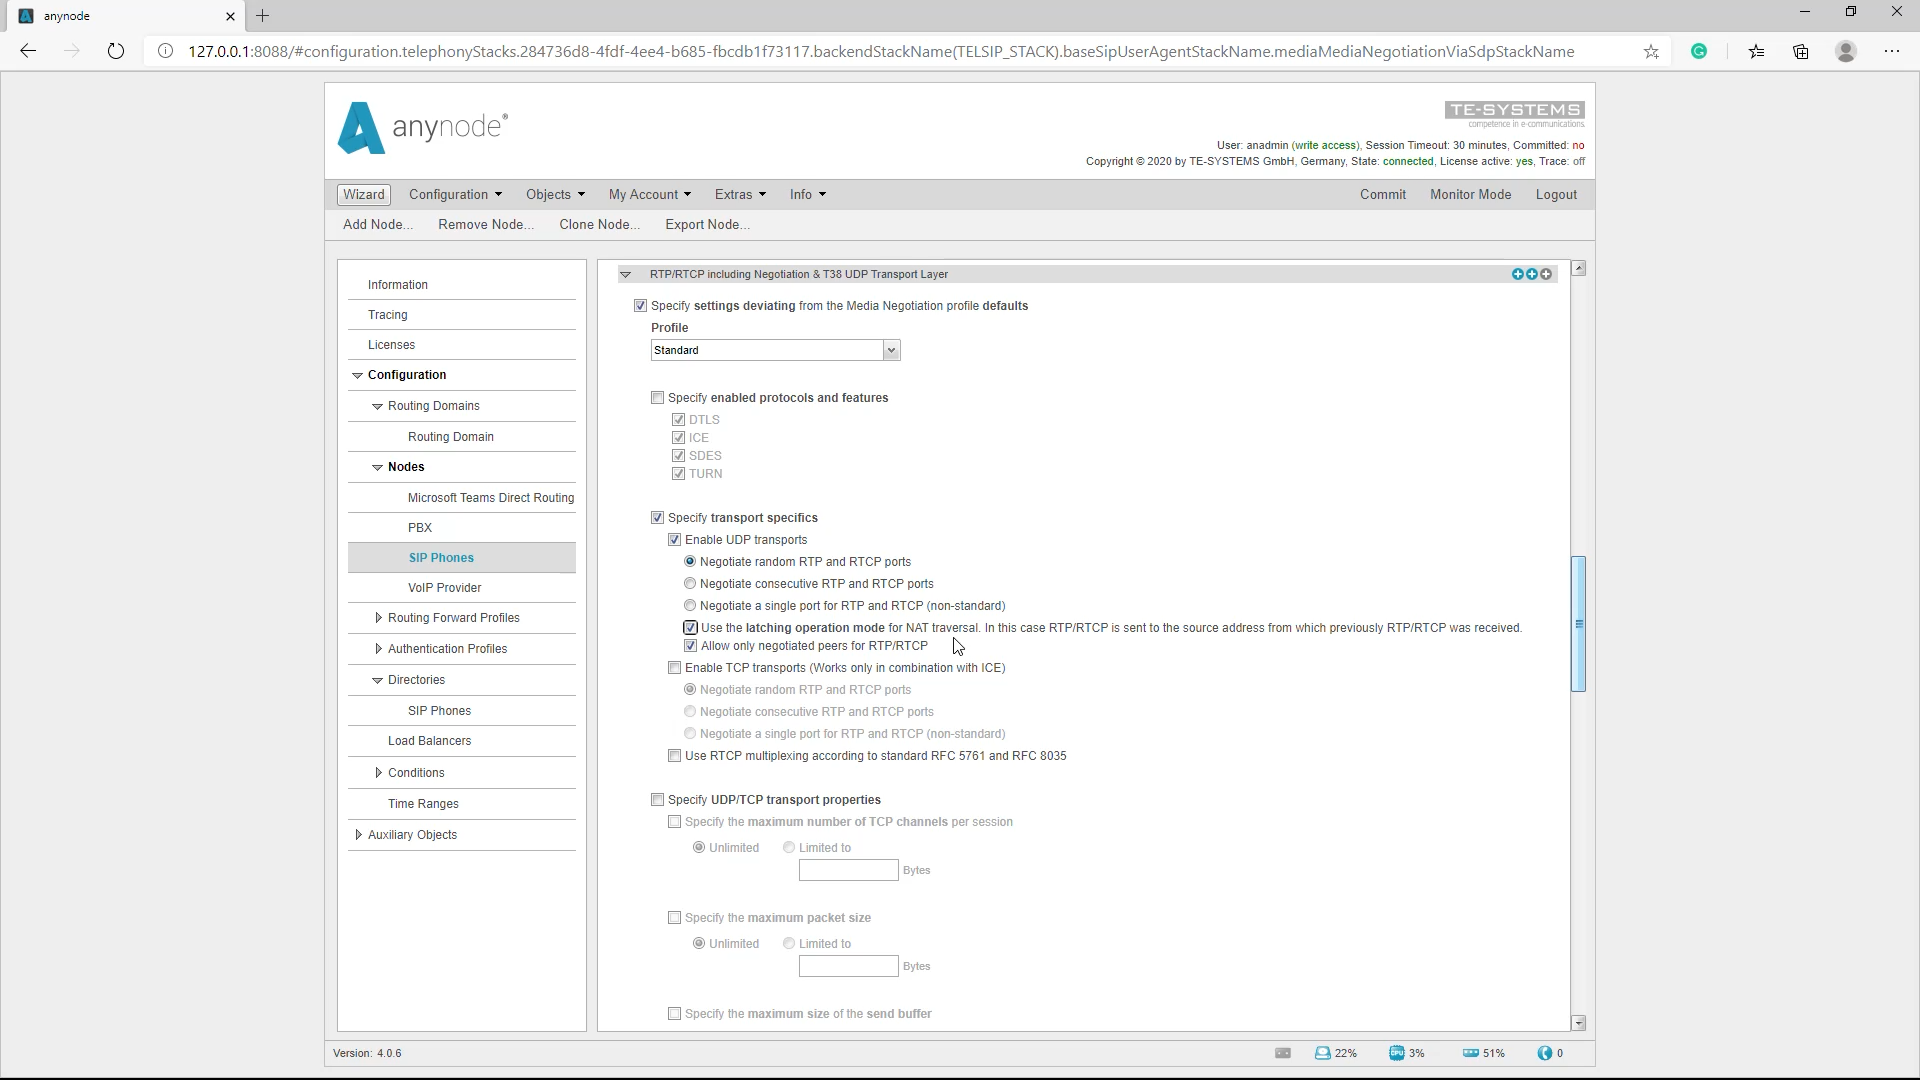
In this case, it may also make sense to activate latching for the media stream. We find this switch in the navigation under “Media Negotiation”. Before we can see the switch, we have to bring the detail level of the view to the second-highest level.
anynode then waits to send RTP data until it has received an RTP packet from the other side for the first time. Only then will anynode begin to send the RTP data to the sender address.
Button: Use the latching operation mode for NAT traversal. In this case, RTP/RTCP is sent to the source address from which previously RTP/RTCP was received.
It should be noted that anynode does not send any data if the other side does not send any data. This option can only be activated if the device on the other side does not act that way.


