Introduction
In this workshop, we will show how anynode can be registered as an application in Microsoft Azure Active Directory and how Azure Active Directory is used for routing in anynode.
In our tutorial video, we will explain the essential configuration steps for this. Dies ermöglicht anynode, auf die Azure AD-bezogenen Benutzerinformationen zuzugreifen, indem ein Azure Dial String Directory erstellt wird. Dieses Verzeichnis wird bei verschiedenen Einstellungen und flexiblen Filterbedingungen mit allen abgerufenen Daten gefüllt. Um die Dial Strings und dazugehörenden Informationen abzurufen, werden die Daten zwischengespeichert und nach einem definierten Intervall abgerufen. Durch die zentrale Verwaltung im Azure Active Directory benötigt anynode keine Änderungen im Falle, wenn Benutzer gelöscht oder hinzugefügt werden.
The newly created Azure Dial String Directories can be bound to the route filters of anynode’s Routing Domains. A Routing Domain example will be reviewed in this video workshop later.
Prerequisites
You will need the following requirements for a successful registration of anynode and access to the Azure AD:
- An Azure AD tenant that corresponds with the appropriate Office 365 environment.
- An Azure AD for Office 365 license.
- An additional certificate in case of certificate pinning as described later in this video workshop
- At minimum, an anynode installation using the certified version 4.2 (or higher).
- Appropriate network access, network routing, and administration rights.
- Access to the installed and configured VoIP environment.
- VoIP credentials for the involved nodes to allow for appropriate configurations.
Register anynode in Azure portal
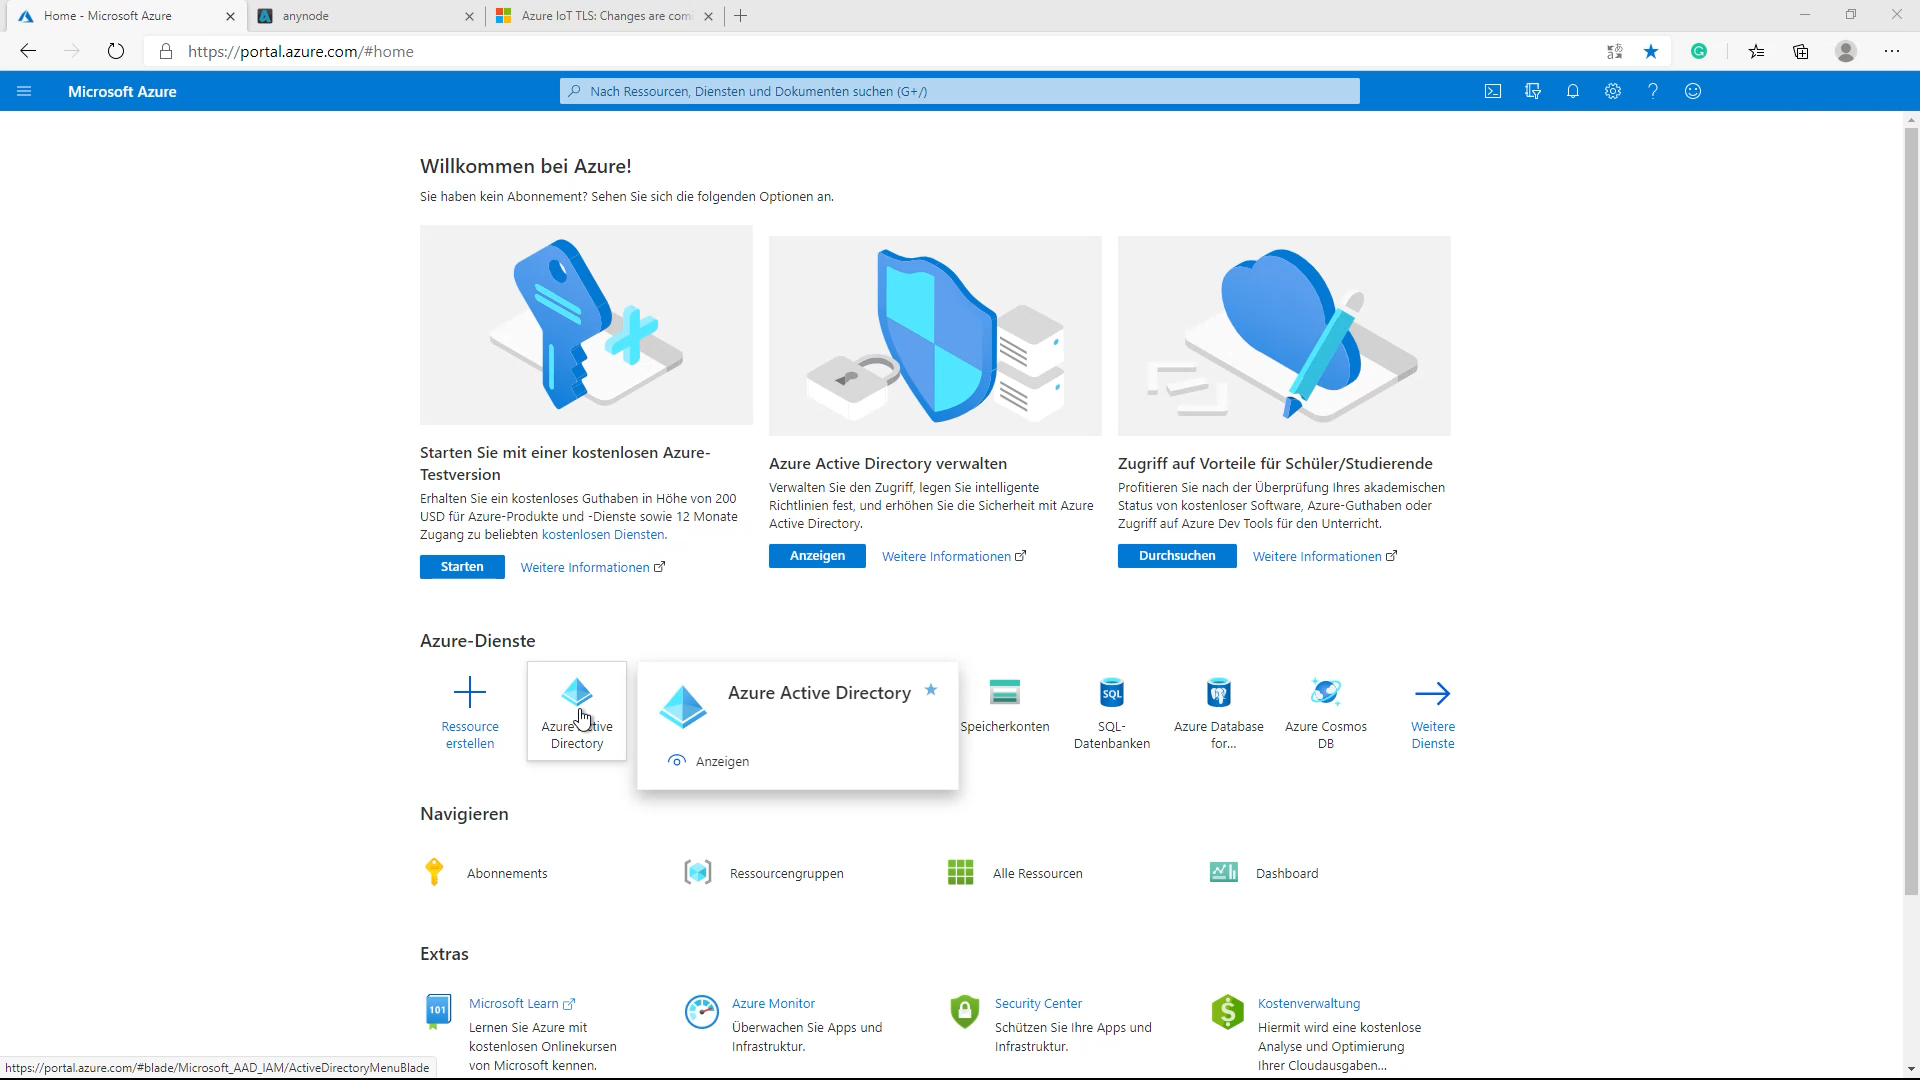
For the Microsoft Azure Active Directory configurations, please log either into the Azure Portal https://portal.azure.com/ or the Azure Active Directory Admin Center https://aad.portal.azure.com/.
App Registration
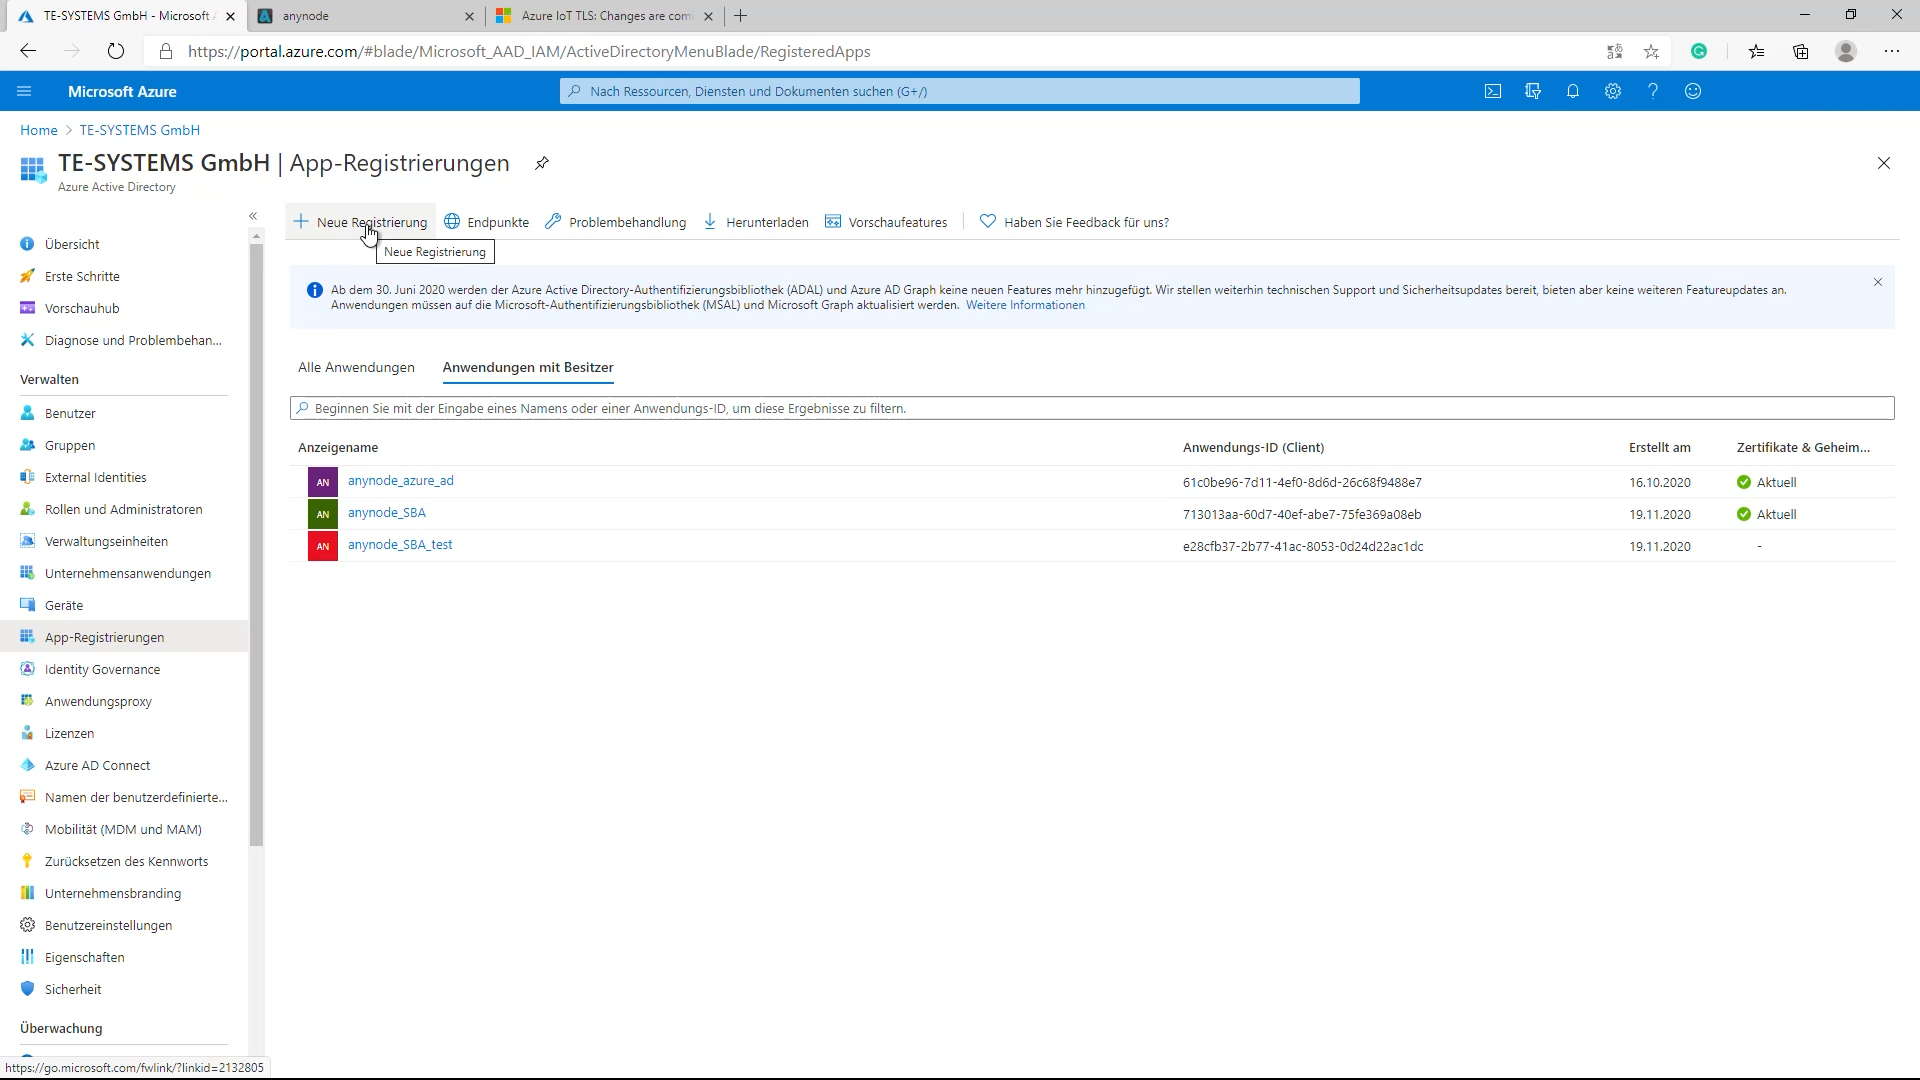
For registering anynode as an application in the Azure AD tenant, change the portal view to the App registrations dialog and click New registration. Next, anynode_workshop_video_ad is entered as a name.
“TE-SYSTEMS only – Single-tenant” is selected as a Supported account type. All user and guest accounts in your directory can use your application or API. Use this option if your target audience is internal to your organization. Once everything is set continue with Register.
The registered application for anynode is now created with an Application (client) ID and it is associated with the Directory (tenant) ID.
Please note that both IDs are required for setting up the anynode Azure Dial String Directory as described later in this video.
Certificates and Secrets
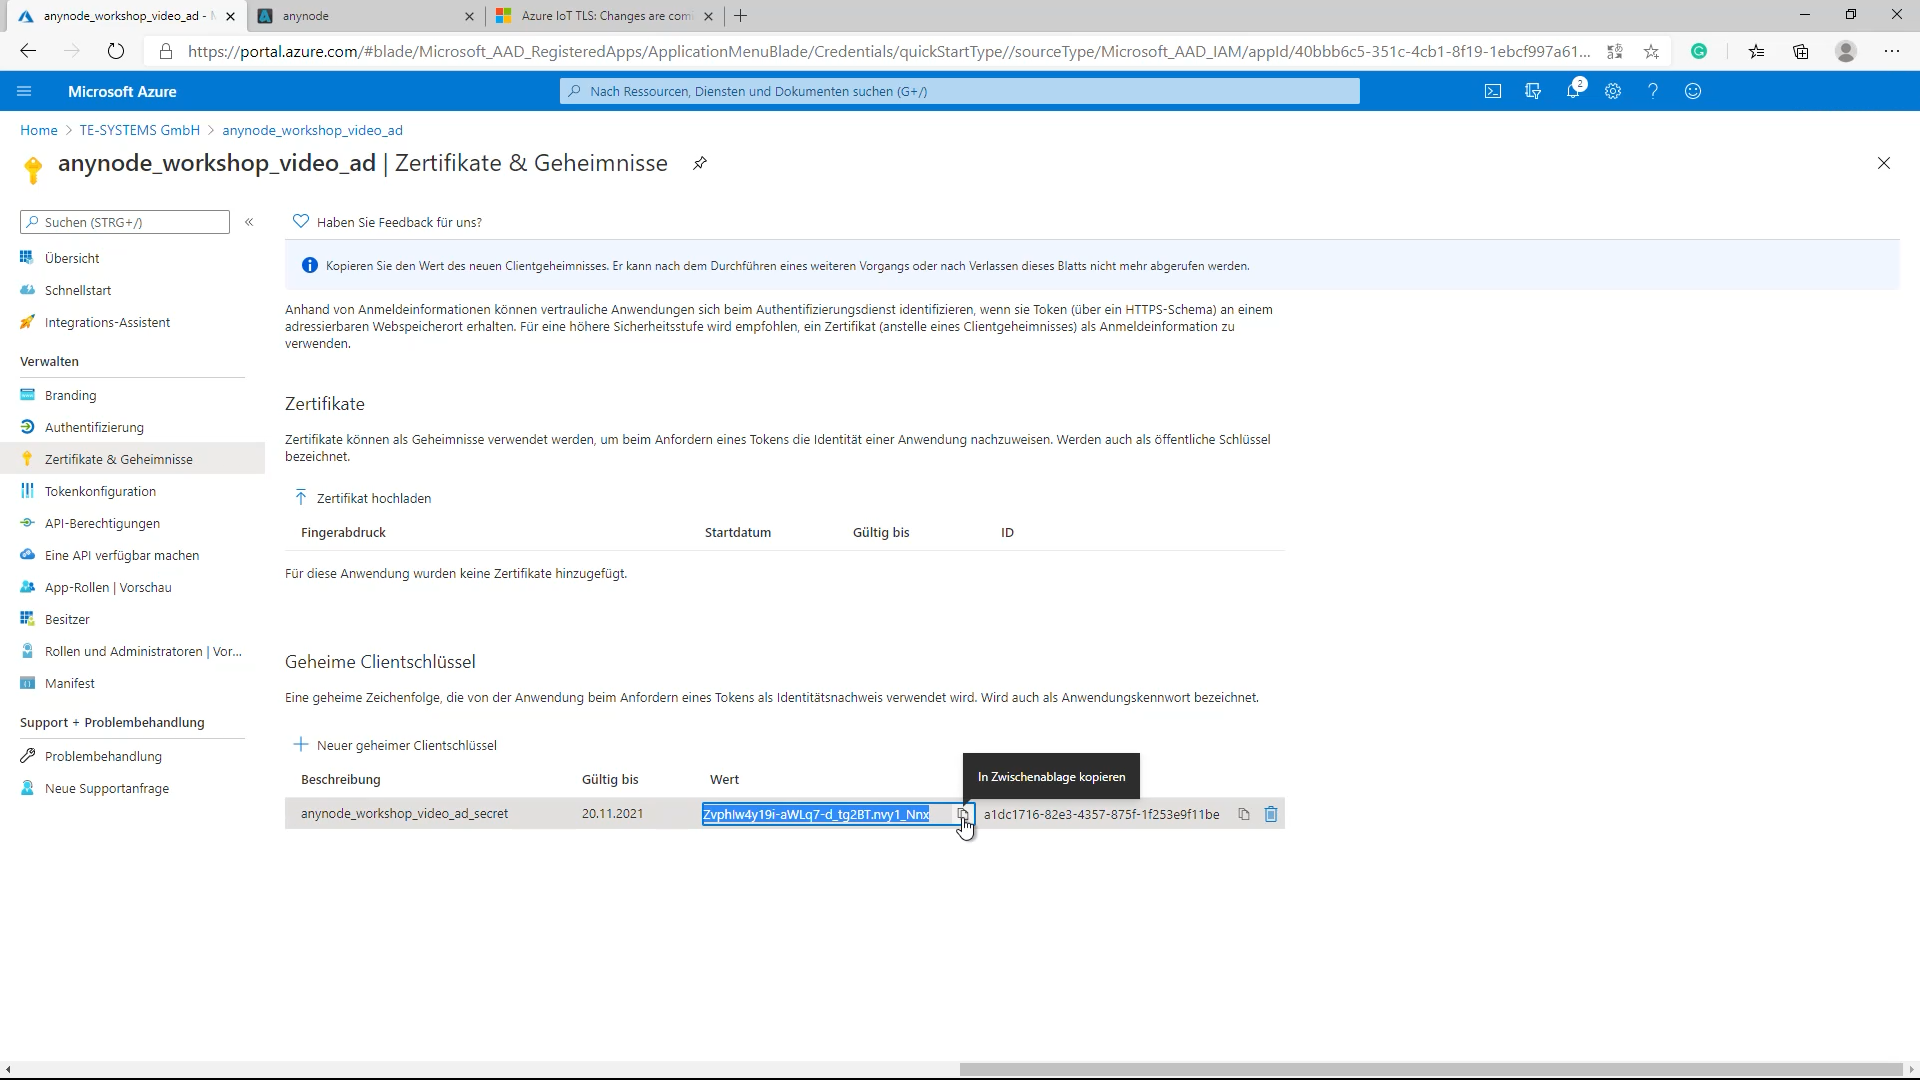
A secret string that is used by anynode for the anynode_azure_ad must be generated. This secret can refer to as a password, used by the application to prove its identity when requesting a token. For this task please change to the application view and the Certificates and secrets dialog.
Once there, use the New client secret button. Add a The Expires option is selected with 1 year. If everything is correct, generate the client secret by clicking Add. The newly created client secret (password) is now generated with a random value.
Use the Copy to clipboard function as this value must be available and entered as client secret (password) for anynode’s Azure Dial String Directory as shown later in this video.
Please note, you have to copy and paste the value of the client secret (password) immediately, it’s not possible to do this at a later stage.
API Permissions
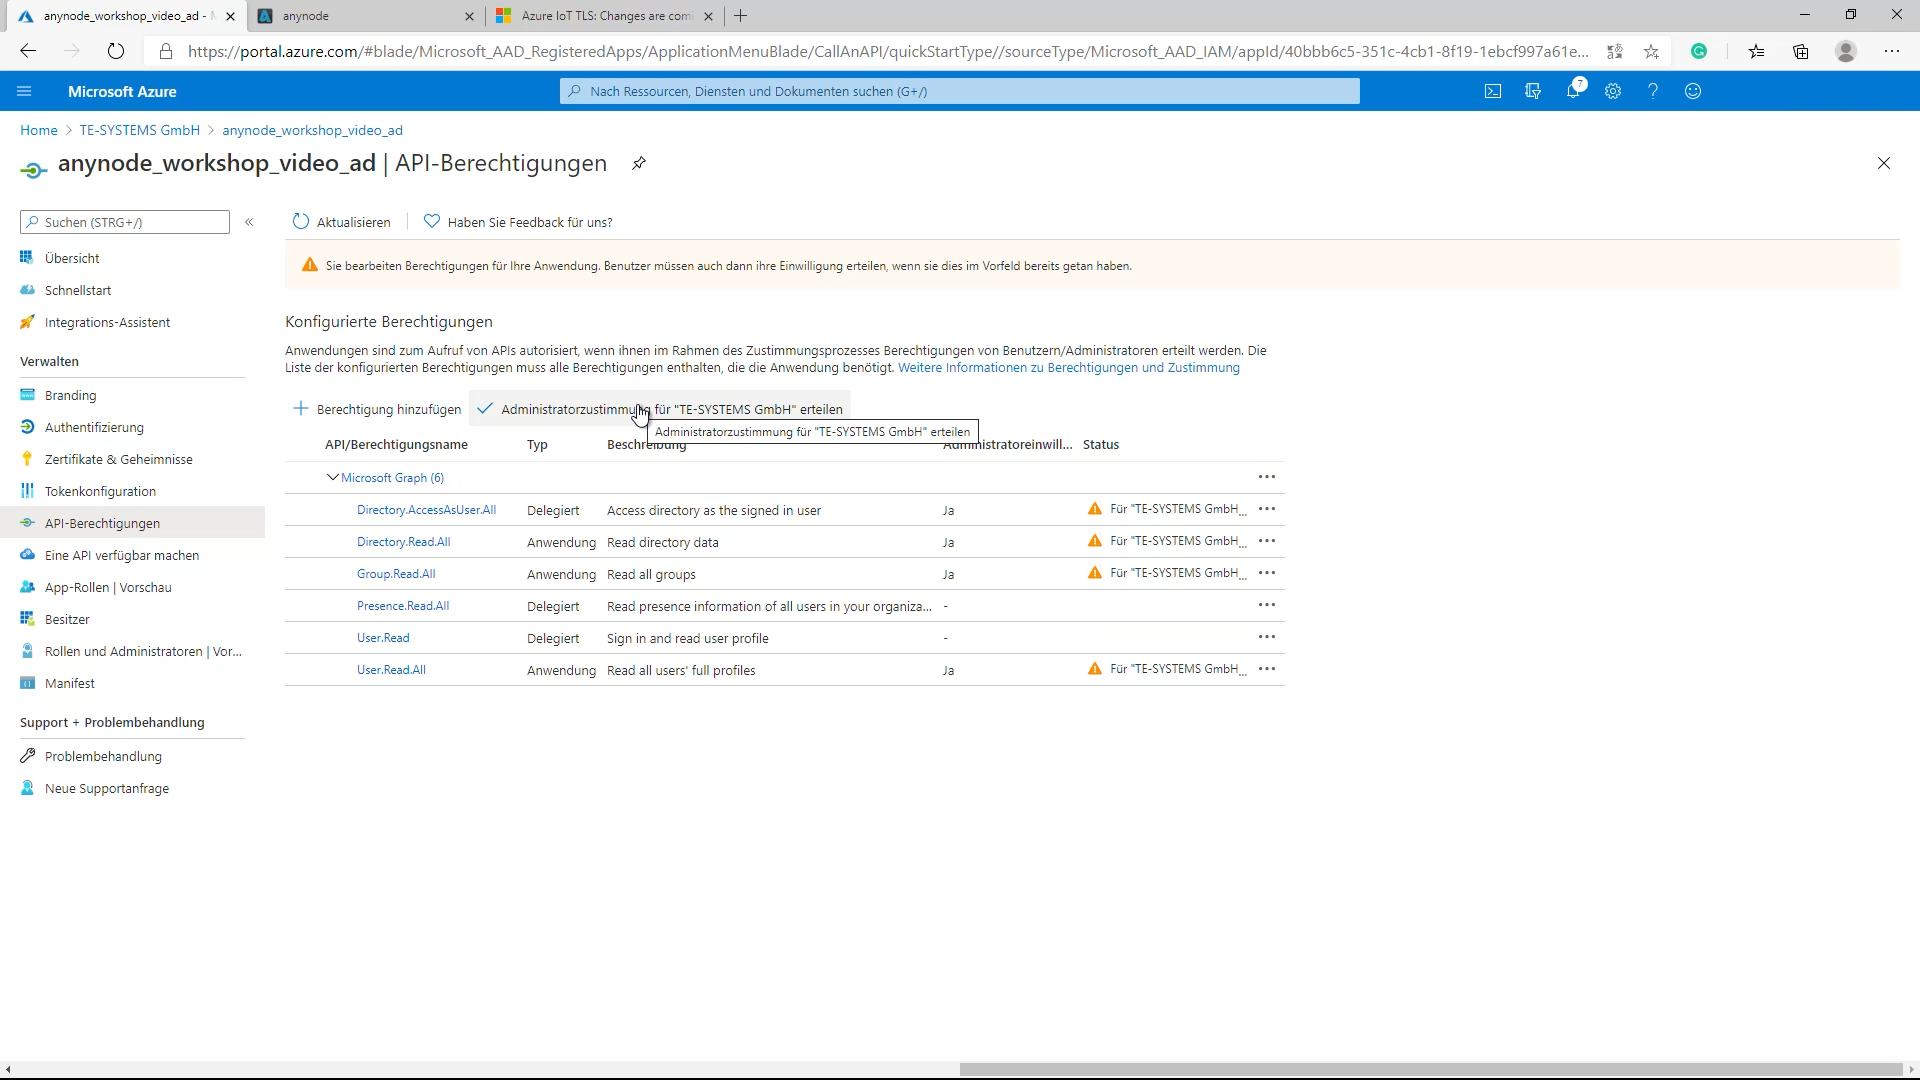
The newly created and registered anynode application (anynode_workshop_video_ad) is initially only enabled with the User. Read permissions. It is necessary to add additional Delegated and Application related permissions. This example uses the referenced Microsoft Graph API Permissions as shown:
Delegated permissions
- Directory.AccessAsUser.All (Access directory as the signed-in user)
- Presence.Read.All (Read presence information of all users in your organization)
Application permissions
- User.Read.All (Read all users’ full profiles)
- Group.Read.All (Read all groups)
- Directory.Read.All (Read directory data)
Please check with the Microsoft Graph permissions reference for details, hints, and known issues. For adding permissions, select the registered application of anynode and change the view to API permissions. There select “Add a permission”, then Microsoft Graph from the listed Microsoft APIs.
If the API permissions are set, proceed with Grant admin consent for the tenant. Please note, if the button Grant admin consent for the tenant is greyed out, check with the Assigned roles of the recent User that is logged into the Azure portal. Some roles might be not set for that user account, e.g. the Privileged role administrator.
Once completed properly, the added API permissions and their states, see Status column, are now displayed with Granted.
API permissions: Functions overview
Now, let’s take a closer look at the API functions once more, and see which is best to achieve what we want anynode to do.
- The DirectoryAccessAsUser.All and Presence.Read.All permissions are needed to access the “Presence” user status. In this case, the MS Graph password method must be used for authentication. If this option is used, an extra user should be created in the User AD for this access. This user does not need any extra rights, as far as known. We will show an example for the MS Graph password method authentication later in this tutorial video.
- Directory.Read.All is needed if license information should be included in the filter.
- Group.Read.All: This right is needed if you want to include the groups and the user memberships of the groups in the filter.
- User.Read.All is the basic right, which is needed to access user attributes (e.g. business phone) of users.
Basically, the delegated permissions are only needed if the user status is to be accessed.
Configuration in anynode frontend
anynode Azure Dial String Directories
For accessing a Microsoft Azure Active Directory tenant through the anynode frontend, a new Azure Dial String Directory must be created. The configuration tasks for that will be processed with the help of anynode’s Directory Assistant.
Add Directory
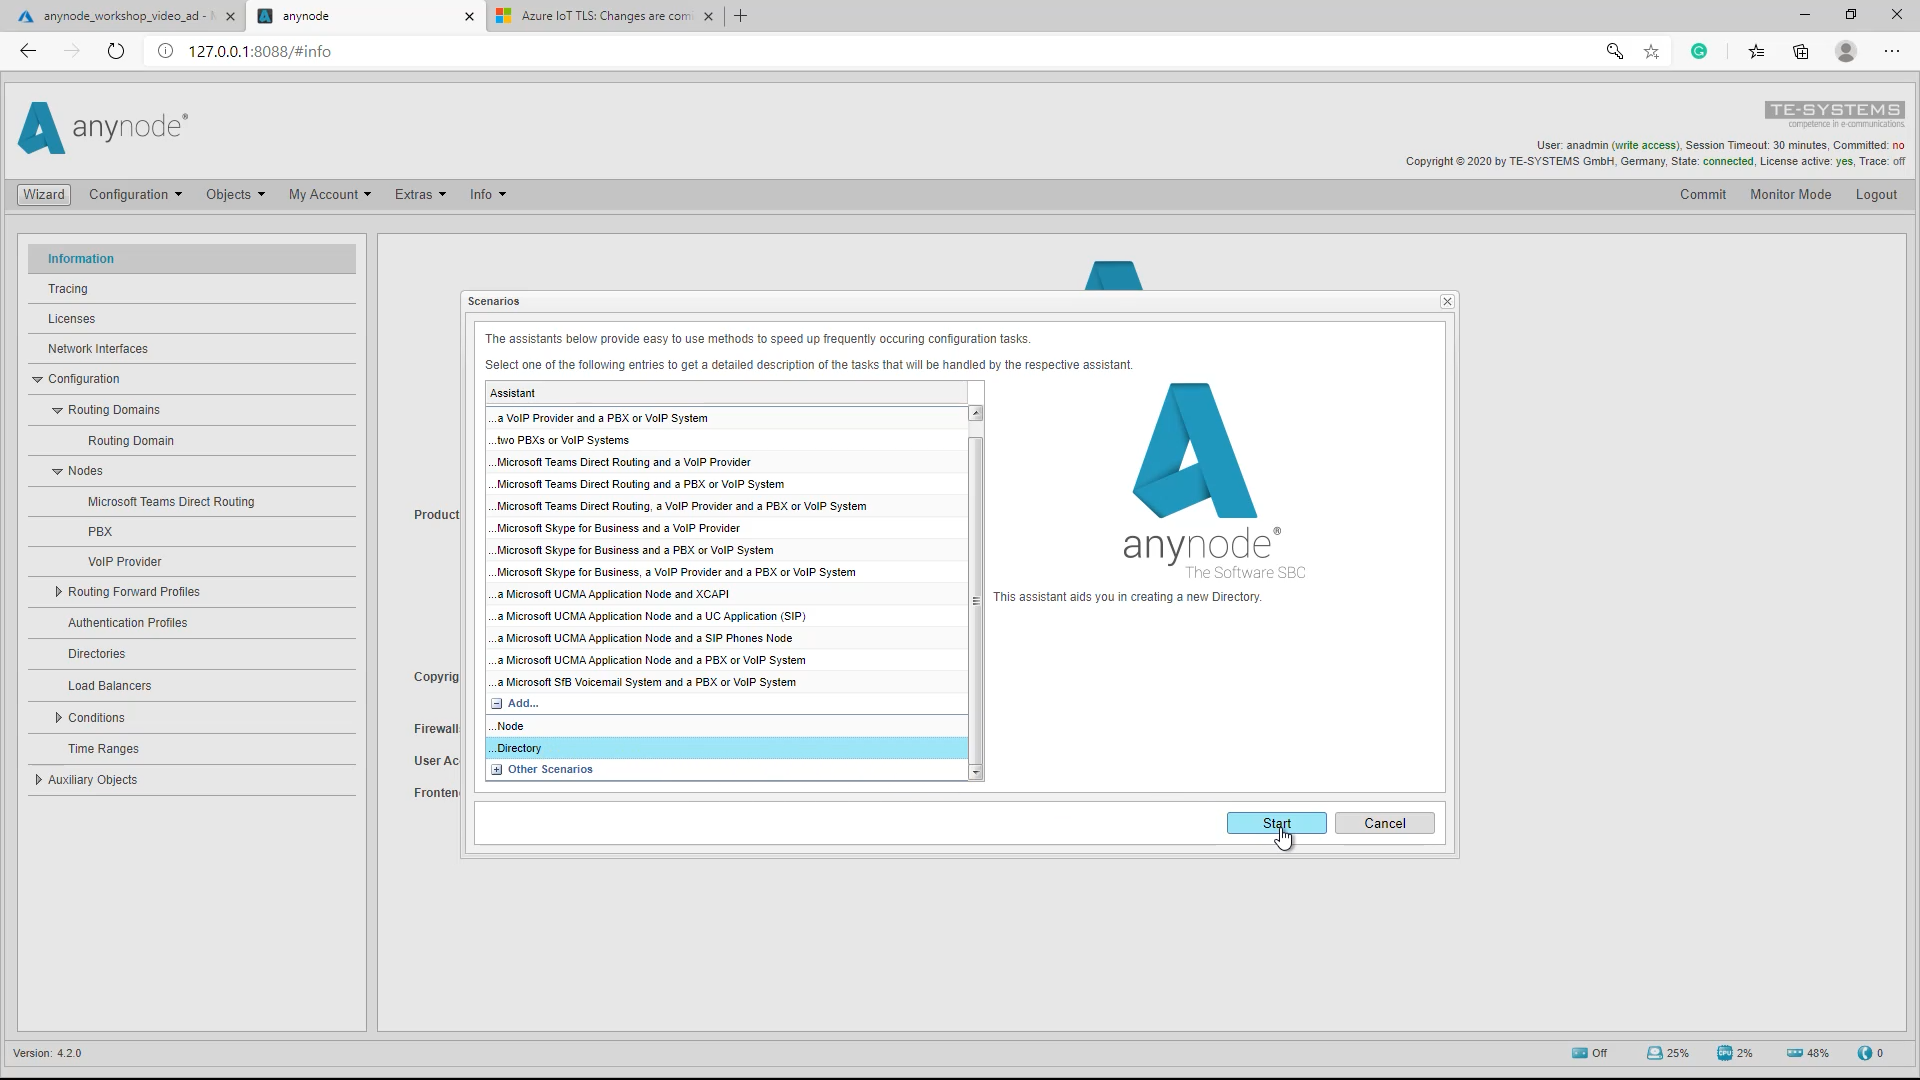
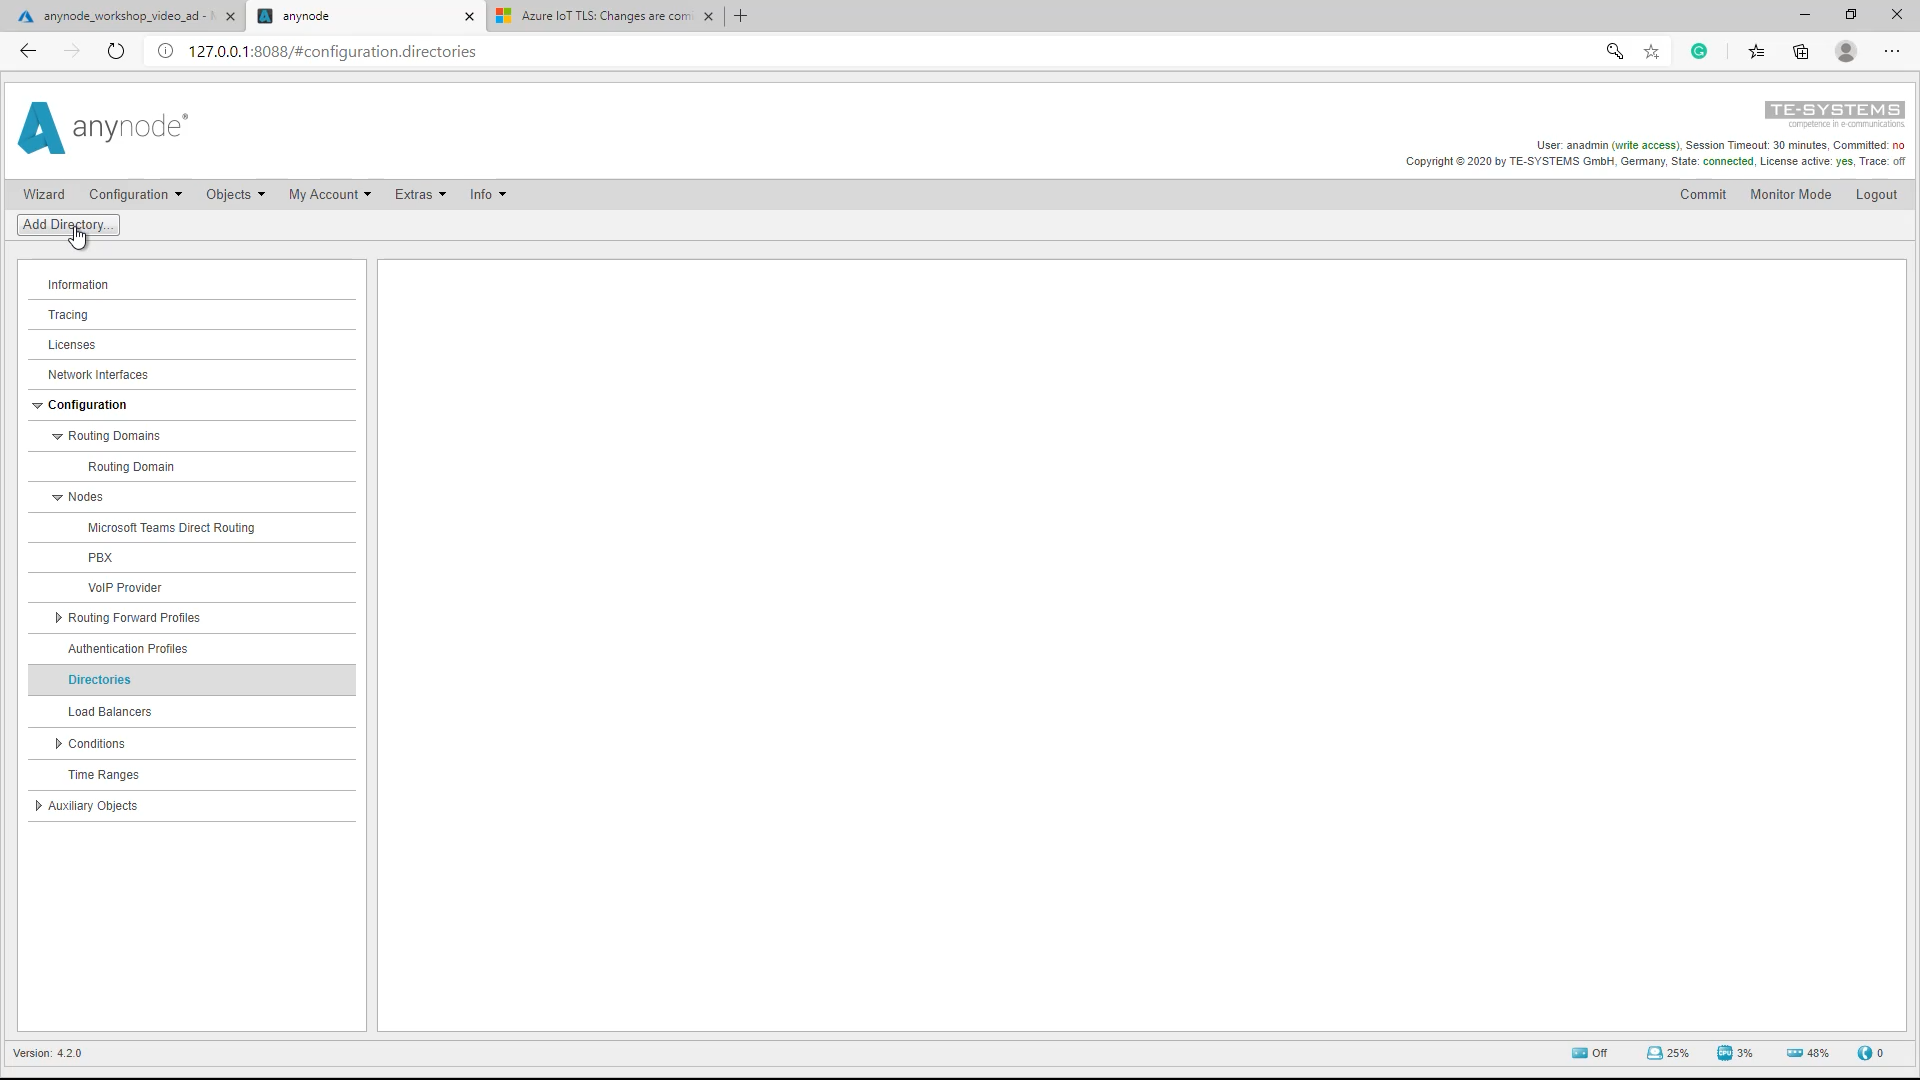
You can create and add a new Azure Dial String Directory through the anynode scenario wizard. Alternatively, use the Add Directory button within the Directories configuration dialog.
Creation Type
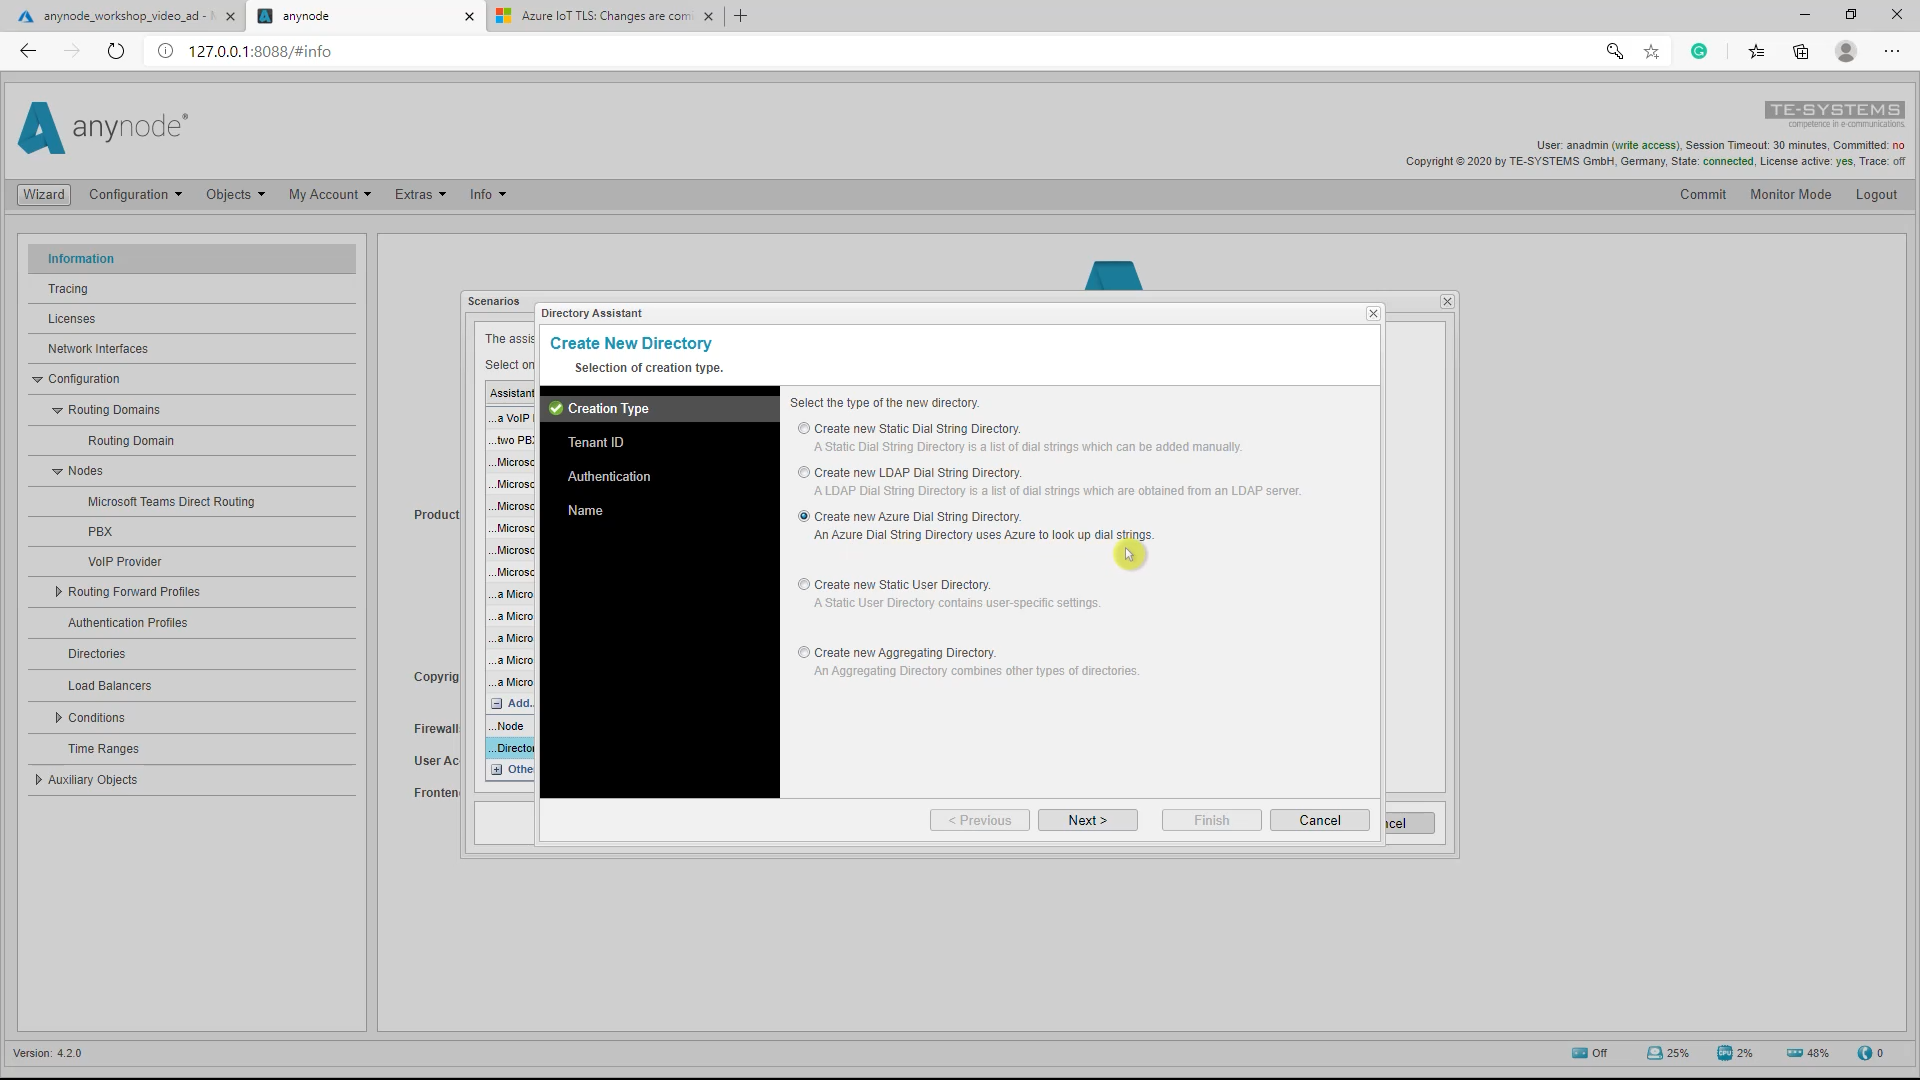
In the first Creation Type dialog of the Directory Assistant, select Create new Azure Dial String Directory and proceed with Next.
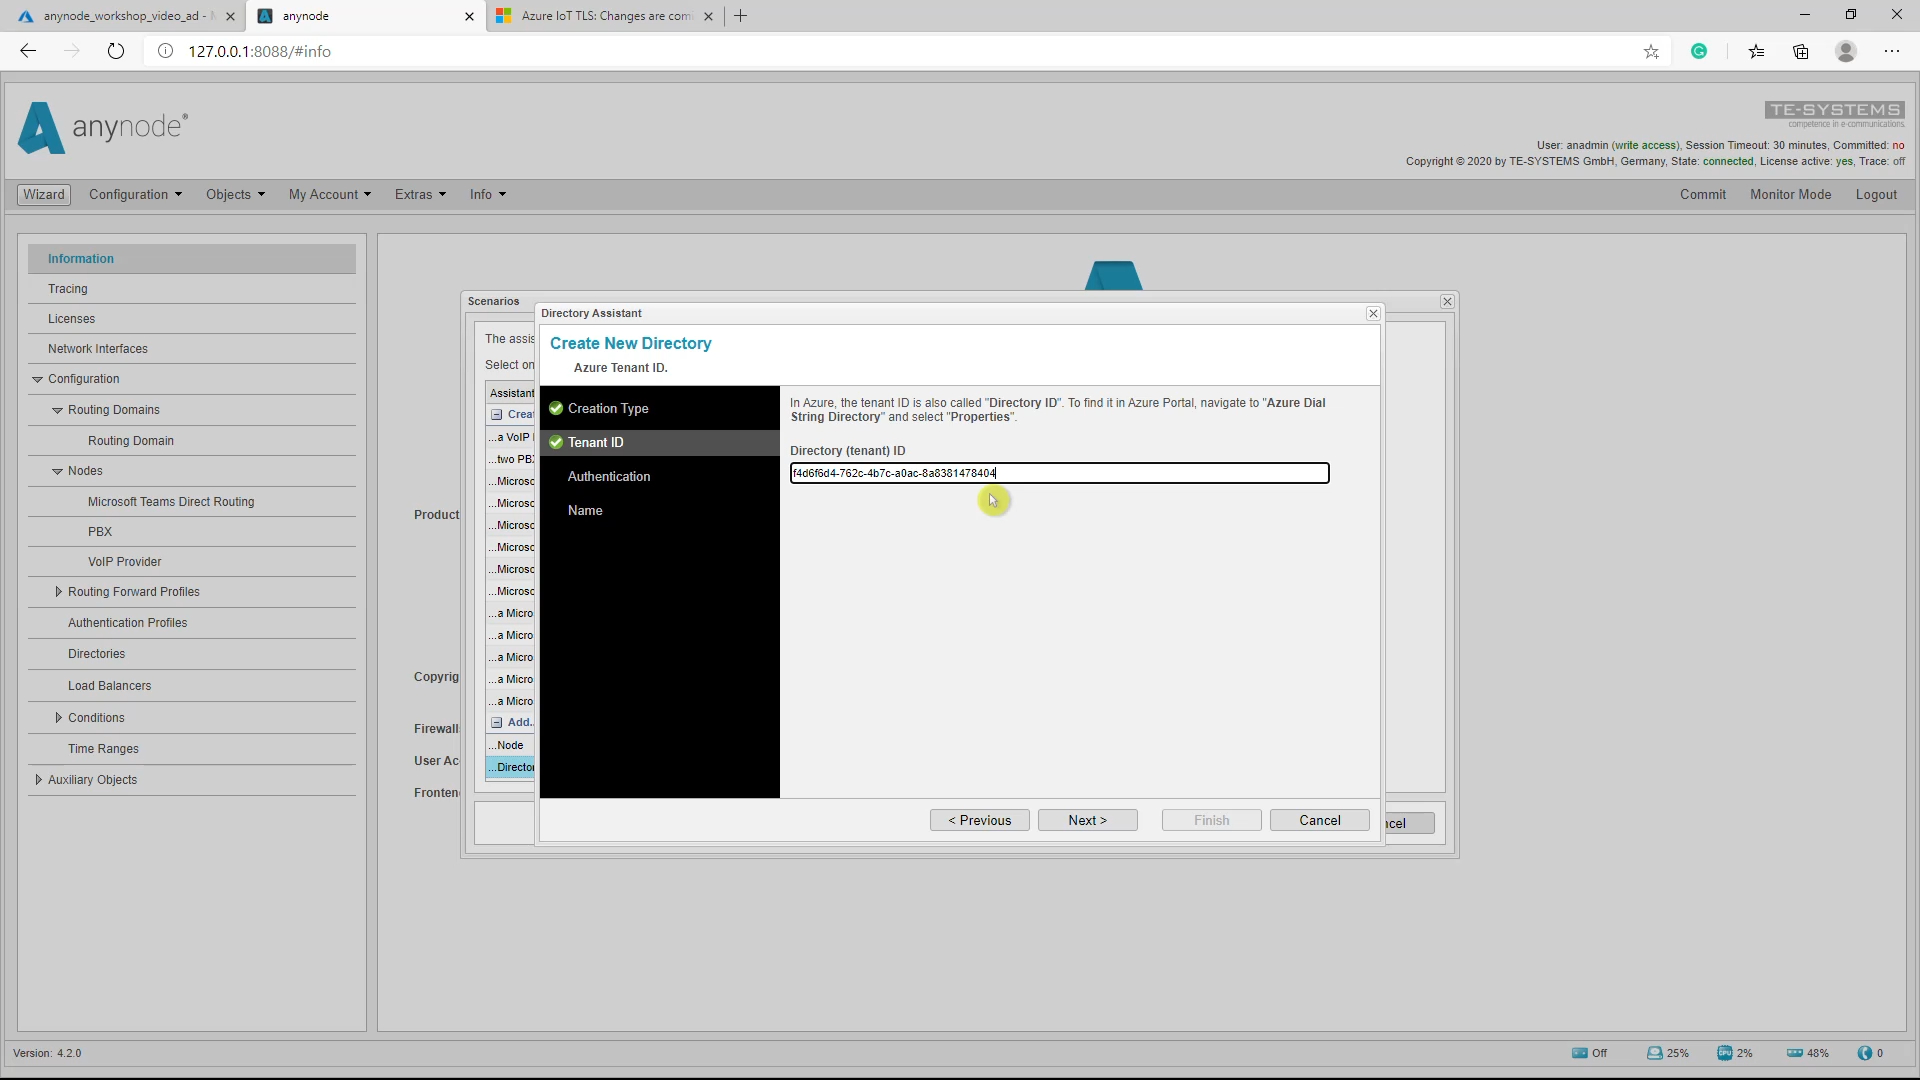
Tenant ID
Next, enter the Directory ID. This is the Tenant ID of your Microsoft Azure Active Directory environment. The Tenant ID can be found in the Azure Active Directory Admin center dashboard dialogs.
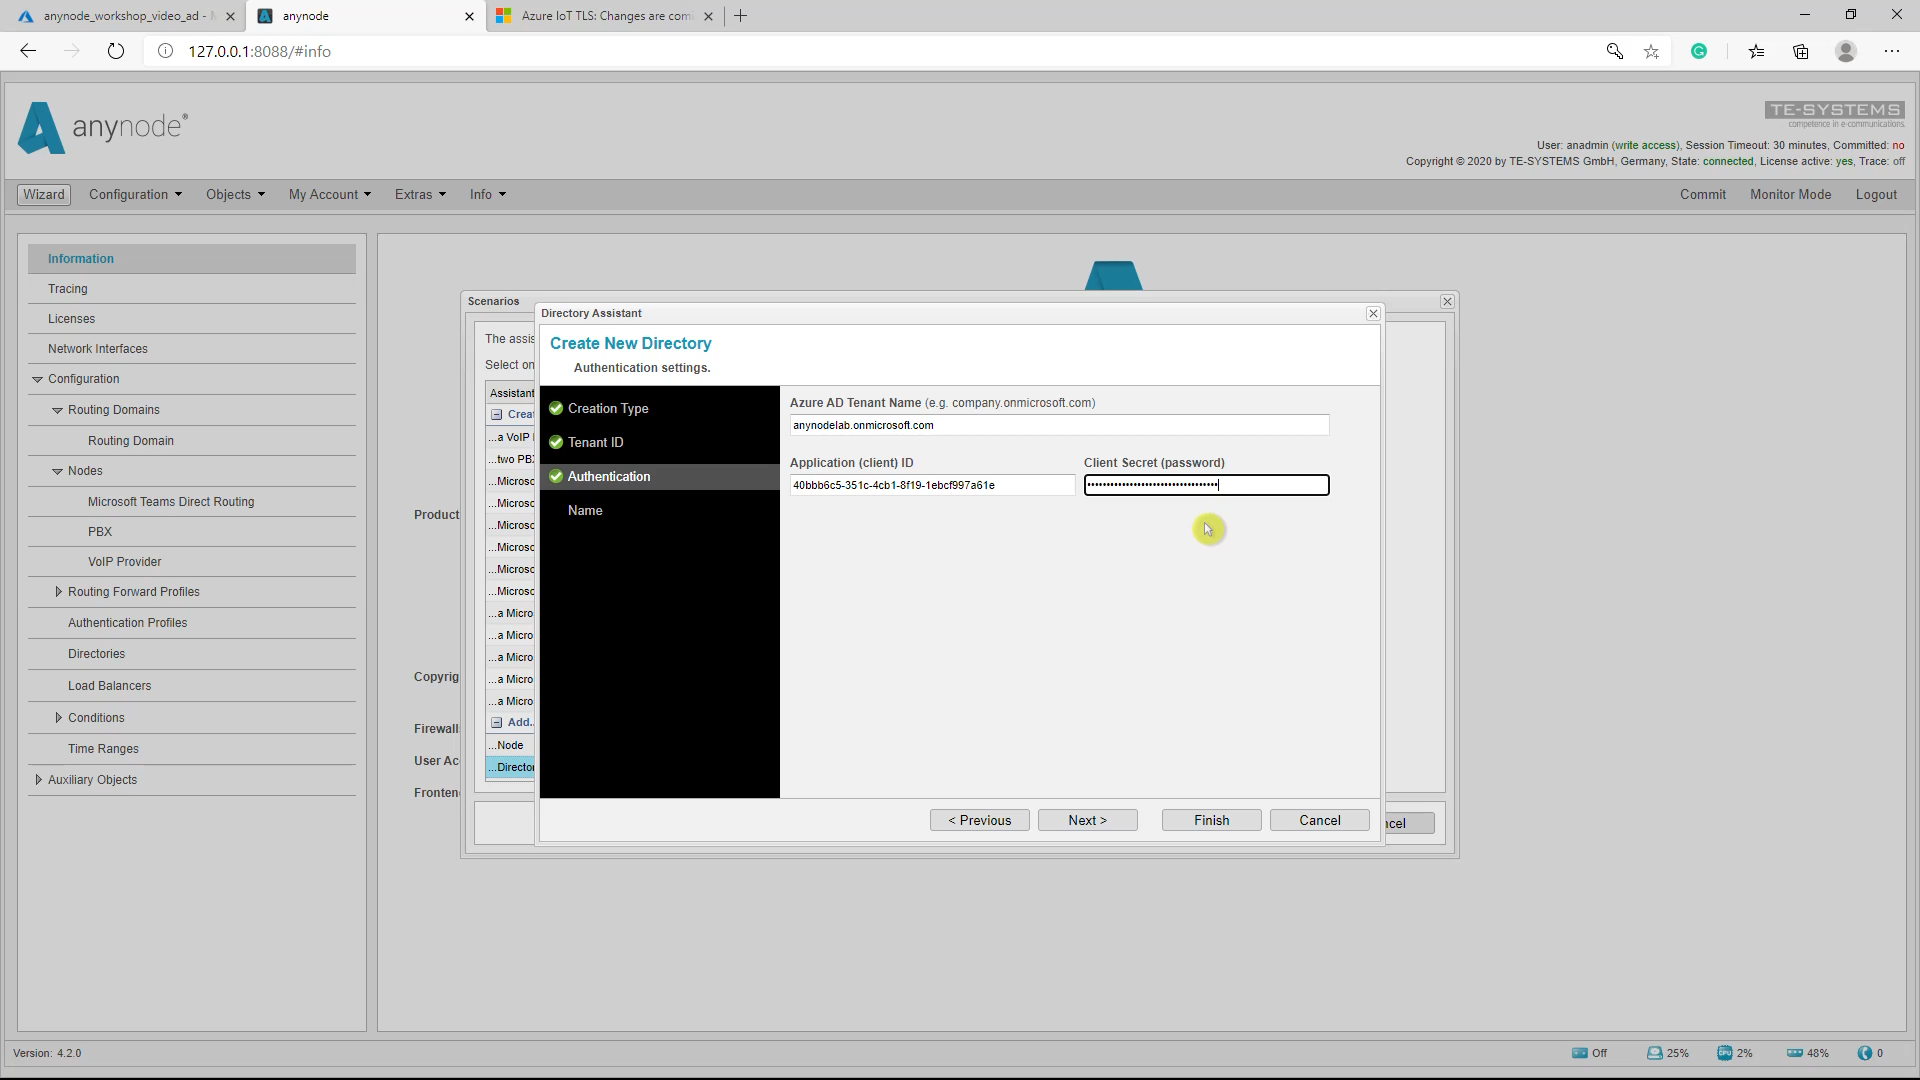
Authentication
For the Authentication, set the Azure AD Tenant Name with one of the verified domain names (in this example anynodelab.onmicrosoft.com) and the Application (client) ID with the associated Client Secret (password) which has been created as a managed application in the local directory of the tenant.
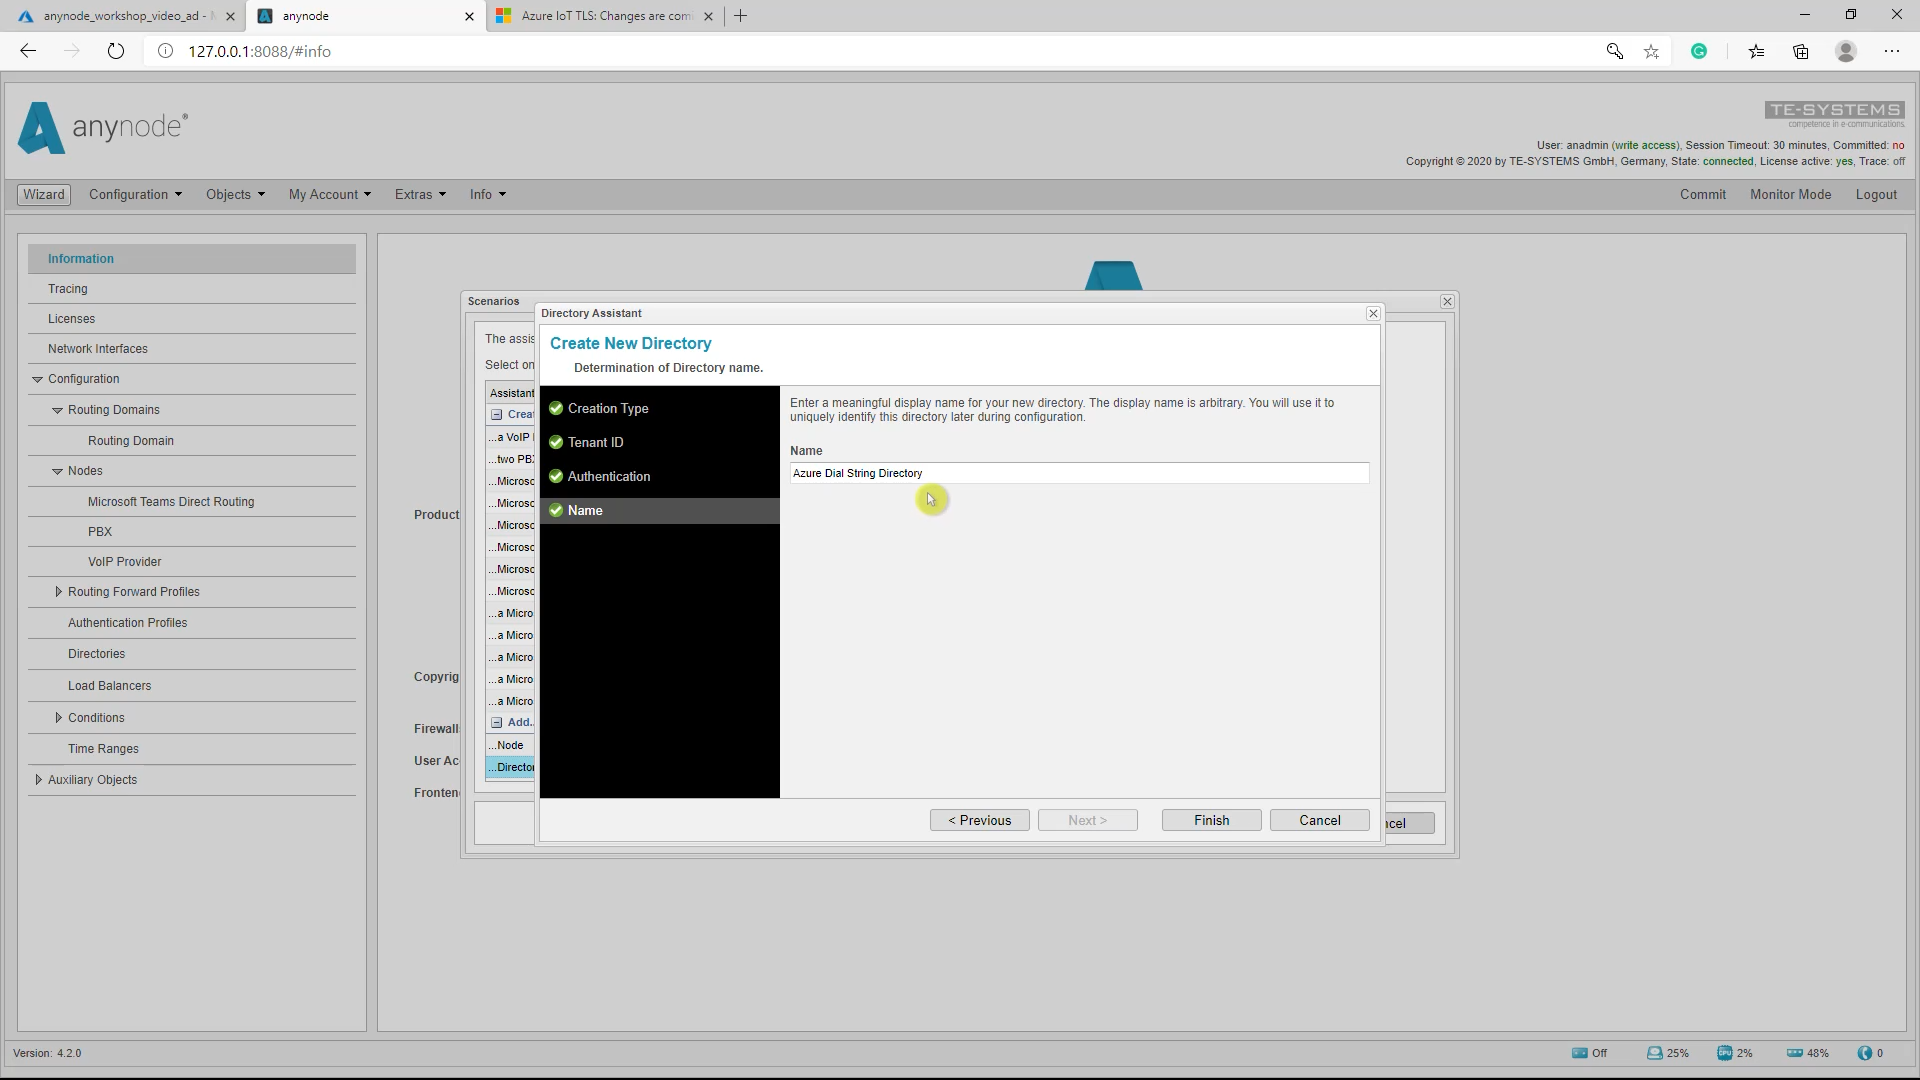
Name
In the last assistant dialog, set the name for the newly created Azure Dial String Directory and finalize the configurations with the Finish button. The Azure Dial String Directory is now being created. Make sure to click Commit to save the newly created configuration.
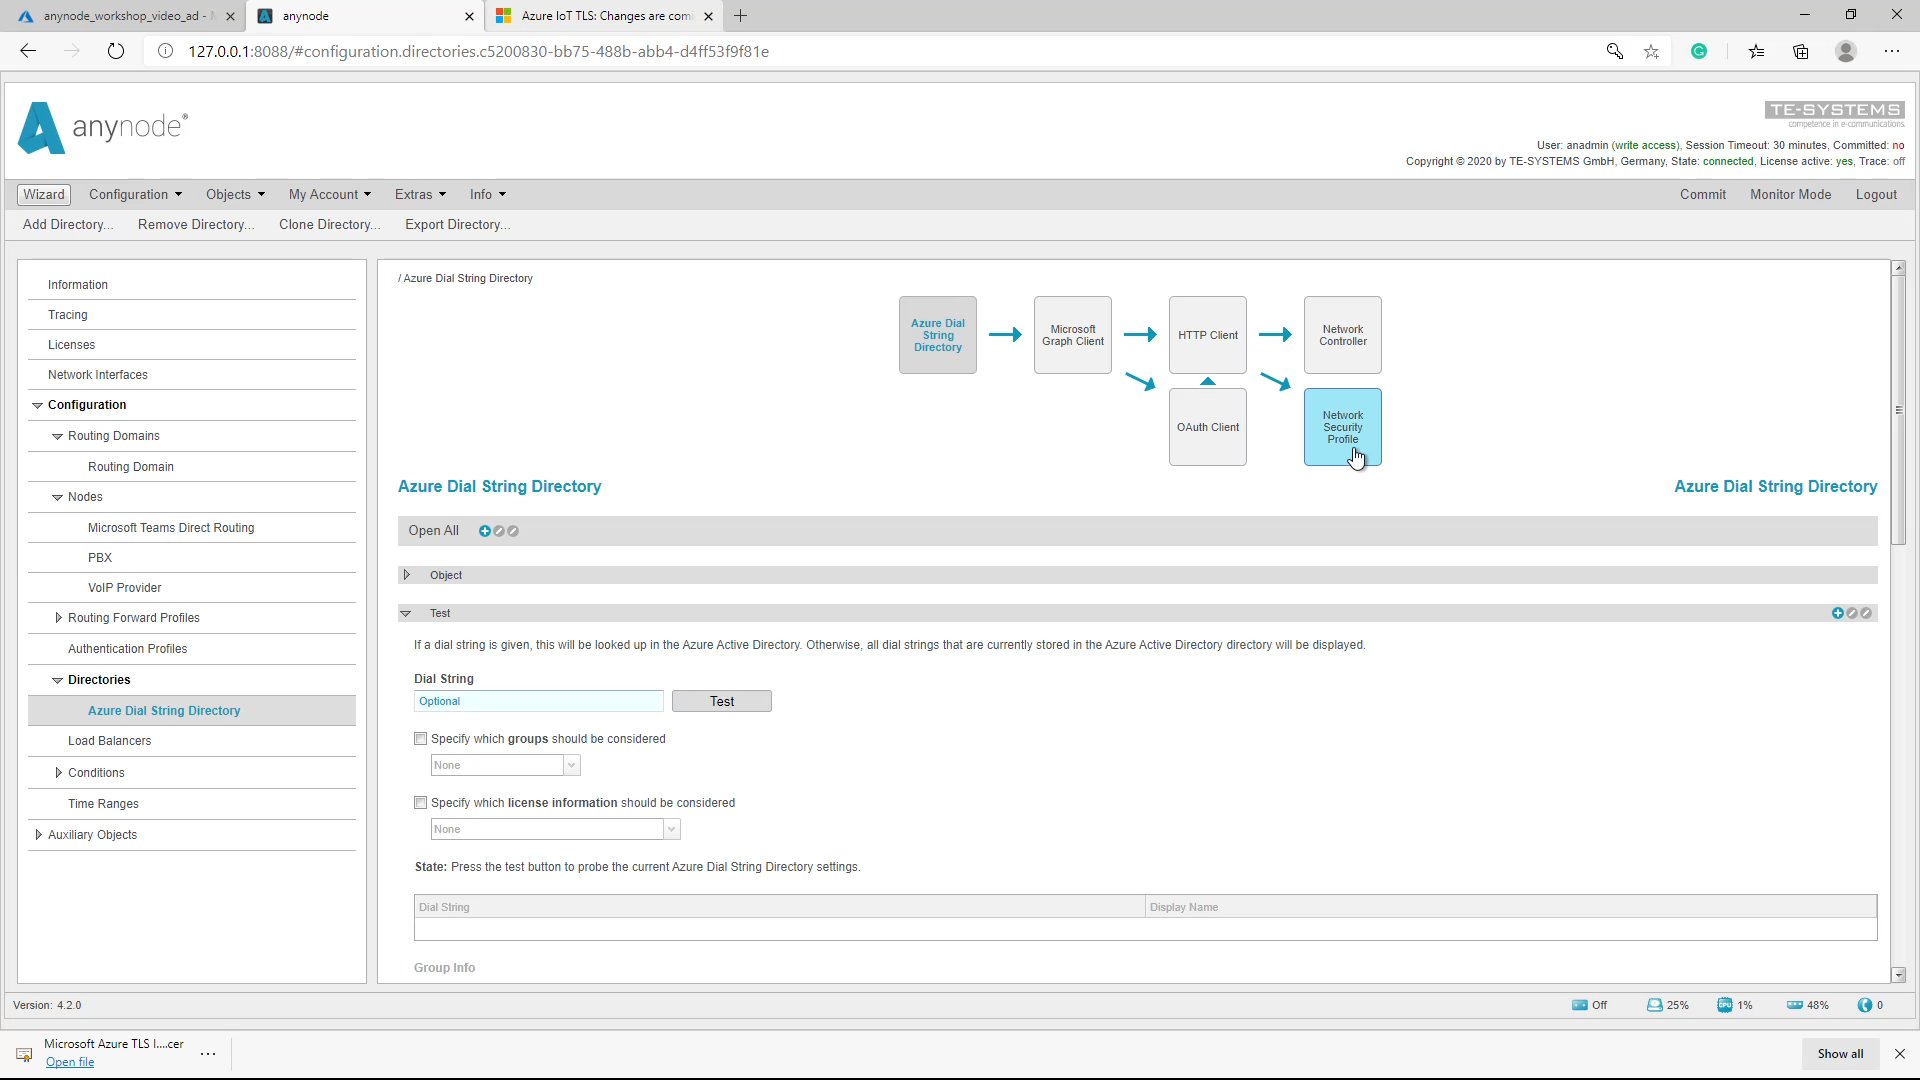
Network Security Profile
Due to updated Microsoft Azure cloud services and TLS related changes, additional configurations are required if certificate pinning is used. This may require importing additional Microsoft Azure TLS certificates for anynode’s Azure Dial String Directory and its Network Security Profile.
Please check the Microsoft Tech community article for complete details.
Although anynode and its assistant usually provide the required certificates, they may no longer be valid because some security settings have been changed.
Check the chapter “To minimize future code changes” and download the “Microsoft Azure TLS Issuing” Certificates.
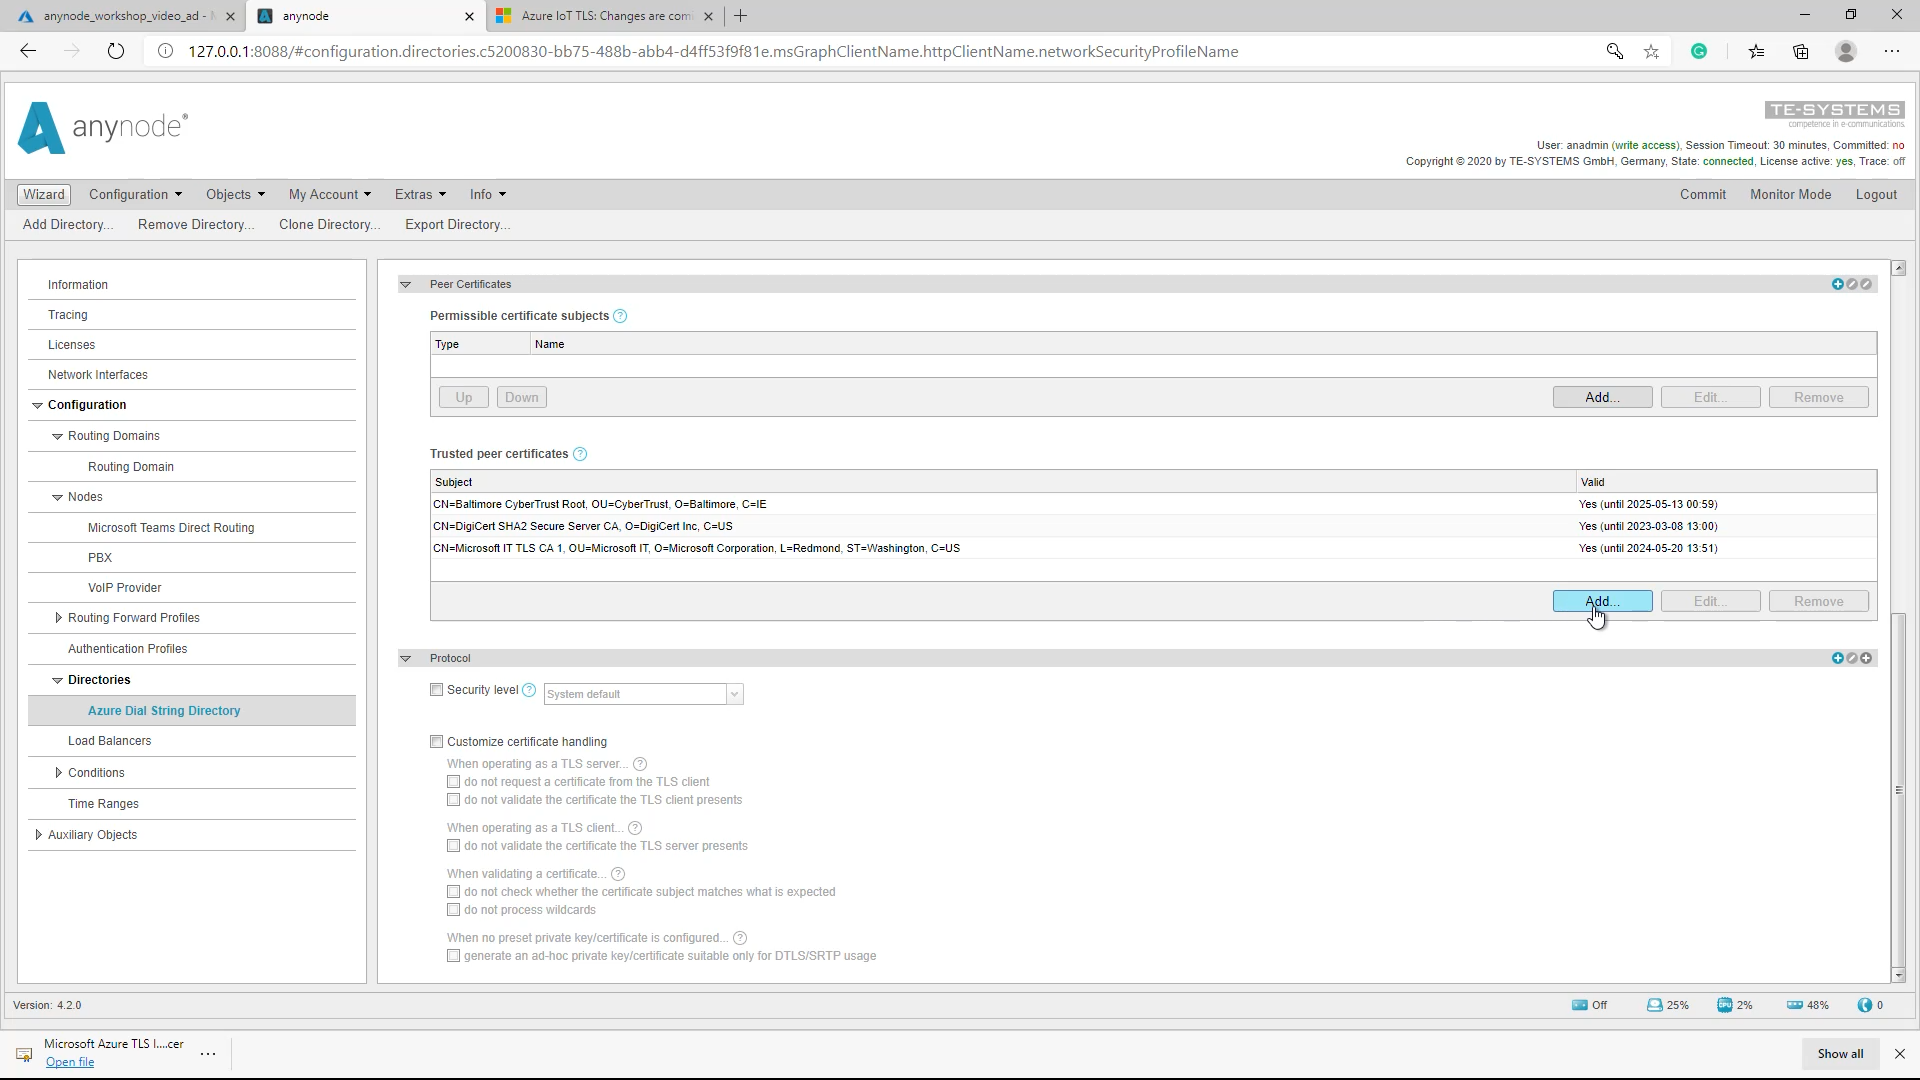
Add Trusted Peer Certificate
For adding the desired certificate, please change the view to the Network Security Profile of the Azure Dial String Directory. In the Peer Certificates section, click the Add button beneath the Trusted peer certificates.
We will now show the configuration steps of importing the Microsoft Azure TLS Issuing CA 01.cer certificate.
Once the upload completes, the Upload is completed. its certificate and state will be displayed. Finalize the import by clicking Finish.
The imported certificate is now set for the Azure Dial String Directory. Don’t forget to Commit afterward to save the new configuration.
Select correct IP for access to the Azure AD
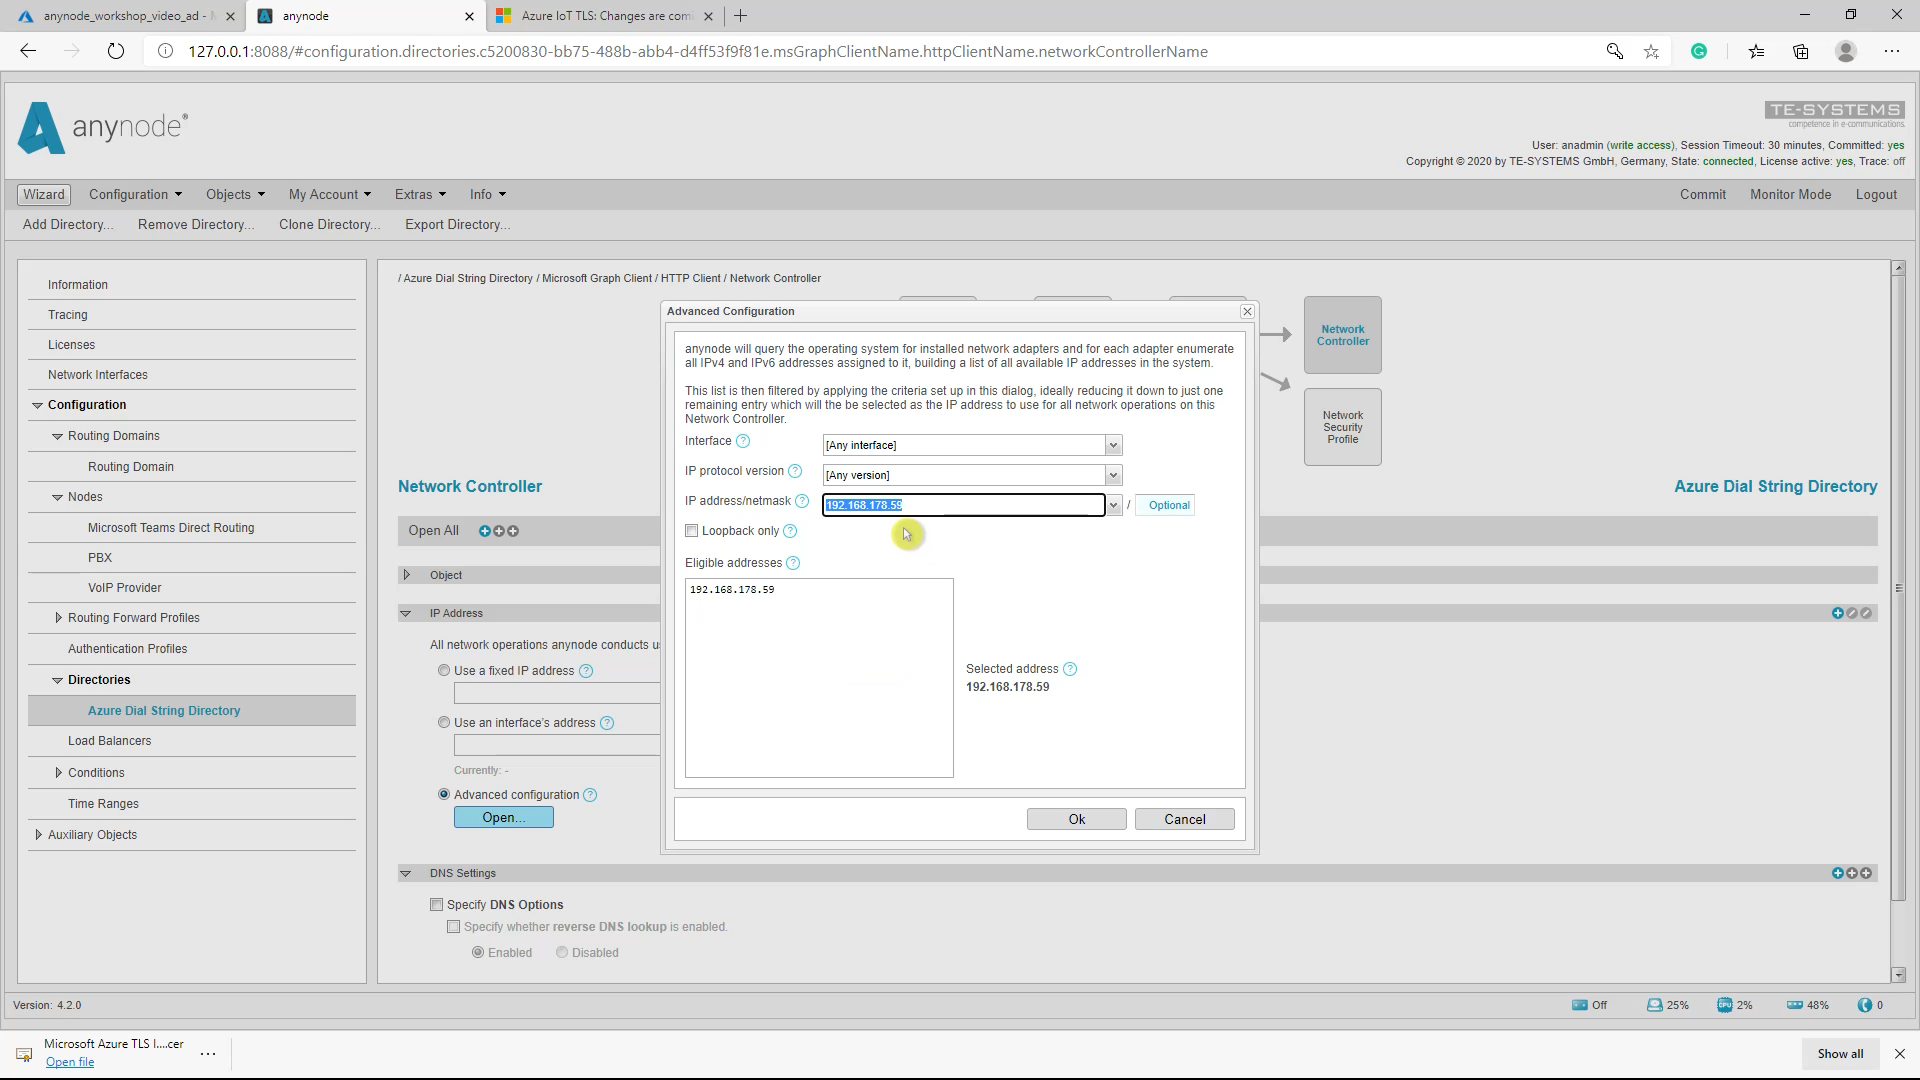
Finally, you have to make sure that the automatically selected IP in your Network Controller View can access the public internet.
Open “Advanced Configuration” and select the correct IP address. Don’t forget to commit afterward to save the new configuration.
Connectivity test
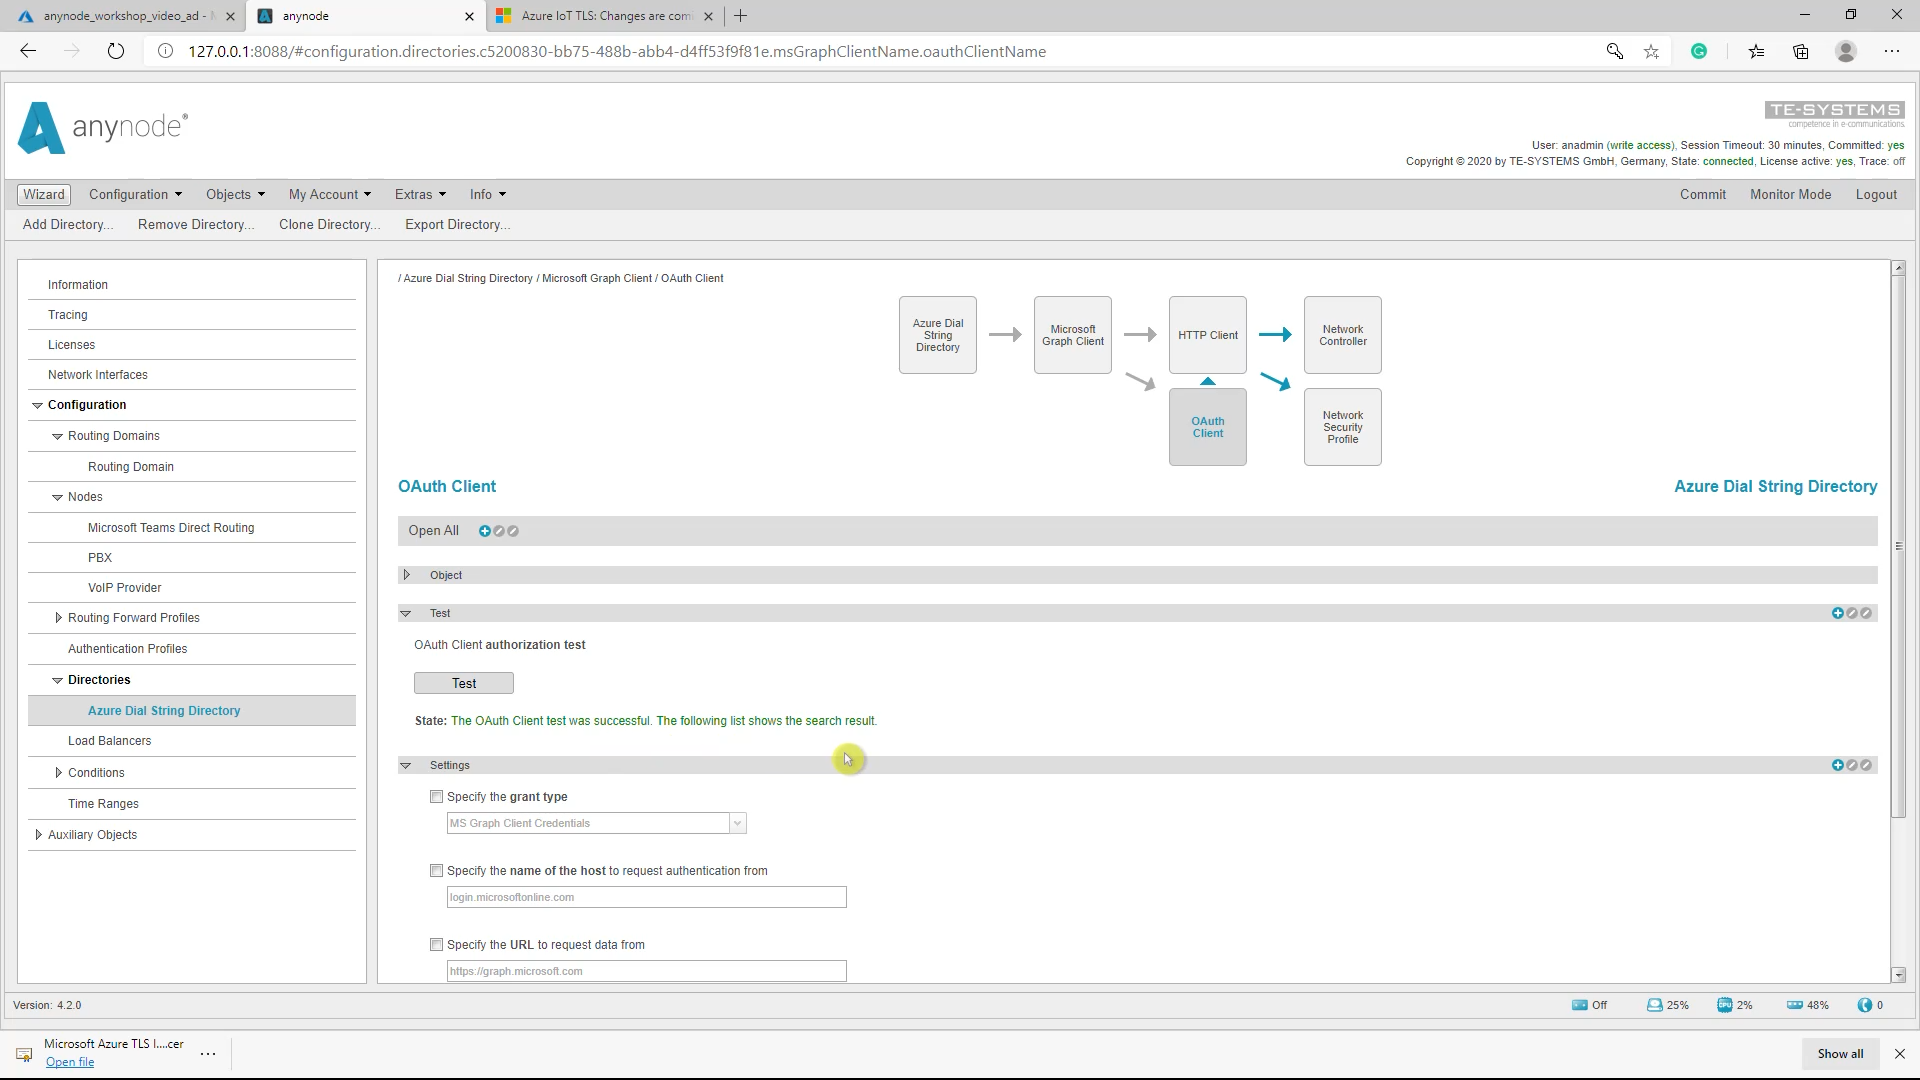
For the connectivity test, it is recommended to do the OAuth Client Authorization Test first and when successful continuing with the Microsoft Azure Active Directory Connectivity Test.
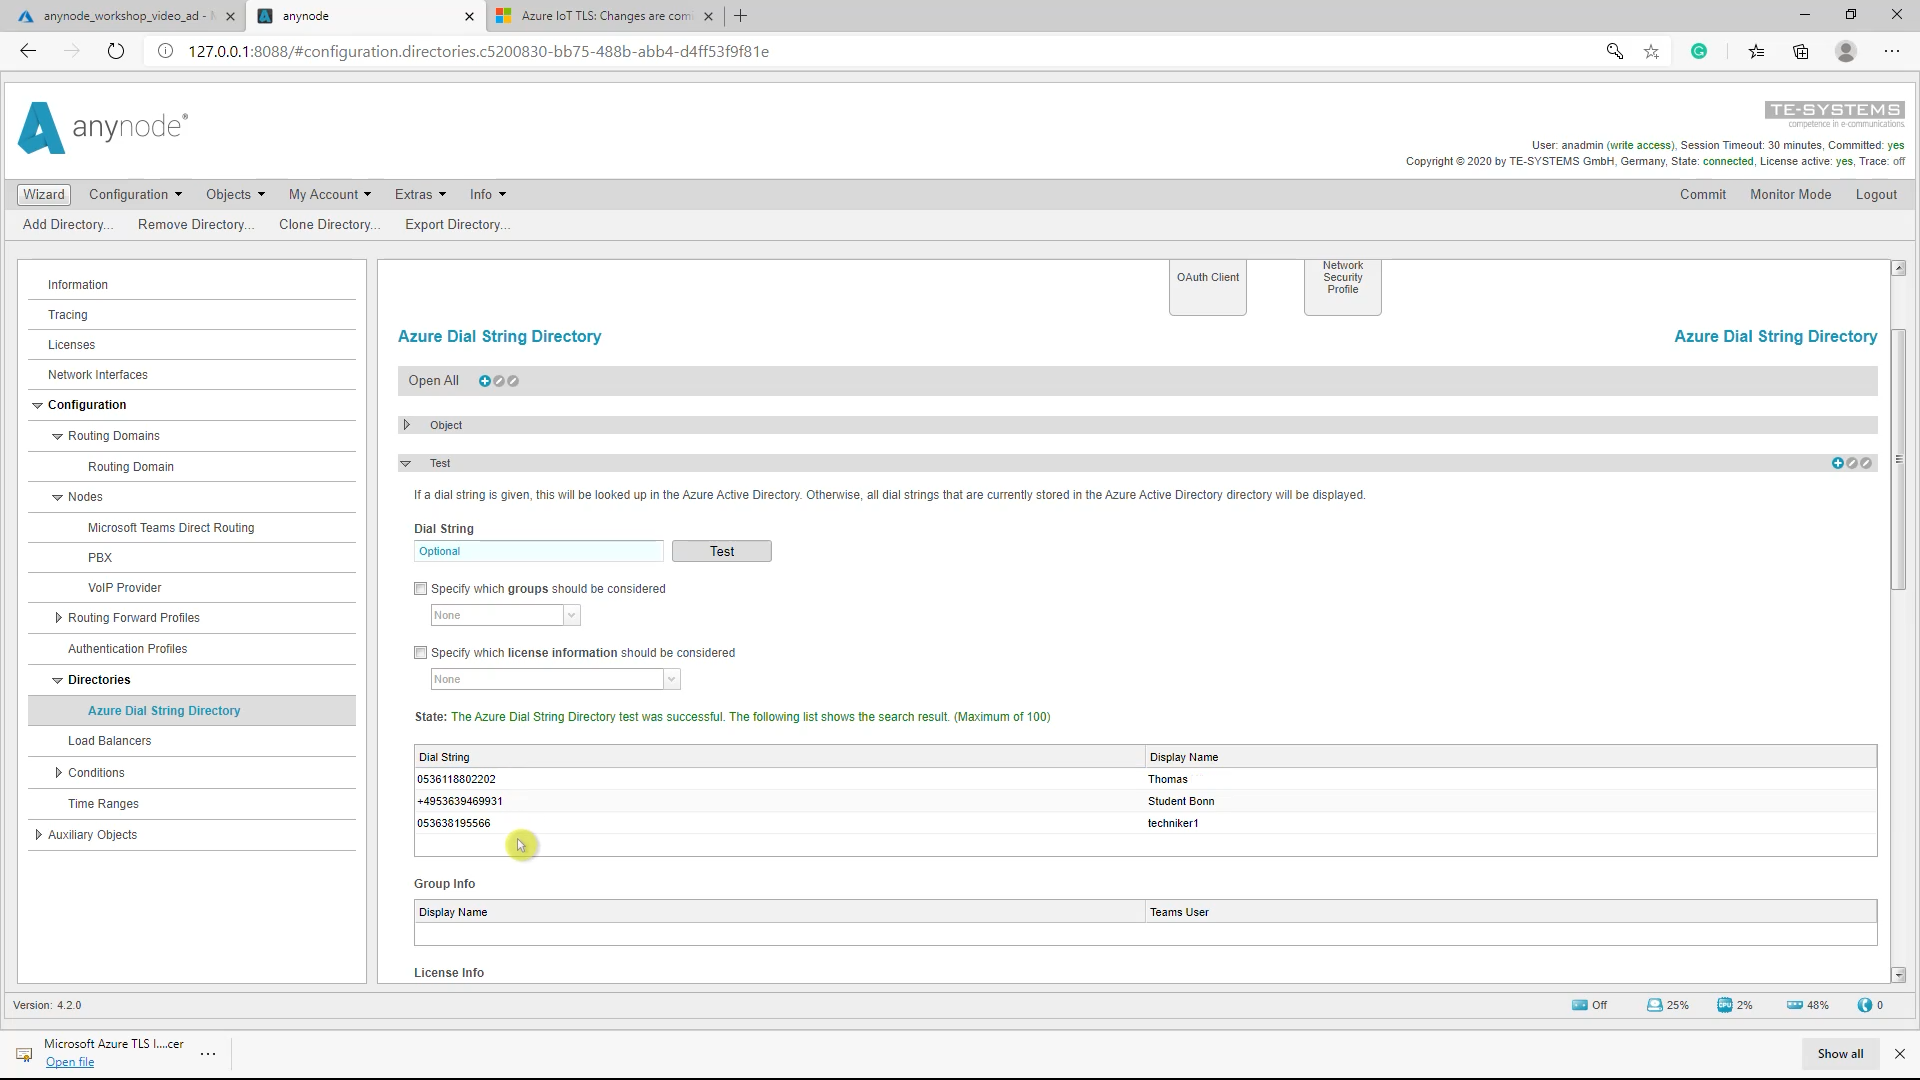
Azure Dial String Directory Test
The following list shows the search result. (Maximum 100) will be displayed. If it fails, please check the Azure AD configurations and that anynode as registered and authorized application has all needed permissions. Also, check about the availability of the Microsoft Azure TLS Issuing certificate as described.
This test, which retrieves the phone numbers, establishes another TLS connection to another Microsoft server, which usually presents a different certificate that anynode may not trust. You can also view this certificate. Add the remote host and port manually.
anynode will then attempt to connect to graph.microsoft.com. It is possible to add this certificate to the trusted certificates and replace the certificate that was previously on the list. In this case, the
Dashboard
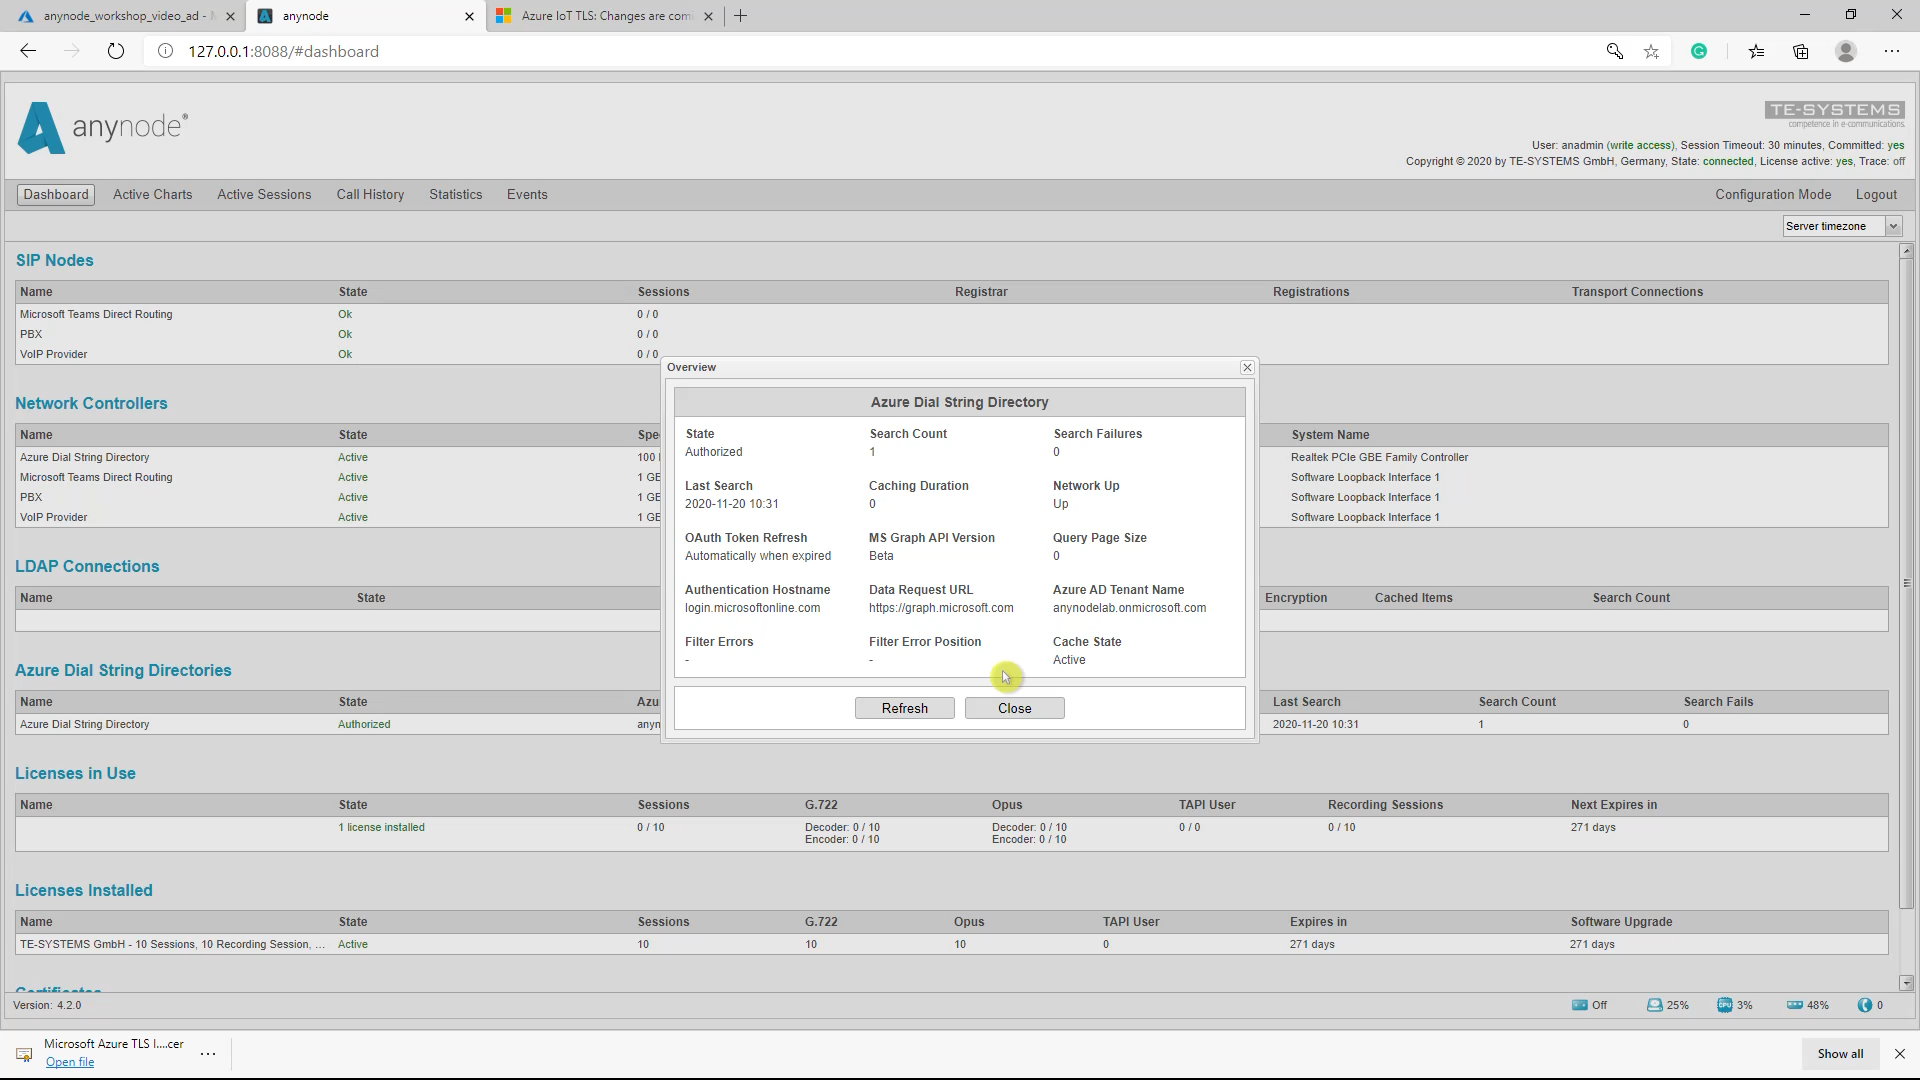
The anynode Dashboard gives an overview of various configuration states. A double-click onto an entry opens a new window with some more details.
MS Graph Password Method
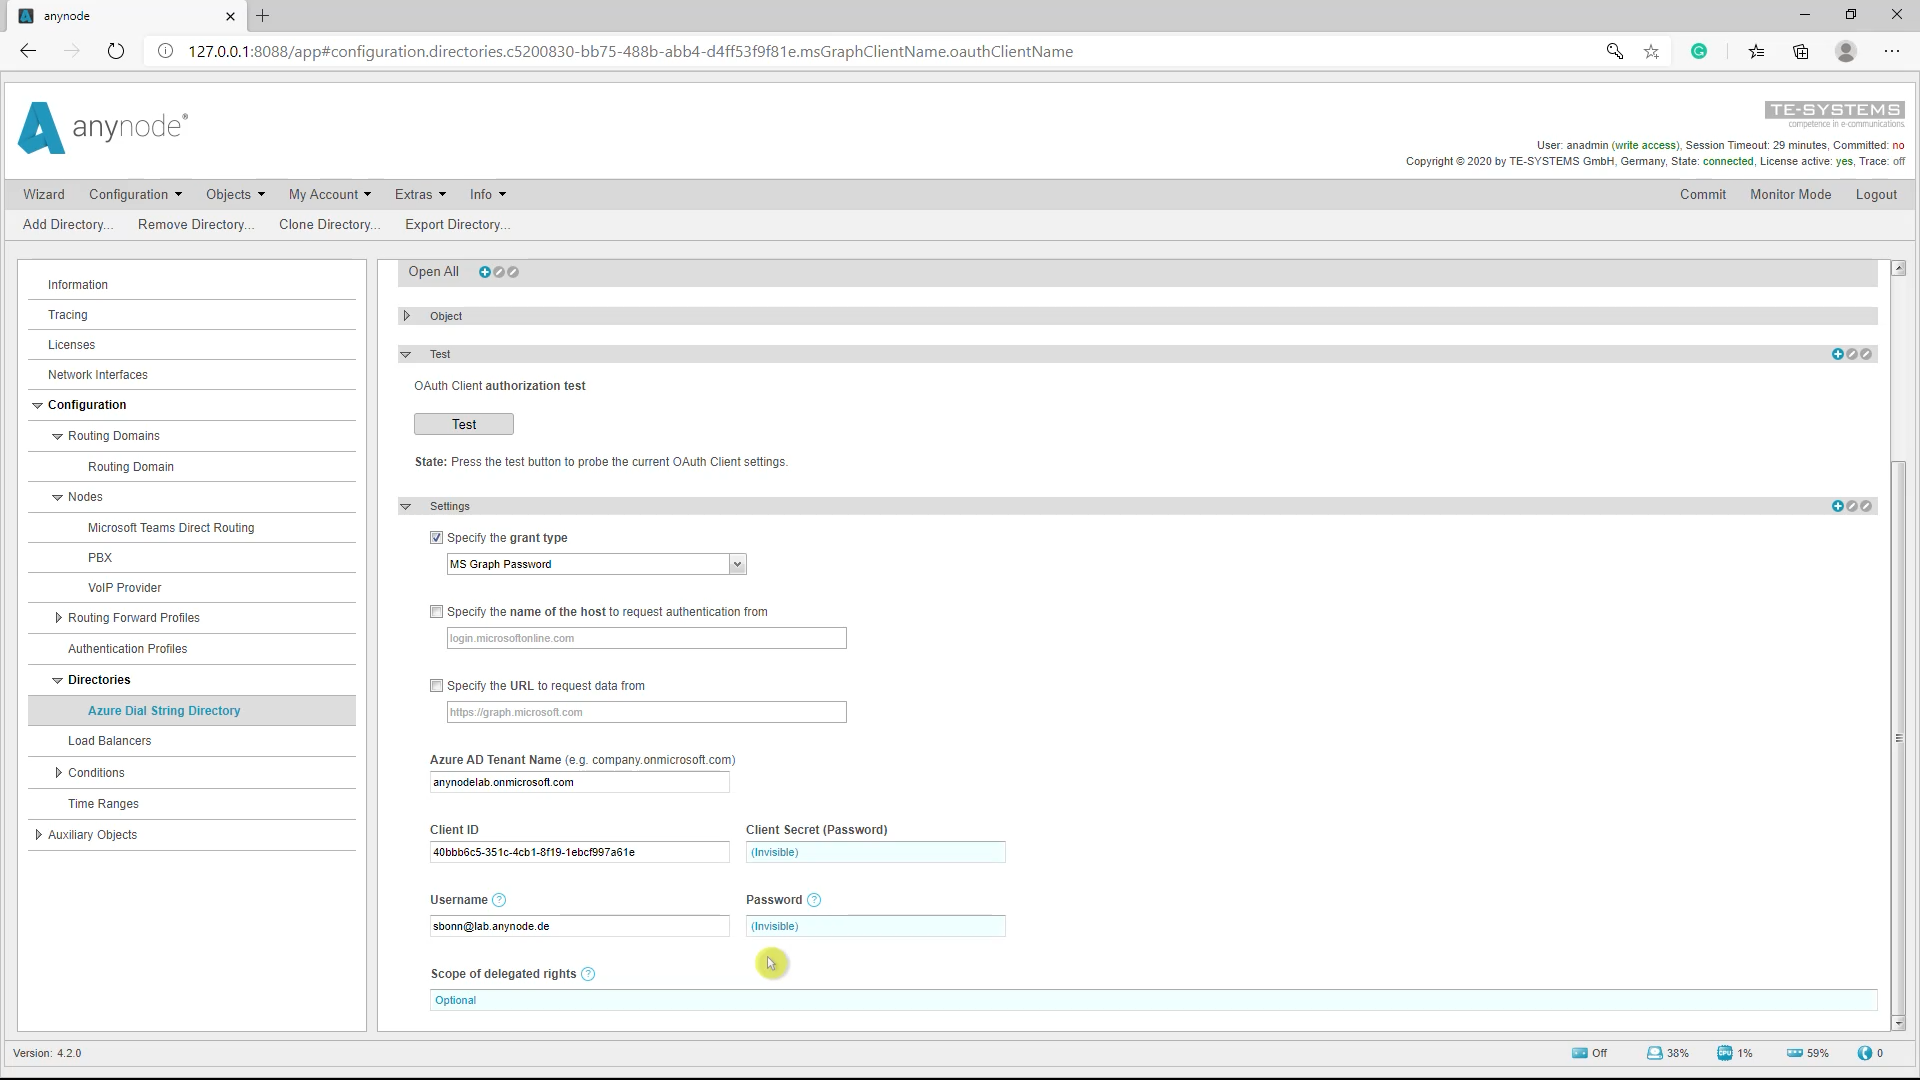
As mentioned in the API Permissions, accessing the presence user states requires using the MS Graph Password method with a user authentication. For this, we recommend using an additional Azure AD User. Insofar known, such a user doesn’t need any additional rights. An example is given here.
Azure AD Routingfilter in anynode
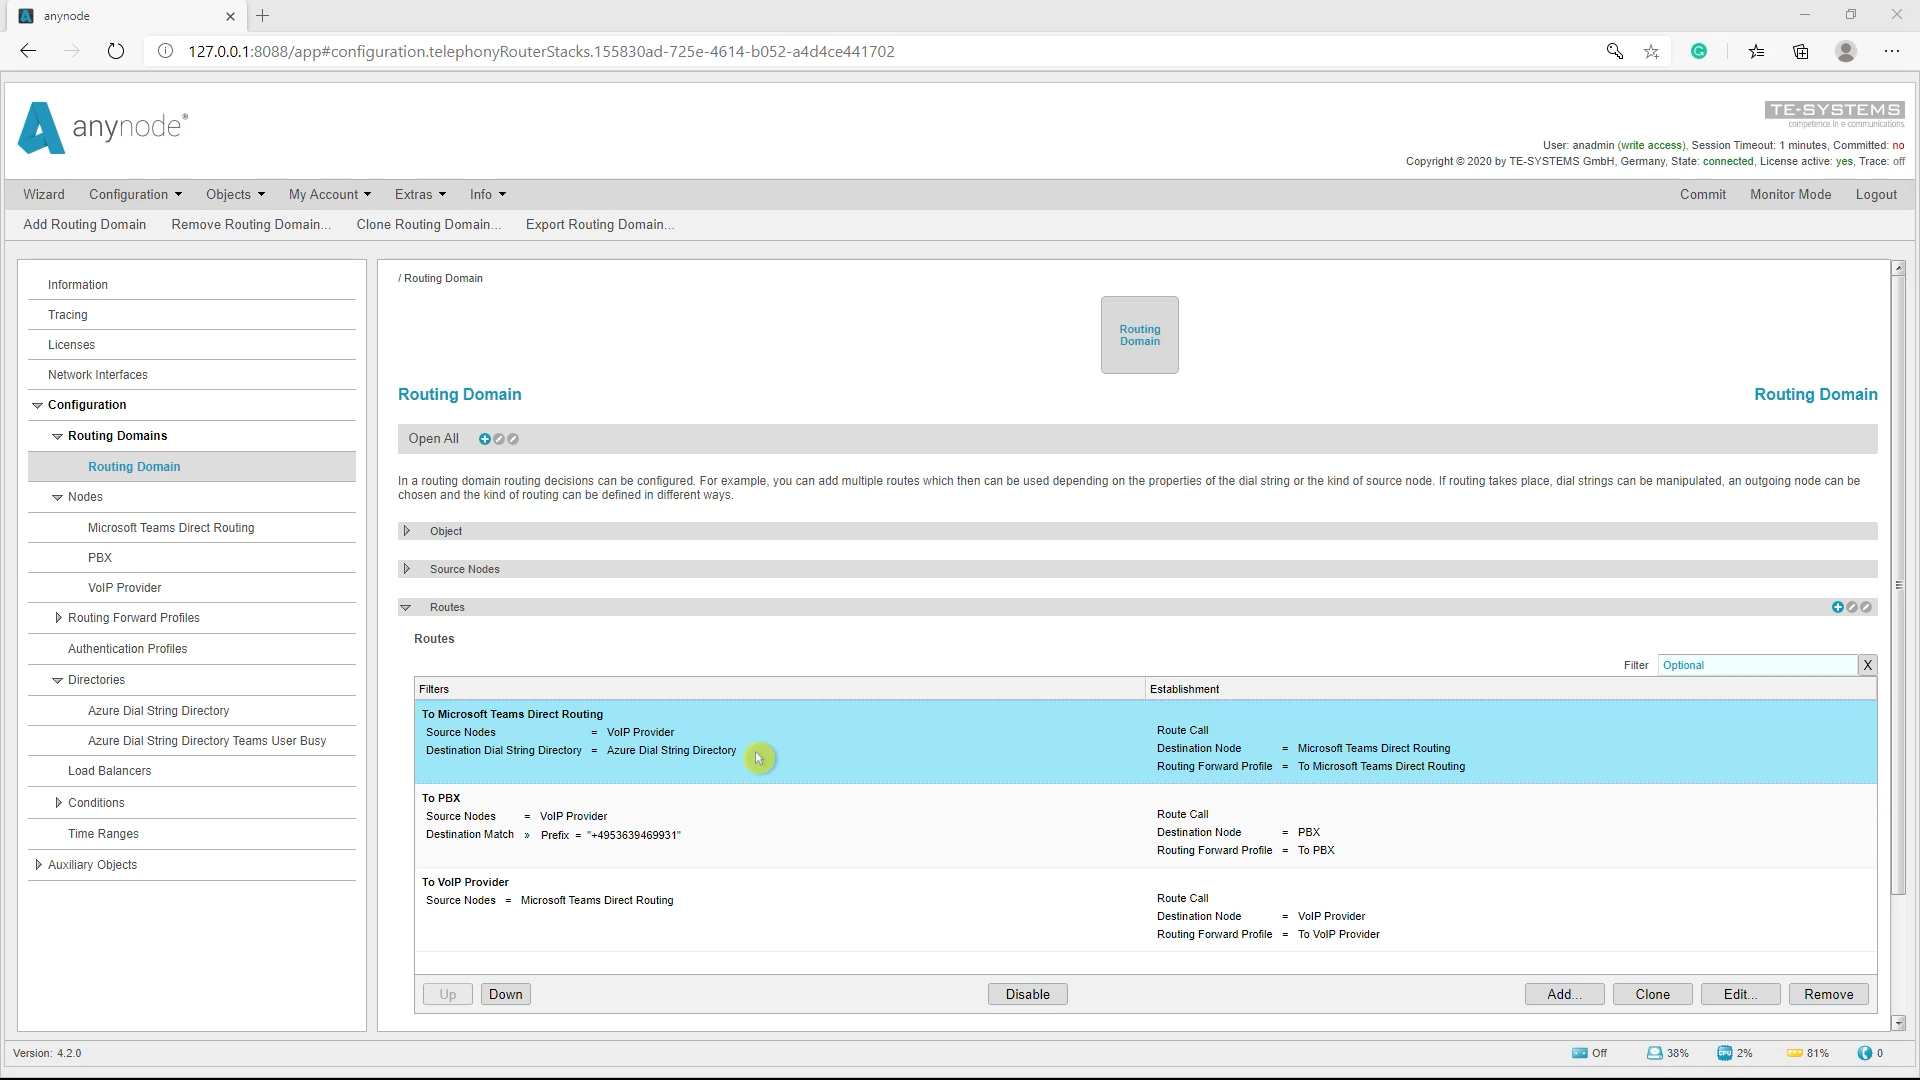
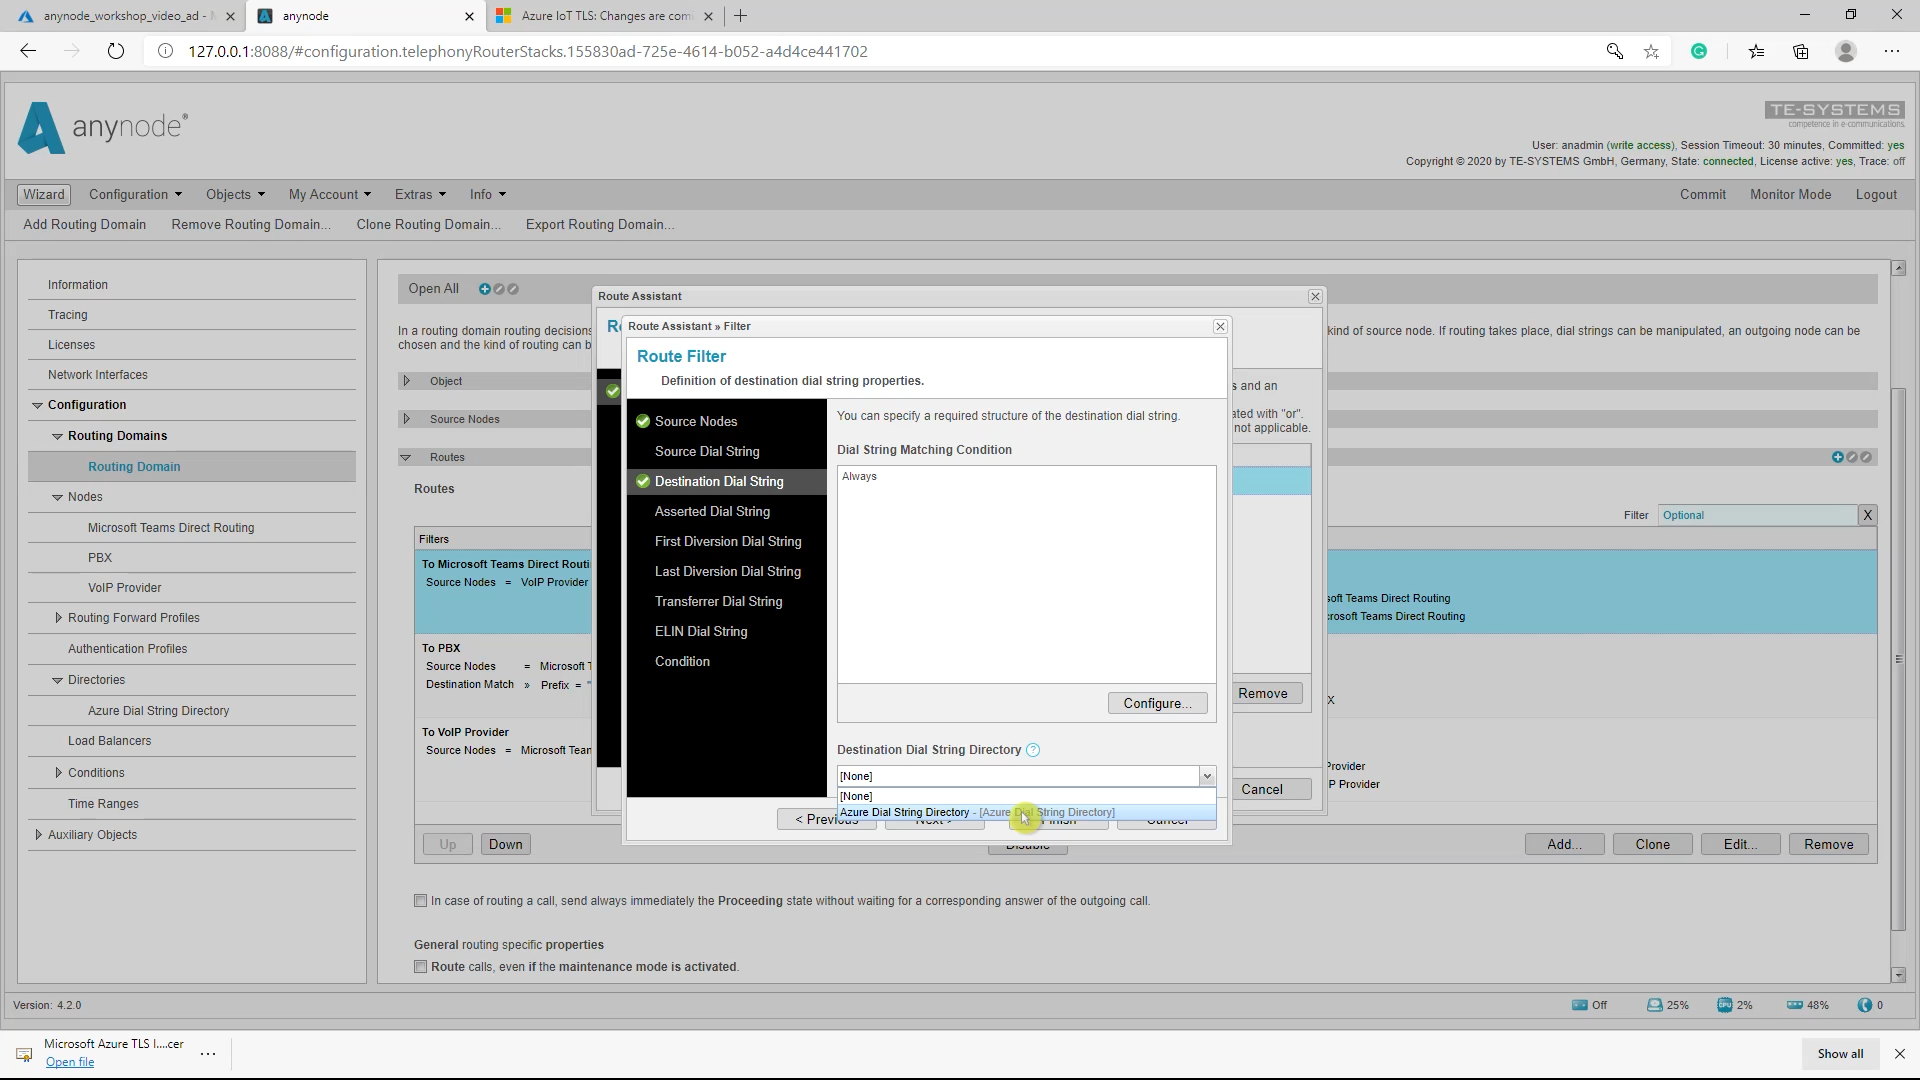
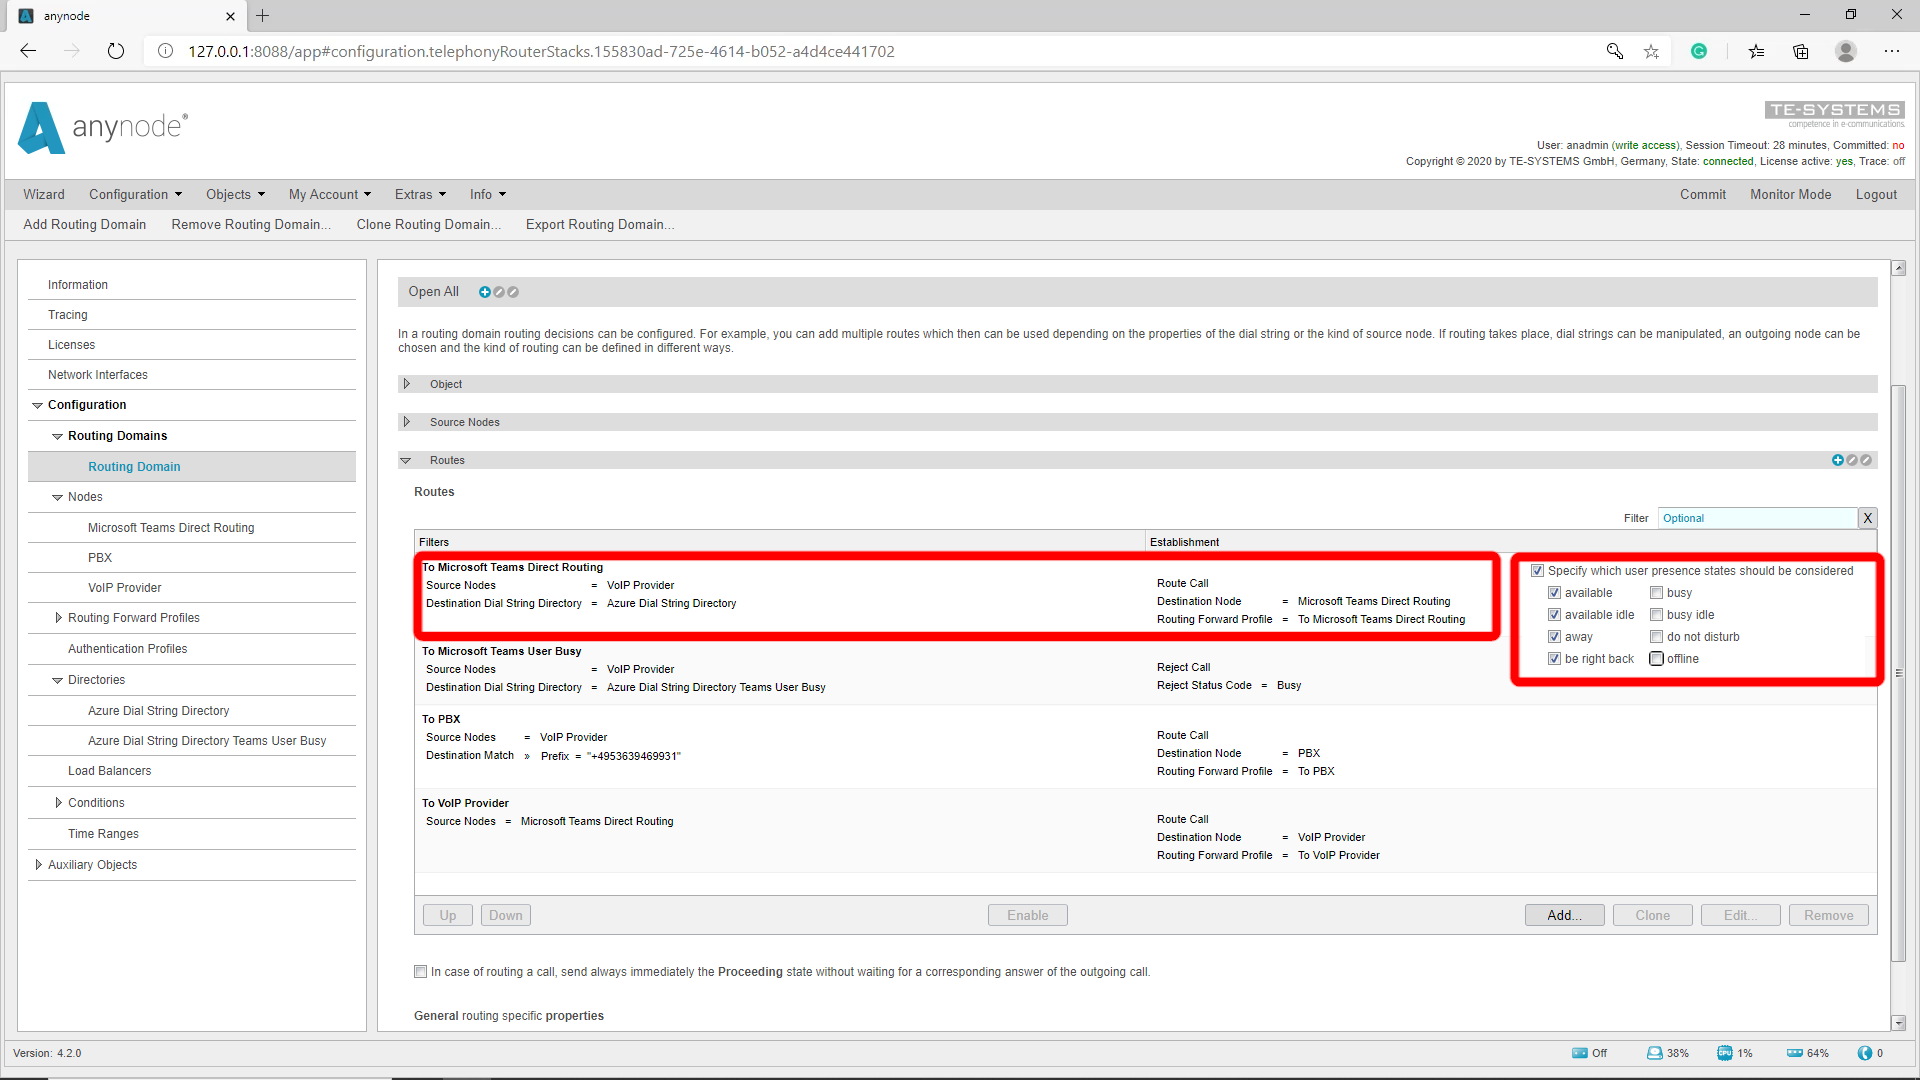
In our example, we use a routing domain with a route filter relation, an Azure Dial String Directory. If a dial string does not match the Azure Dial String Directory request with its conditions, for example, this number here, the call will not be routed to the Microsoft Teams Direct Routing destination node. It will instead match the second filter rule and the call will be routed to the PBX node. You can select the Azure Dial String Directory in the route filter.
Practical example: Routing depending on user status
In our practical example, we would now like to set up a routing dependent on the Microsoft Teams user status. If a Teams user has his presence status set to “do not disturb”, is offline, or is on a call, the call should not be routed to the Teams user.
For this purpose, we have previously granted access to DirectoryAccessAsUser.All and Presence.Read.All in the API permissions and used the MS Graph Password method. These settings are needed to access the “Presence” user status.
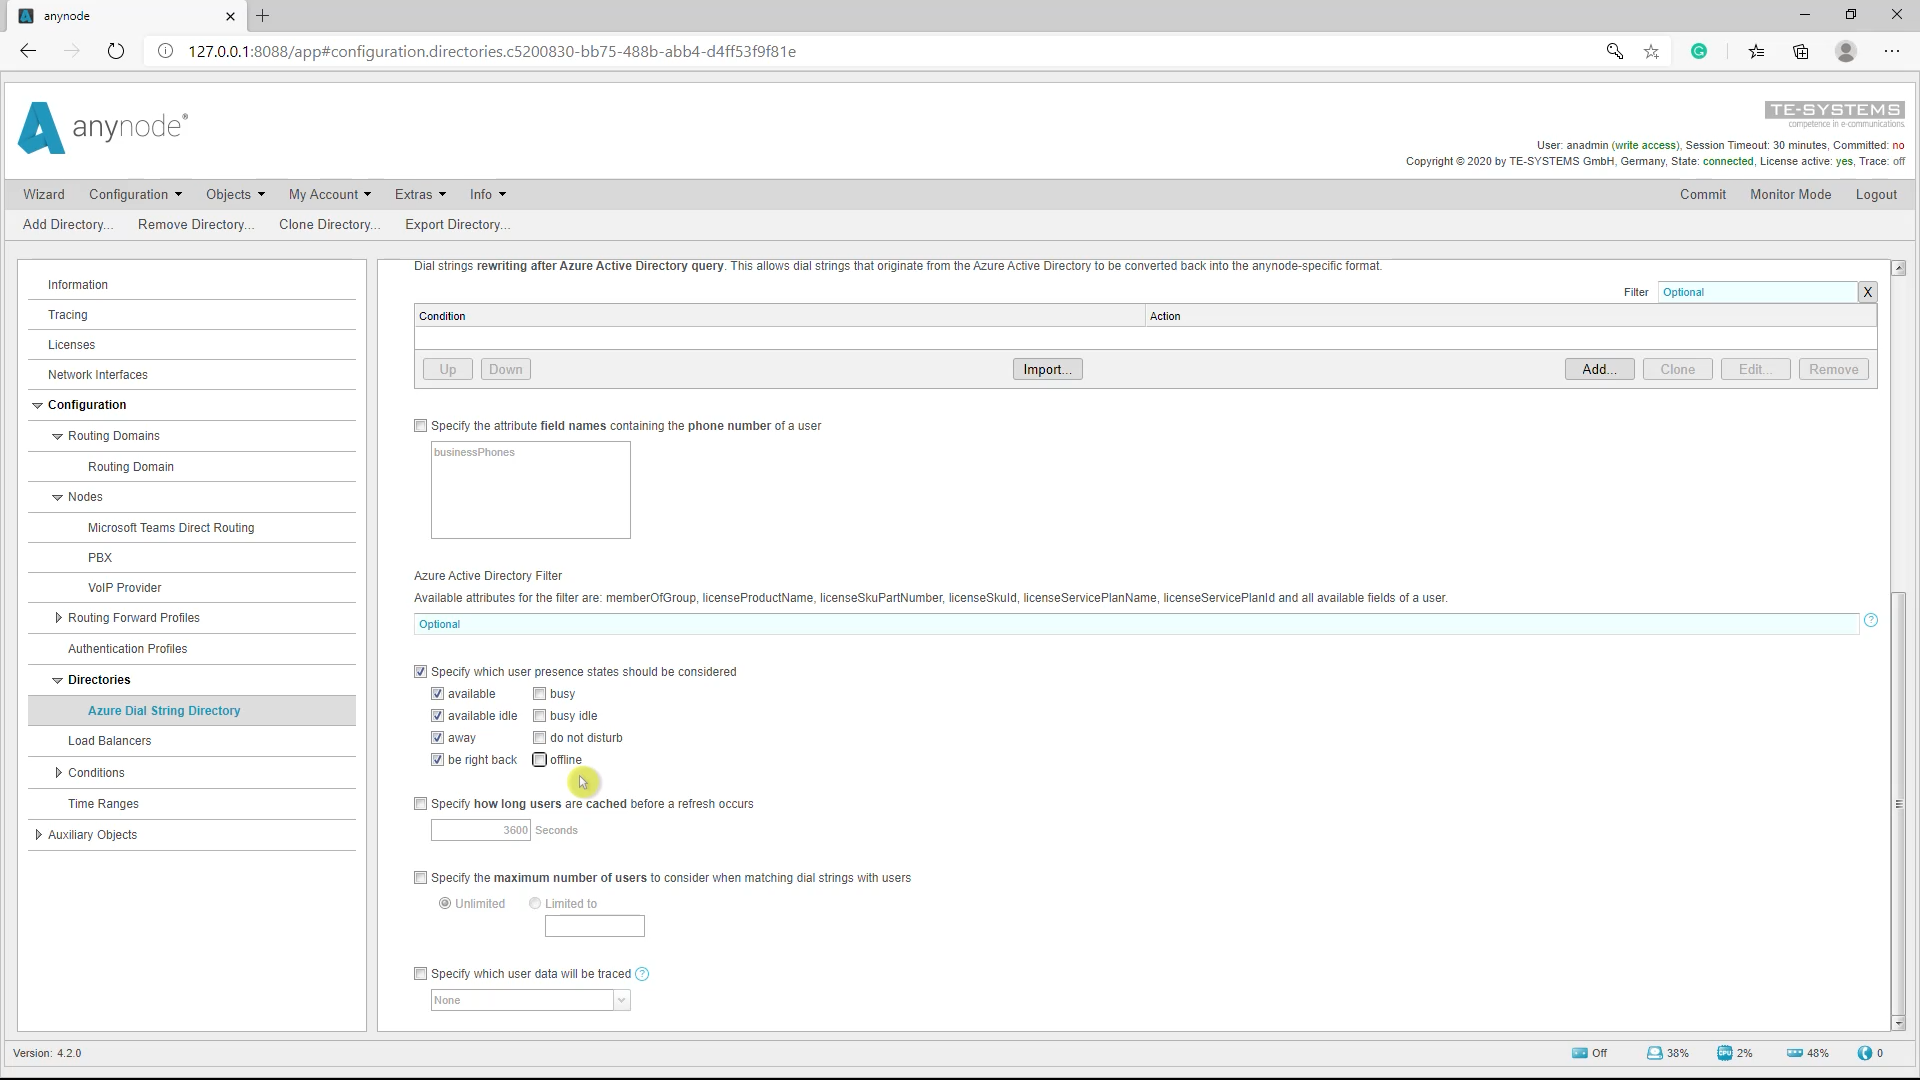
Open the “Settings” in the Azure Dial String Directory. Under Azure Dial String Directory Filter you can define which User Presence State is taken into account. In our example we will now remove the default check marks for “Busy, Busy Idle, Do not disturb, and Offline”. This means that the first entry in the route table is only taken if the Teams user is not currently on the phone and has his user status set to “green” or “yellow”.
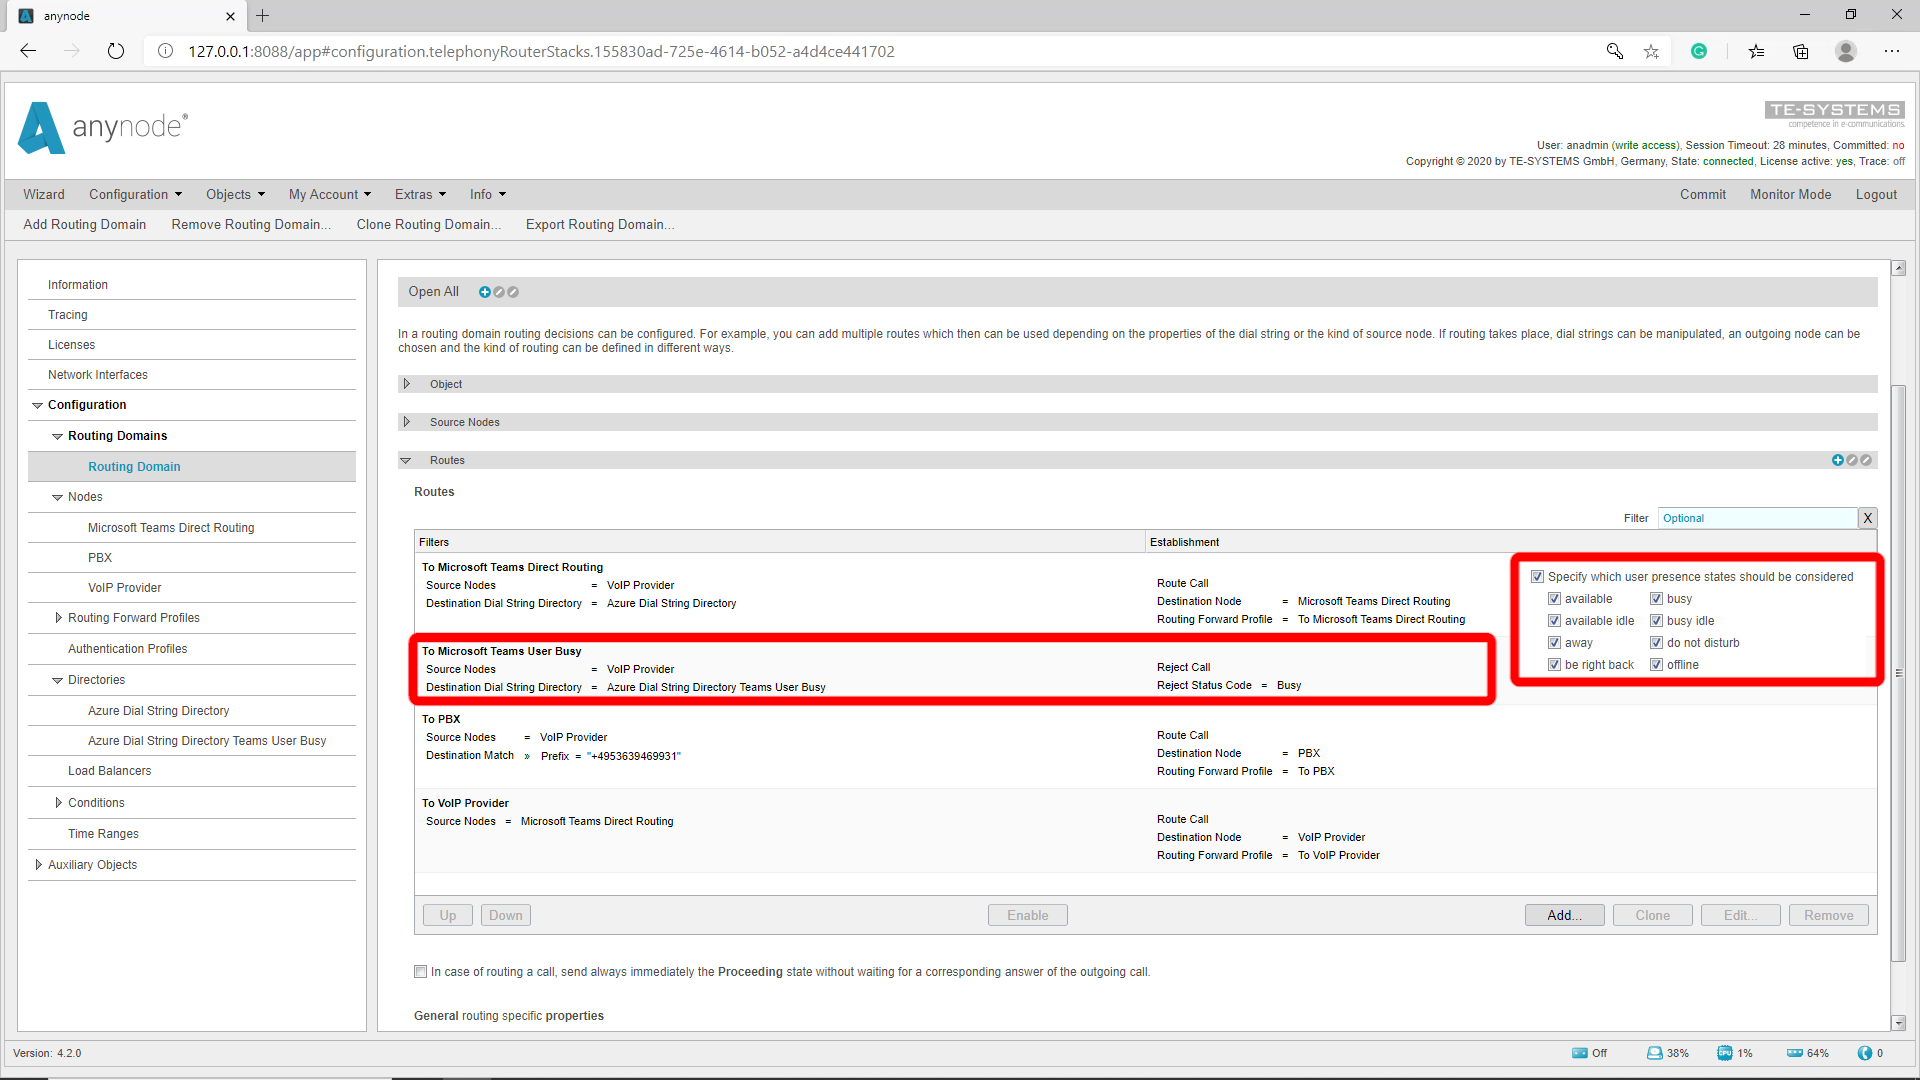
Now we have to create a second route with the Azure Active Directory where all fields are still checked so that the call can be rejected. To do this we clone the previous Active Directory so that we don’t have to do all the settings again. The name can be chosen freely if required. We now add the standard checkboxes again so that the route becomes active if the team user does not have a green or yellow status. In the route filter, we then select the cloned Active Directory. At Establishment we select “Reject Call” and as status “Busy”. This route should be the second route in the route table because the route table is processed from top to bottom.
So we have the first route which becomes active when a Teams user is called who is in the Azure Dial String Directory and has a green or yellow user status. The second route becomes active when a Teams user is called who has a red user status or is offline. The third route becomes active when a PBX user is called.
This concludes our video workshop and we wish you a successful day.


